How to hang a gallery wall
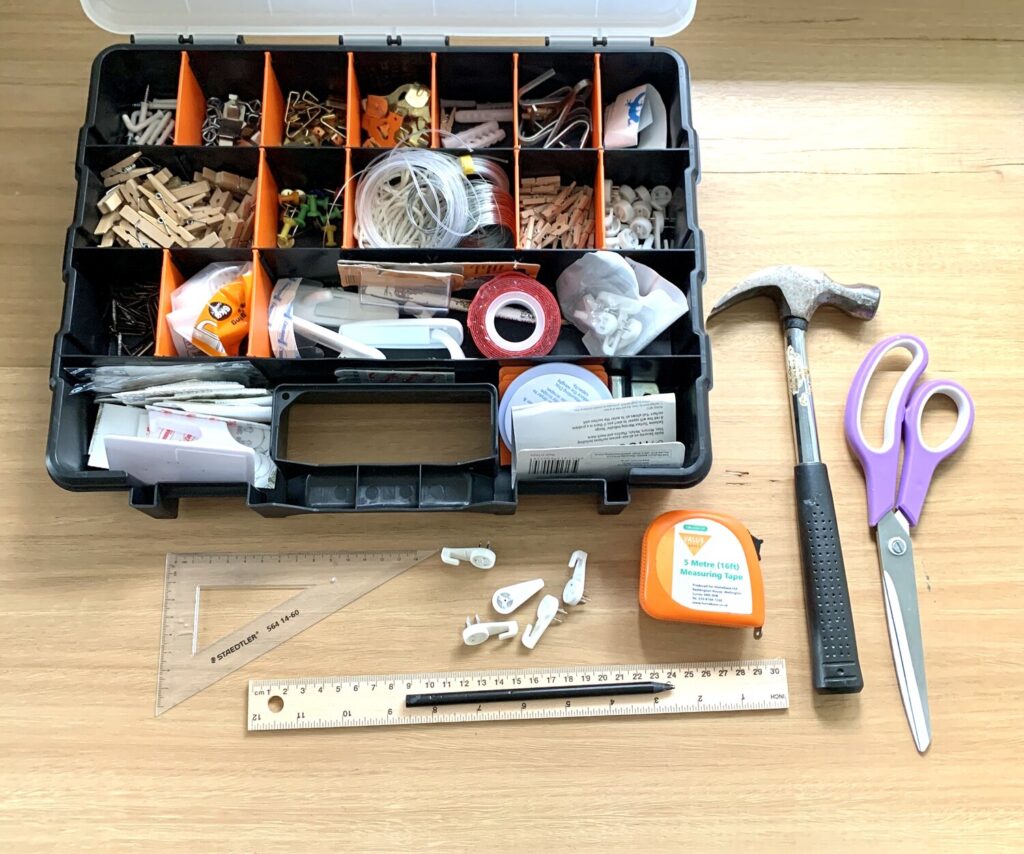
What you’ll Need:
Picture hooks (various sizes, be sure to check the weight loading),
Hammer,
Spirit level,
Tape measure,
Pencil,Ruler, Set square if you have one,
Kraft paper (I have roll of 900mm x 50m Kraft Paper from Officeworks which is ideal),
Scissors.
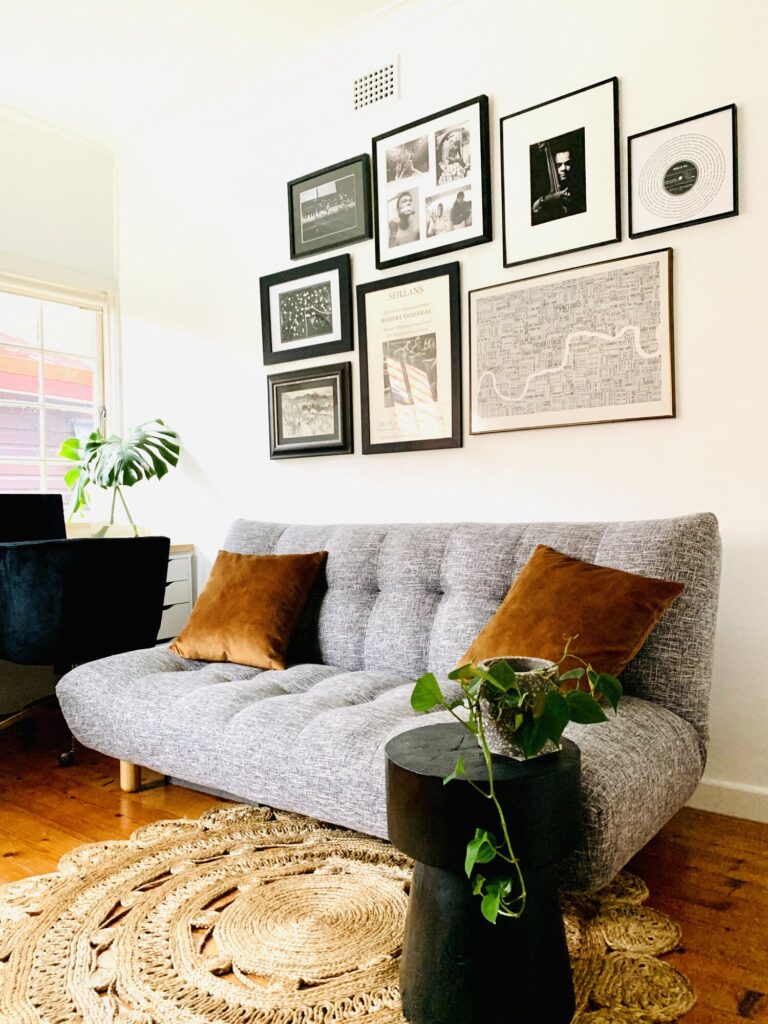
Make sure you have all the frames you plan to hang ready. Gallery walls with a consistent theme or colour palette look fabulous – perhaps you have a collection of black and white artworks and photography, botanical themed prints, or a portfolio of stunning images from your travels that you’d like to display. Spend some time deciding on your preferred style of gallery – will it be a formal grid, coordinated artworks or mis matched images and objets?
Low cost frames can be found in Kmart, Spotlight or Target, and you will also find decent quality frames in places like Country Road and West Elm, and Temple & Webster has, as always, a huge range. Gallery wall frame packs are available at many retailers to get you started if you are able to print images to fit, and will come with an idea of how to best lay them out. There are also a wealth of online framing companies such as Frames Now who have an enormous range of styles and sizes and can also offer custom framing and replacement glass or mat boards, and even print to stretched canvas. Try not to go too matchy matchy with frames unless you are aiming for a formal grid style, in which case identical frames are the best option. All black frames in different shapes and sizes work well together with a consistent theme of images, and conversely a variety of finishes gives a more relaxed look.
If you don’t already have a collection there are some great retailers out there with gallery walls ready to go, frames and all, like this one from Desenio. If your gallery is to be located alongside furniture be sure to change up your accessories to complement the tones in the artworks to complete the look.

How to hang:
First of all you need to measure the space – I wanted my gallery centred above a sofa bed so I took the length of the sofa and arranged my artworks within it. Had the space been available I would have liked to offset it – don’t forget to consider this as an option, for example one large singular artwork looks great set off to one side of a bed or sofa, and the same can apply to a gallery wall. Leave a 30cm gap between the top of a sofa and the frames to avoid them getting knocked out of place and to give them room to be admired. The centre of the arrangement should be at eye level for optimum viewing so measure the distance between the bottom of the lowest frame (ie. 30cm above the sofa if this is where the gallery is to be positioned) and eye level – generally about 175-185cm above floor level.
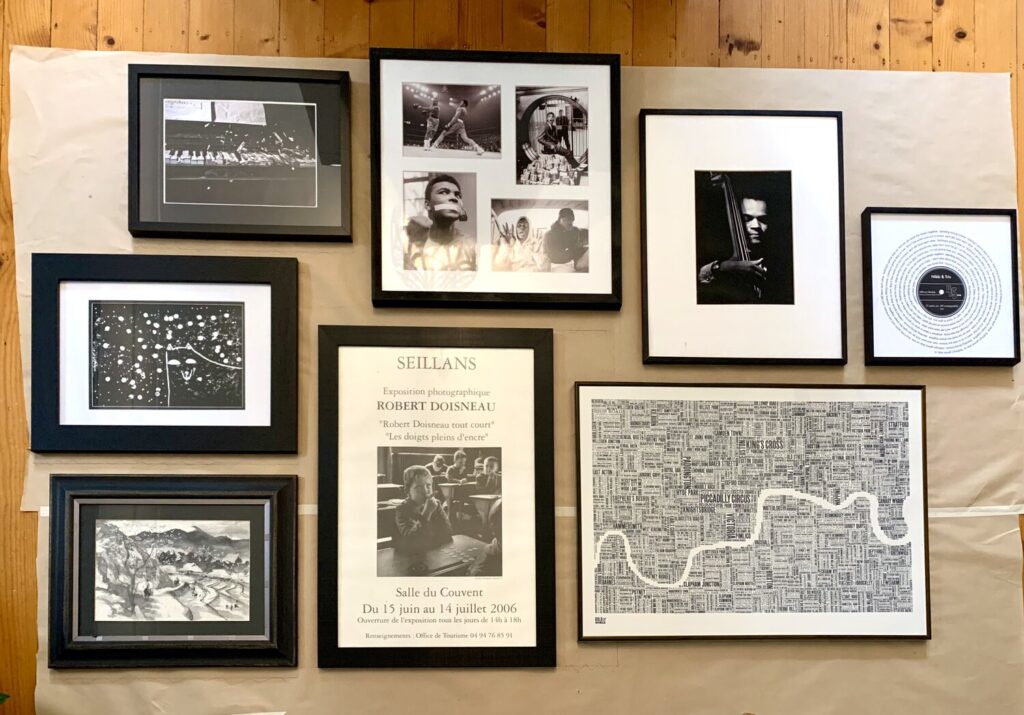
Lay out a large piece of kraft paper big enough to cover the wall space – you may need to tape the paper together to get a large enough section. Arrange your frames on top of the paper, building the layout out from one or two larger centrepieces. Take a photo on your phone and then move the arrangement around a few times until you find the composition that works for you.
Use your ruler and / or set square to ensure your frames are evenly spaced – personally I find this easier to achieve by drawing around my frames on my large piece of kraft paper rather than using individual paper cut outs for each frame. You can also check your lines are straight and double check spacing easily once all the frames are drawn on in your chosen layout.
Next measure the hanging point on the back of each frame and mark it on the paper – if there is picture wire pull it taught to where it will sit when hung. Take your time to make sure the nail or hook is placed at the correct point or all your work on the spacing between frames will be out of kilter.
Once you have all your frames drawn, correctly spaced, with hanging points marked on, put the kraft paper on the wall in the appropriate position. Check you are happy with the arrangement and ask yourself if it fills the space appropriately. Now for the fun bit! Put your hooks or nails in at the marked spots and hang all your picture while the kraft paper is still on the wall. This is your final opportunity to ensure you have everything just as you want it – it will be much easier to mark adjustments on the paper. If you are happy with everything, remove the frames, carefully take down the paper and re-hang your pictures in place, using a spirit level to ensure they are all perfectly level. And voila! A fabulous gallery wall has appeared!