


Blog
From the latest interior design trends to timeless classics, we aim to inspire you with our expert interior designer tips, industry insights, and behind-the-scenes peeks into our projects.


13 Mar
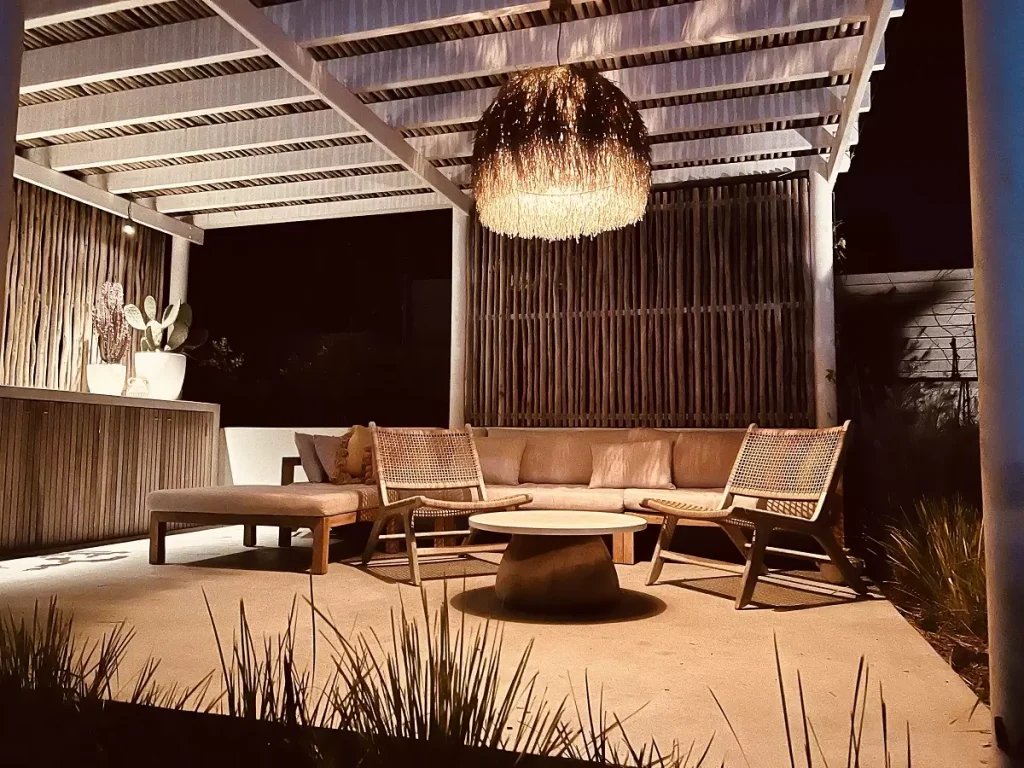
How Do You Design a Home Bar for Your Entertainment Area?
A home bar works best when it’s designed around three things: where you entertain, what you serve, and how much storage you actually need.
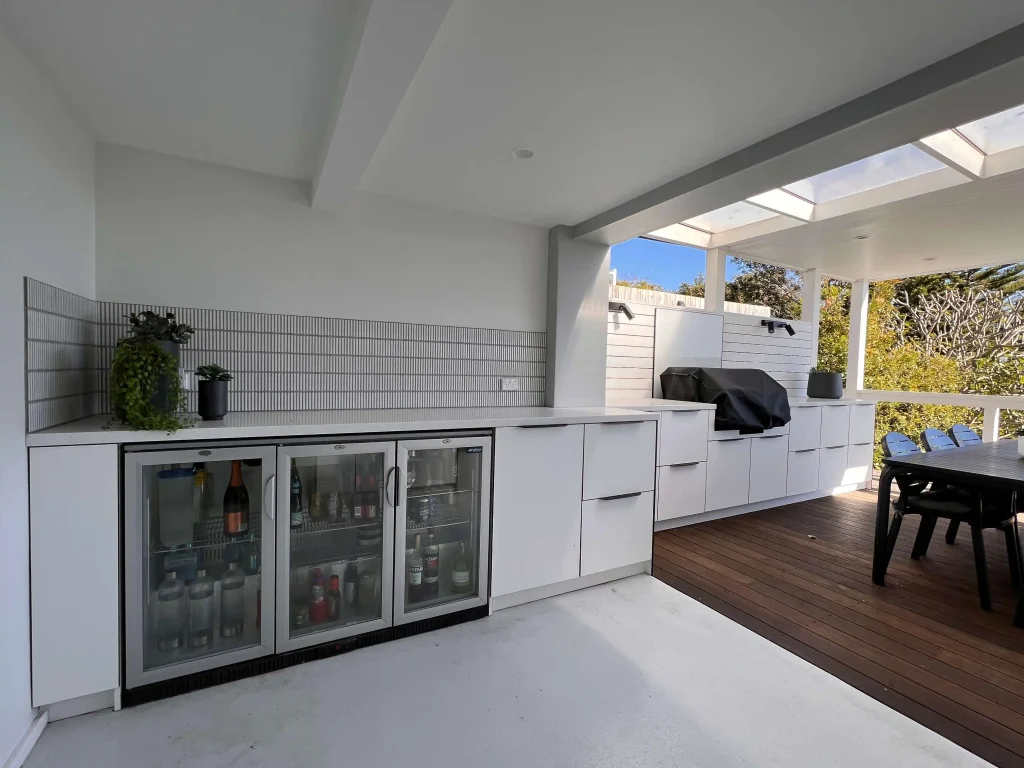
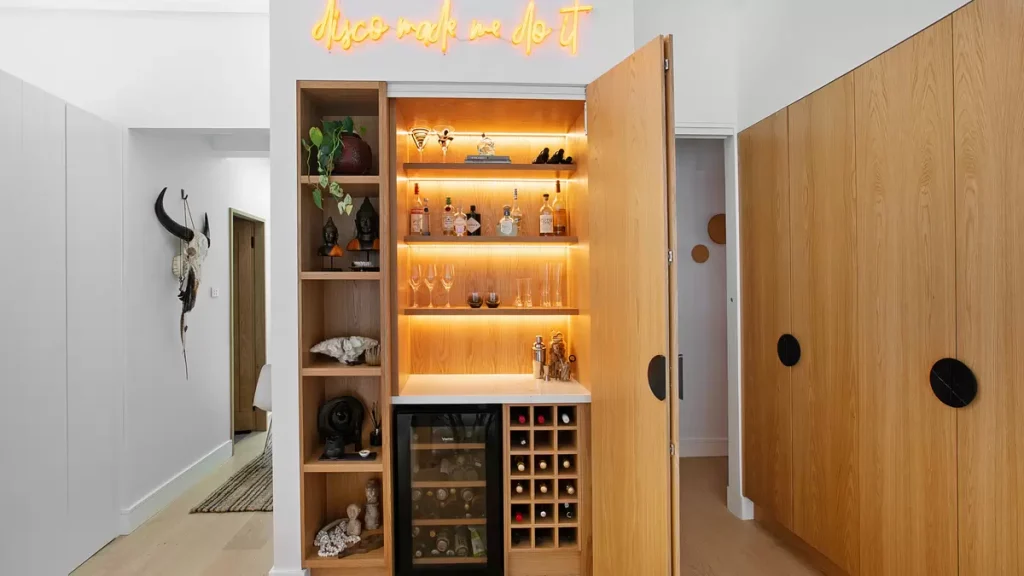
In Northern Beaches homes, the most successful bars usually sit close to the kitchen or outdoor entertaining area and feel integrated with the rest of the joinery. A well-designed home bar makes entertaining feel effortless: drinks and glassware live where you actually use them, clutter stays out of sight, and the whole space feels more considered (without screaming “look at my bar”).
In this guide, I’ll walk you through the key decisions – layout, storage, finishes, lighting, appliances, and the little details that make it feel like it belongs in your home, not a pub fit-out. On Sydney’s Northern Beaches, where indoor–outdoor living is second nature, a well-integrated bar makes entertaining feel easier and more considered.
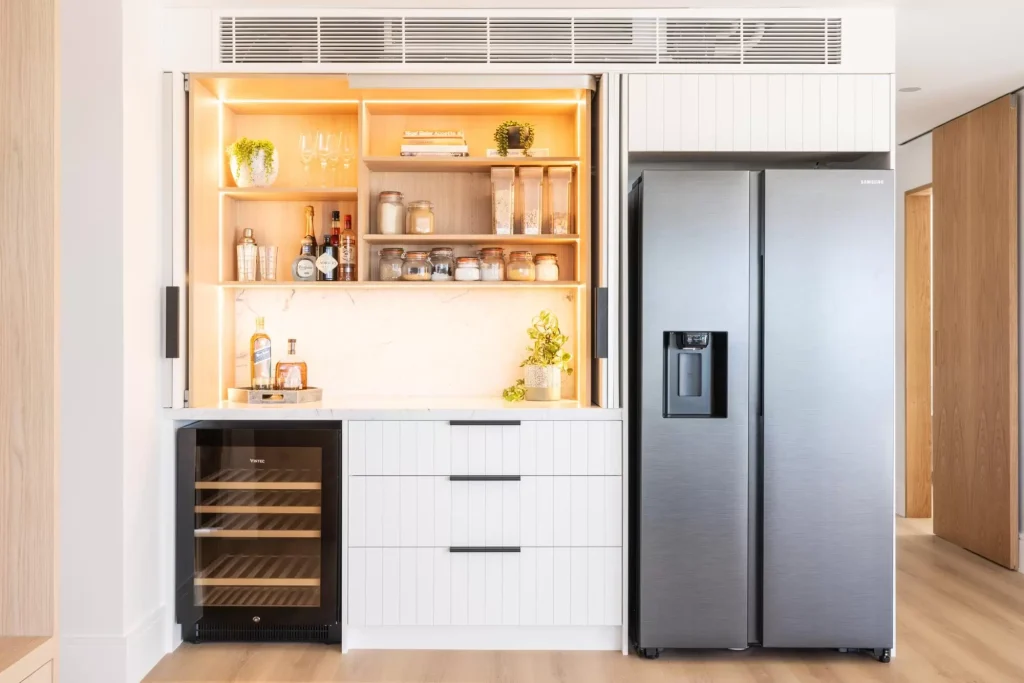
We often hear from clients that the kitchen becomes the “default bar” during gatherings but this can feel chaotic – people crowd the island, you’re hunting for wine glasses, and suddenly entertaining feels like managing traffic.
A dedicated bar fixes that by creating:
Before you start pinning “dream bars,” get practical. The best bars are built around how you entertain.
In many Northern Beaches homes, we’re designing bars as part of a broader renovation – often alongside kitchen joinery, living room cabinetry, or an outdoor entertaining zone. Planning the bar at the same time as the surrounding joinery usually gives you a more cohesive result.
The “right” spot for your home bar is usually one of these:
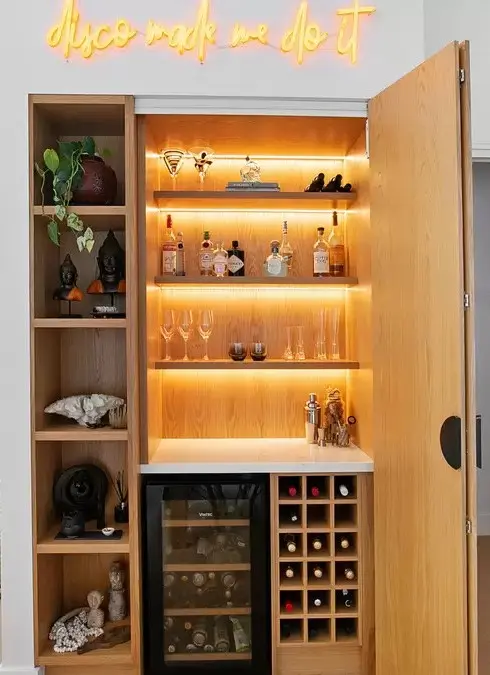
This is where custom joinery shines. You want the bar to look calm even when it’s fully stocked.
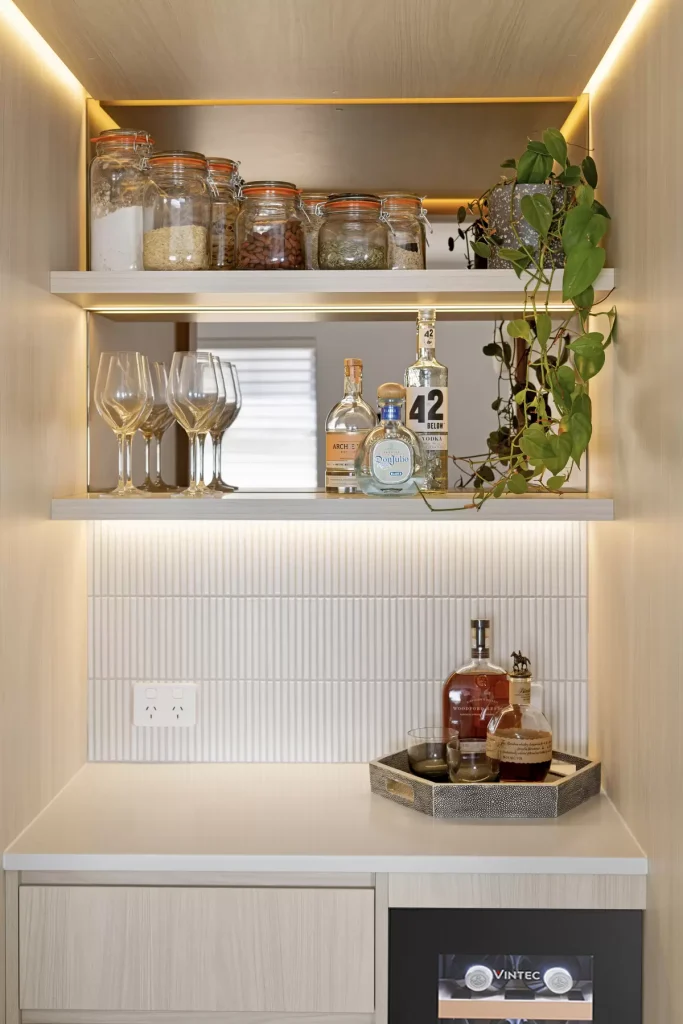
A Northern Beaches bar often needs to hold more than alcohol too:
When it’s planned properly, it becomes a hosting hub, not just a booze cupboard.
You don’t need everything. You just need the right things.
Tip: appliances look best when fully integrated (panel-ready) so the bar reads like furniture, not “kitchen leftover zone.”
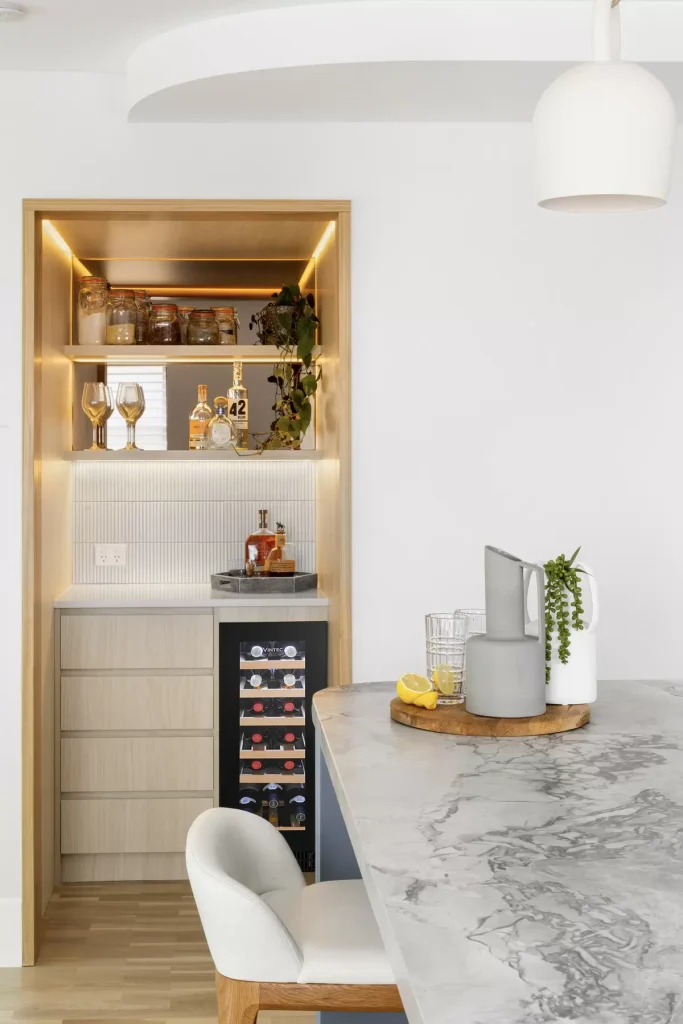
This is where we steer away from trends and lean into finishes that feel quietly confident.
Bars need lighting that feels intentional.
If you want the bar to feel special, lighting is the quickest way there.
This is where many bars go wrong. They get styled like a showroom and then never look that way again.
Instead, style for real life:
One thing we often see in real projects is that clients focus on the finishes first, when the layout and storage are what determine whether the bar is genuinely easy to use. So be sure to ask …
Do I need a sink in my home bar?
No – not always. A dry bar works well if your kitchen is nearby. A wet bar is more useful if you entertain often, host outdoors, or want the bar to function independently.
What’s the minimum space needed for a bar?
A home bar can work in a single run of cabinetry, as long as you allow enough depth for storage and appliances, plus comfortable standing room in front.
Is a wine fridge worth it?
If you drink wine regularly or like to keep a few bottles on hand, yes – especially in Sydney where temperature swings can be tough on wine stored in cupboards.
How do I make a bar feel “high-end” without being flashy?
Focus on proportion, joinery detailing, integrated appliances, warm lighting, and a restrained material palette. The luxury is in how calm and considered it feels.
Where should a home bar go in an open-plan living area?
The best place for a home bar is usually near the kitchen, but outside the main prep zone, so guests can gather there without disrupting cooking or clean-up.
Can a home bar double as a coffee station?
Absolutely! And it’s often the best way to justify the space day-to-day. With the right storage and power planning, it can handle coffee, mugs, and breakfast essentials beautifully.
If you are planning a renovation or joinery upgrade and would like a home bar that feels elegant, practical, and easy to use – whether that’s for family gatherings, dinner parties, or relaxed indoor-outdoor entertaining. We’d love to help. Let’s turn that awkward wall into your home’s new favourite corner – enquire with Orli Interiors and we’ll make sure your bar is equal parts beautiful, functional… and dangerously easy to use.
26 Feb
10 Interior Design Secrets to Effortless Luxury: A Northern Beaches Guide to Designing a Home That Feels Calm, Considered and Architecturally Refined
Luxury on Sydney’s Northern Beaches has its own identity.
It isn’t glossy for the sake of it. It isn’t over-layered. And it isn’t about copying a look from overseas and hoping it translates.
From Manly to Avalon and Palm Beach, the most successful high-end homes share one defining quality: they feel resolved.
Every junction, material transition and sightline has been thought through. The home works with the light, the climate and the way the family actually lives. It feels effortless because it was designed strategically.
If you’re planning a luxury renovation on the Northern Beaches, here’s what truly creates that elevated, quietly powerful result.

The majority of renovation mistakes happen before demolition begins.
Homeowners choose finishes based on how they look in a showroom rather than how they behave in coastal light. Northern Beaches properties often experience:
A highly polished stone that looks beautiful in artificial lighting may feel harsh at 4pm. A cool white paint can appear flat in a south-facing living room.
Effortless luxury begins with understanding how light moves through your home across the day and across seasons. When undertones, textures and materials are selected in response to that light, the home feels balanced and calm.
This is the difference between styling and true interior design.
On the Northern Beaches, open-plan living dominates. The kitchen is rarely hidden. It’s visible from the entry, the dining zone and often the outdoor area.
If the kitchen feels disconnected from the architecture, the entire ground floor feels unresolved.
Luxury kitchen design is about:
A large budget does not guarantee a successful outcome. Flow, proportion and alignment matter more than brand names.
Buyers walking through homes in Seaforth or Collaroy feel good circulation immediately, even if they cannot articulate why.
Movement through space is a silent indicator of quality.

Salt air accelerates corrosion. UV exposure fades finishes. Moisture impacts timber stability.
True luxury design on the Northern Beaches accounts for:
A renovation that ignores coastal realities may look pristine at completion, but deterioration can begin far sooner than expected.
Longevity is a form of luxury. Materials that age well protect both aesthetic integrity and capital value.
Luxury isn’t visual first. It’s operational.
Consider your real life:
Custom joinery allows you to eliminate clutter before it appears. Deep drawers instead of standard cupboards. Integrated bins. Concealed appliance storage. Full-height cabinetry that uses every millimetre.
In many older Northern Beaches homes, storage was not designed with modern life in mind. Correcting that during renovation dramatically improves how the home feels to live in.
Calm is engineered.

The Northern Beaches aesthetic has matured.
Cool greys have softened. Stark whites have warmed. The most elevated homes now lean into:
But warmth must be disciplined. Mixing undertones without intent creates subtle visual tension.
Effortless luxury relies on a restrained material story. Two timber tones. One primary stone language. A cohesive paint palette tested in natural light.
Texture provides richness. Restraint provides sophistication.

Open-plan living works beautifully when zones are clearly defined.
Luxury homes on the Northern Beaches accommodate layered lifestyles:
Circulation should feel intuitive. You should not cross through a workspace to reach the fridge. You should not see daily clutter from the sofa.
Zoning creates ease. Ease feels expensive.
Outdoor living is not optional in this climate.
But true luxury outdoor design goes beyond furniture placement.
It includes:
In high-value suburbs from Frenchs Forest to Manly, buyers expect seamless indoor-outdoor flow.
When exterior zones feel architecturally connected rather than appended, the entire property reads as cohesive and elevated.
Pause at your entry and observe what you see.
Luxury is often about what is removed.
Controlled focal points – perhaps a framed ocean view, a sculptural pendant, or a statement stone island – anchor the space. Everything else supports that hierarchy.
If visual noise competes for attention, the home feels less refined regardless of budget.
Editing is discipline, not minimalism.
The Northern Beaches property market is emotionally driven but financially astute.
Even if you do not plan to sell, your renovation should consider:
Strategic design decisions protect capital. Poorly resolved layouts can reduce buyer competition significantly.
Effortless luxury balances personal expression with long-term value.

The final layer of luxury is sensory.
Soft layered lighting in the evening.
Acoustic comfort through textiles.
The tactile contrast between stone and timber.
The absence of visual clutter.
When a home feels calm at night, when it functions effortlessly in the morning, and when it ages gracefully over time – that is true success.
Luxury is not excess. It is a resolution.
Full-home luxury renovations often range from mid six figures to $1M+ depending on structural changes, custom joinery, outdoor integration and material specification. Detailed documentation before construction is critical to controlling costs.
For high-value properties, yes. An experienced Northern Beaches interior designer ensures cohesive planning, intelligent material specification, detailed joinery documentation and coordination with builders and consultants – reducing costly changes during construction and protecting your investment.
Elevated coastal, contemporary organic and refined modern Australian styles perform strongly. The key is warmth, texture and connection to landscape rather than overly themed coastal styling.
Prioritise layout, joinery and high-impact zones such as kitchen, bathrooms and entry. Invest in quality where it matters most and maintain cohesion across the home.
If you’re planning a luxury renovation or new build on Sydney’s Northern Beaches and want a home that feels calm, cohesive and strategically designed from day one, the first step is clarity.
Book a personalised design consultation and let’s explore how your home can be elevated – not just aesthetically, but functionally and financially.
Enquire now to secure your consultation and begin designing a home that truly reflects your lifestyle and protects your investment.

07 Feb
Flooring 101 for Northern Beaches Homes: Concrete, Tiles, Timber, Hybrid & Laminate – What’s Right for You?
If you’re torn between concrete, tiles, or timber-style floors, you’re not alone. Floor selection is one of the biggest mood-setters in a renovation – and one of the easiest places to feel overwhelmed. Below is a clear, design-first guide we use with our Sydney clients to choose flooring that feels sophisticated, calm and quietly confident (without endless second-guessing).
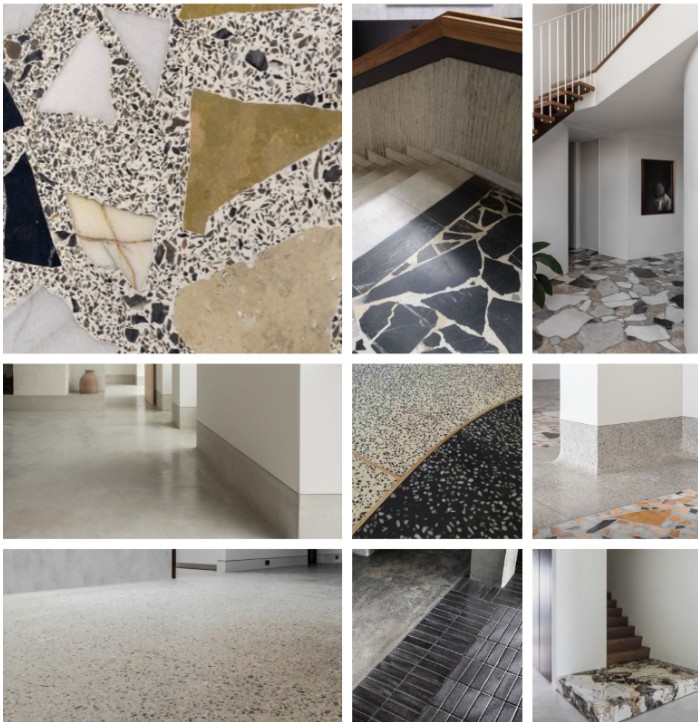
Ground / Polished Concrete (aka: the calm, architectural option)
What it is:
A standard concrete slab is mechanically ground back with diamond grinders after it cures. You can choose how much the surface is cut back – from almost no visible aggregate to a light salt-and-pepper reveal. It’s then sealed (and sometimes densified) for a smooth, refined finish.
How it reads in a space:
Design levers:
Practical notes:
Choose this when: you want the floor to sit quietly under custom joinery, art and statement furniture rather than compete with them.
What it is:
Stones, pebbles or custom aggregates are added to the concrete before pour. The surface is then exposed – either by washing while “green” or by grinding later – so the aggregate becomes the feature.
How it reads in a space:
Design levers:
Practical notes:
Choose this when: the floor itself should be a feature – entries, stairs, thresholds and indoor–outdoor transitions on the Northern Beaches love this.
One is calm and architectural. The other is decorative and textural. Neither is “better” – they just do different jobs.
Concrete is brilliant – but it isn’t the only path to a serene, contemporary home.
Great scenarios for tiles:
Design notes for tiles:
Watch-outs:
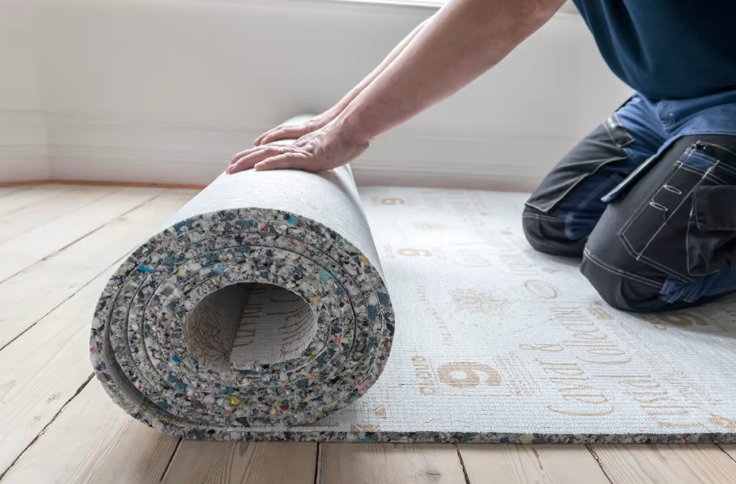
This is where lifestyle, moisture and maintenance come into play. Quick definitions first:
How they feel underfoot (and to live with):
Northern Beaches specifics:
Salt air, bi-folds, and sandy kids are real. If you’re worried about water, hybrid is the low-stress, good-looking workhorse. If you crave authenticity and the patina of time, engineered timber wins – we’ll specify an appropriate finish and humidity-sensible board construction. Laminate is the practical all-rounder when budget needs a firmer hug.
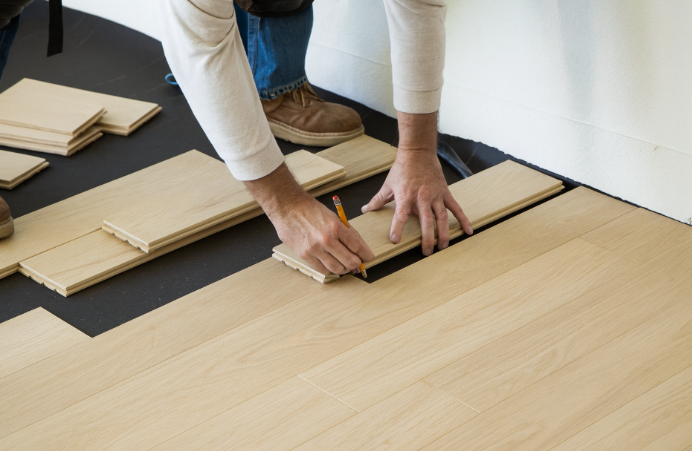
Case study – timber flooring
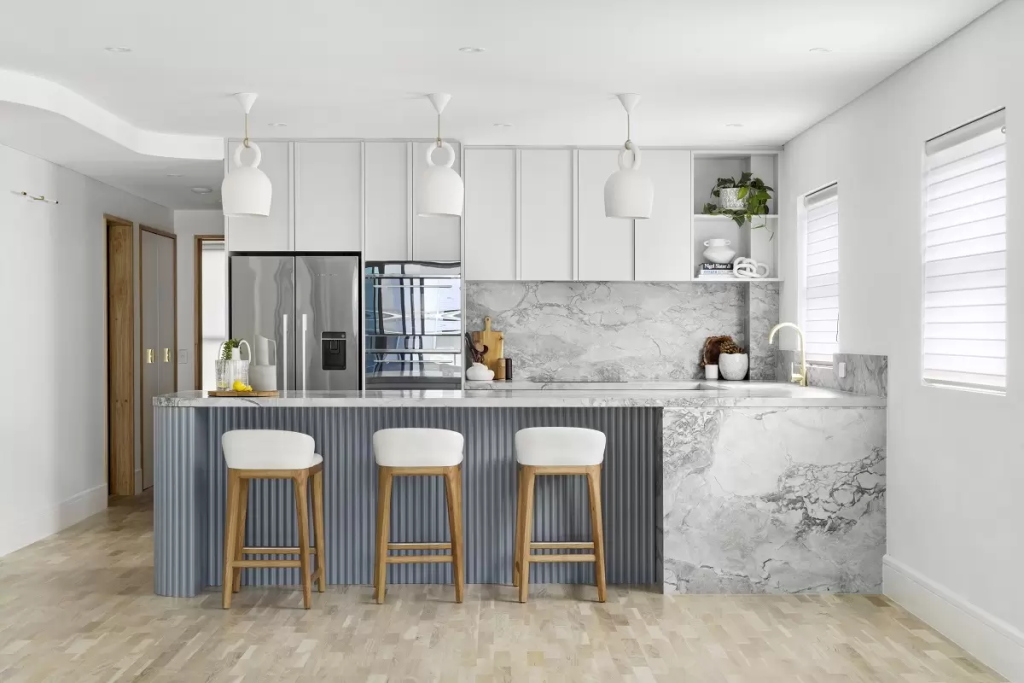
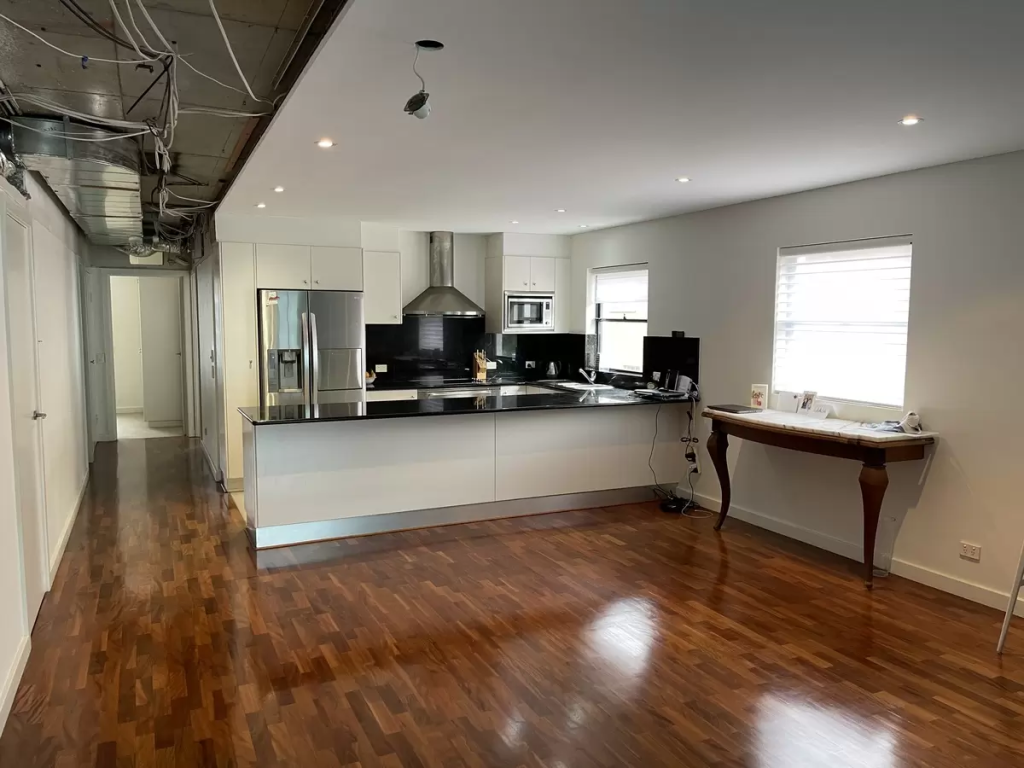
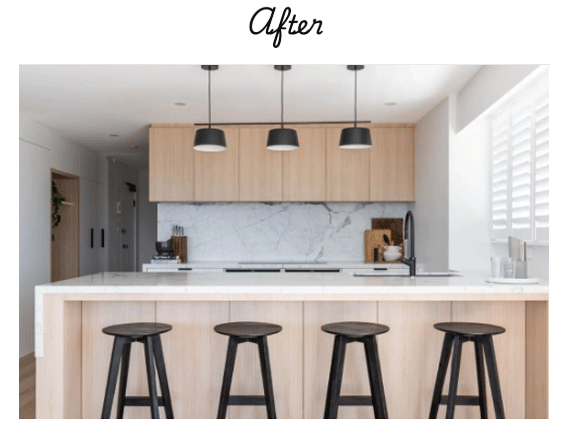
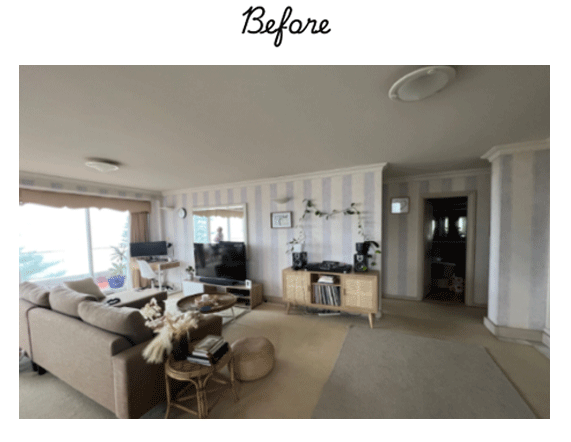
Another reason we love timber flooring is its ability to evolve with your home. Unlike many finishes, timber doesn’t lock you into one look forever — it can be refreshed, lightened, or softened as your style (or the light in your home) changes. In our Dee Why project, we took a dark, shiny solid timber parquetry floor and sanded and bleached it back to a light oak tone. The result was immediate: brighter ambient light, a calmer feel underfoot, and a home that suddenly felt more open and contemporary without changing the layout. It’s a powerful reminder that sometimes the most transformative design move isn’t replacing — it’s reworking what’s already there.
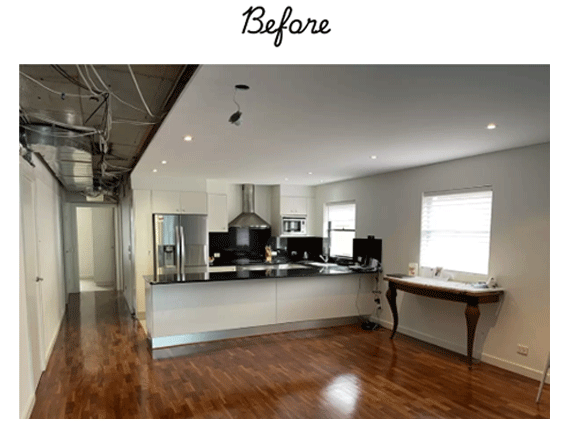
Before
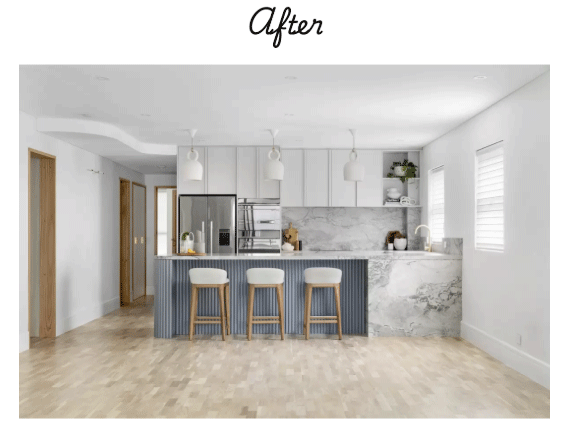
AFTER
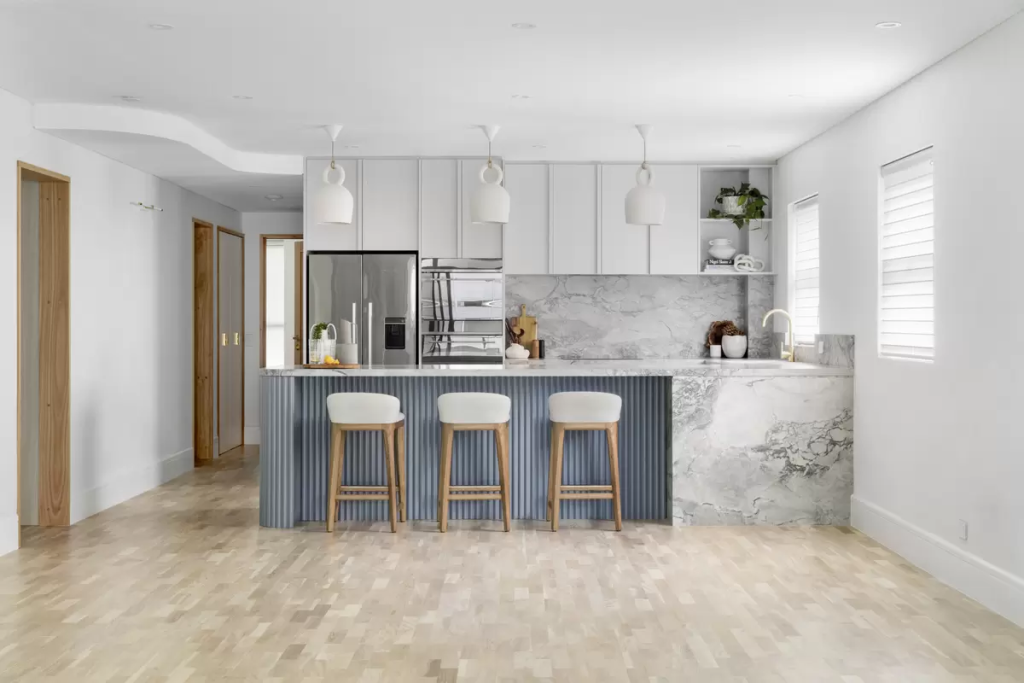
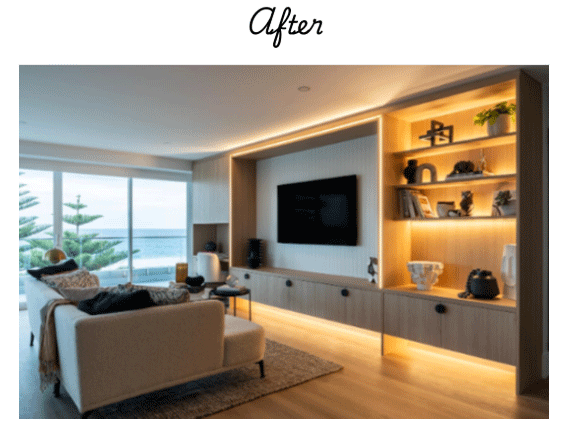
Engineered timber is often the sweet spot for coastal homes — it delivers warmth and texture without fighting the architecture or the environment. In our Collaroy project, we used engineered timber to anchor the palette of sandy neutrals and create that relaxed, coastal entertainer’s feel the clients were craving. The layered construction gave us stability and consistency across large, open-plan areas, while the softer oak tones brought warmth underfoot and balanced the light-filled spaces beautifully. It’s the kind of flooring choice that quietly supports the brief — coastal, calm, and inviting — without ever trying too hard.

Case study – hybrid flooring
Hybrid flooring can be an incredibly smart choice when performance needs to work just as hard as aesthetics. In our Manly seafront apartment renovation, the clients had previously dealt with damp and mould issues from the coastal air, and they also needed something scratch-resistant enough to live comfortably with their dog. Hybrid flooring gave us the durability and moisture resistance the space demanded, without compromising on appearance. We selected a refined, timber-look finish that still felt high-end and cohesive with the apartment’s architecture — an important consideration given the long-term plan to sell at a premium price. It’s a great example of how the right practical choice can still support a polished, market-ready result.
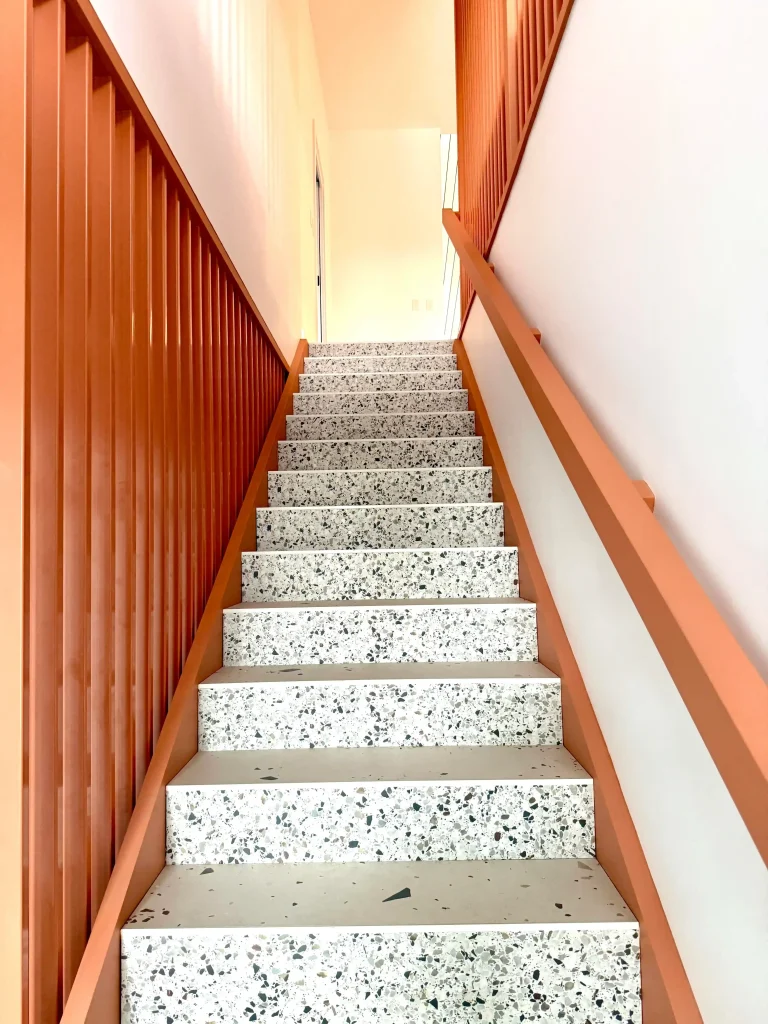
Case study – tiled flooring
Tiled flooring can be a brilliant way to balance budget, durability, and design personality — especially for busy family homes. In our Manly Vale project, the client loved the look of concrete, but the budget didn’t quite stretch that far. Instead, we selected a contemporary large-format 600×1200 concrete-look tile with subtle aggregate detailing, which delivered the same grounded, architectural feel in a far more practical way. To add personality (and a bit of fun), we paired it with a heavier terrazzo tile from the same range on the stair risers, turning the staircase into a design feature rather than an afterthought. For a family with three kids who value colour, character, and long-term durability, it was the perfect mix of hard-wearing and expressive — proof that practical choices can still feel bold and intentional.

Concrete is where our current Cremorne project really gets to show its personality. We’re having fun layering different expressions of the same material — a heavier aggregate concrete through the entry to introduce colour, texture, and a sense of arrival, then something more pared-back through the living, kitchen, and dining zones so the art and custom joinery can do the talking. We’re also exploring Palladiana-inspired ideas and considered transitions between flooring types, using contrast and rhythm rather than hard stops. It’s shaping up to be one of those homes where the floors quietly guide you through the space — and we genuinely can’t wait to see it come to life.
| Goal / Constraint | Best Bets | Why |
| Minimal, gallery-calm interiors | Polished/ground concrete or large-format porcelain | Seamless, quiet planes that recede under art and joinery |
| Feature underfoot, texture & movement | Visible aggregate concrete | Stone mix becomes the hero; brilliant in entries & transitions |
| Family proof, low stress with water/sand | Hybrid | Water-resistant, stable, easy care; still reads “timber” |
| Authentic warmth & longevity | Engineered timber | Real timber, refinishing ability, timeless character |
| Budget control with durability | Laminate or porcelain tile | High wear tolerance and strong look-for-less |
| Best for wet areas | Porcelain/stone tile | Slip ratings, easy cleaning, exterior continuity options |
| Thermal mass (passive comfort) | Concrete | Stores heat/cool to smooth temperature swings |
Your kitchen benchtop has a huge influence on how your floor colour reads – and getting this pairing wrong is one of the quickest ways to create regret. Stone carries strong undertones (warm, cool, creamy, greyed), and your flooring will either soften those tones beautifully or fight against them every single day. We often guide clients to choose flooring in response to their kitchen stone, not the other way around. It reduces visual tension, makes the whole space feel calmer, and saves a lot of second-guessing once everything’s installed. It’s a simple rule – but one that makes the difference between a home that feels considered and one that feels slightly “off.”

Flooring Transitions
Flooring transitions are one of those details that can either quietly solve problems — or unintentionally draw attention for the wrong reasons. On a practical level, they need to manage changes in material thickness, movement, and wear without creating trip hazards or awkward breaks. But from a design perspective, this is where things get interesting. When handled thoughtfully, transitions can become a feature in their own right — a change in direction, a subtle border, a Palladiana-style junction, or a clean shadow line that helps define zones without walls. Done well, they guide you through the home, add rhythm and intention, and make the overall design feel resolved rather than pieced together.
If you’re planning a luxury family home renovation on the Northern Beaches and want help choosing between concrete, tiled flooring, timber, hybrid or laminate, we’ll make it clear, calm and beautifully resolved – so your flooring supports your life, not the other way around.
Thinking about a renovation in Manly, Freshwater, Avalon or Mosman? Let’s talk about how you live, then choose the finish that will serve you for years. Book a consultation and we’ll bring samples, options and a clear recommendation – no overwhelm, just good decisions.

17 Jan
How Much Should You Budget To Furnish Or Renovate the Key Rooms in Your Home?
Here’s the thing about budgets: size, quality, and scope do most of the heavy lifting. The larger the room, the more pieces it needs. The higher the quality, the longer it lasts (and the better it feels). And once you move from furnishing to renovating, you’re paying trades, compliance, and construction – not just pretty things.
Below is a practical, Sydney-relevant guide we use with clients at Orli Interiors. It blends our internal benchmarks with current local cost ranges so you can plan with confidence.

These are the ballpark totals we typically see once a room is fully furnished (key pieces, lighting, rugs, art, accessories). They assume quality that holds up to family life and still looks good five years from now.
If your space is large/open-plan, add 15–30% because you’ll need bigger rugs, more lighting, and proportionate furniture.
Furnishing is one thing. Renovating – kitchens, bathrooms, joinery – changes the services, structure, and compliance. So how much does a kitchen or bathroom renovation cost in Sydney?
Two context points worth knowing:

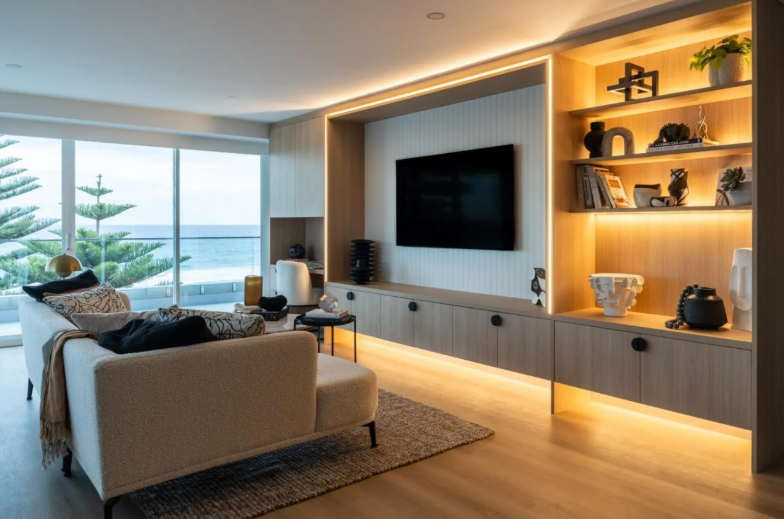
Living room
Where to invest: sofa, rug, window coverings, and lighting. These set comfort, proportion, and the mood.
Suggested allocation (scale up/down per tier):
Why prioritise the sofa? It’s the workhorse – aim to spend more on the focal pieces you touch daily, then save on easily replaceable accents.
Dining room
Your table and chairs carry most of the spend; pendant lighting and window treatments finish the space.
Suggested allocation:
Dining rooms frequently exceed $10k per room at even basic levels once quality and scale are considered. Like the living room this is a heavily used area of the home and worth investing in accordingly.

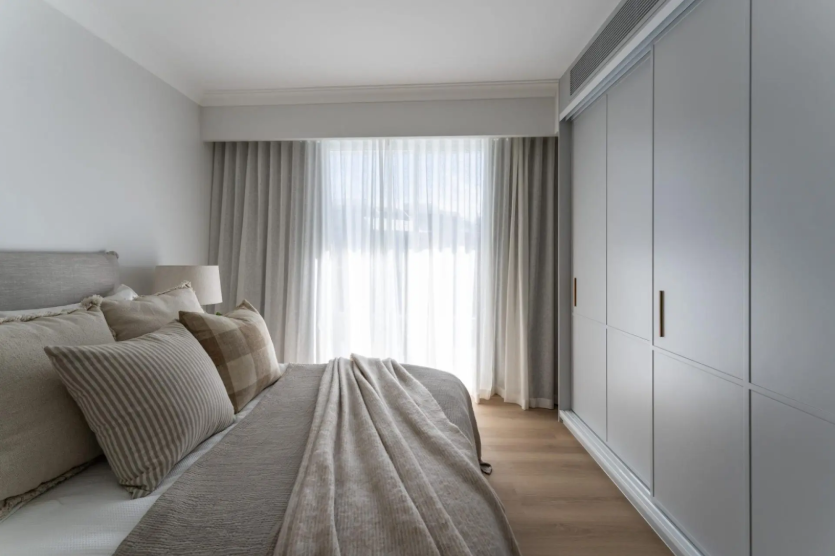
Your spend here affects sleep quality and longevity while practical storage helps to maintain a calming and restorative environment.
Suggested allocation:
Rug/linen/soft furnishings/art: 15–25%

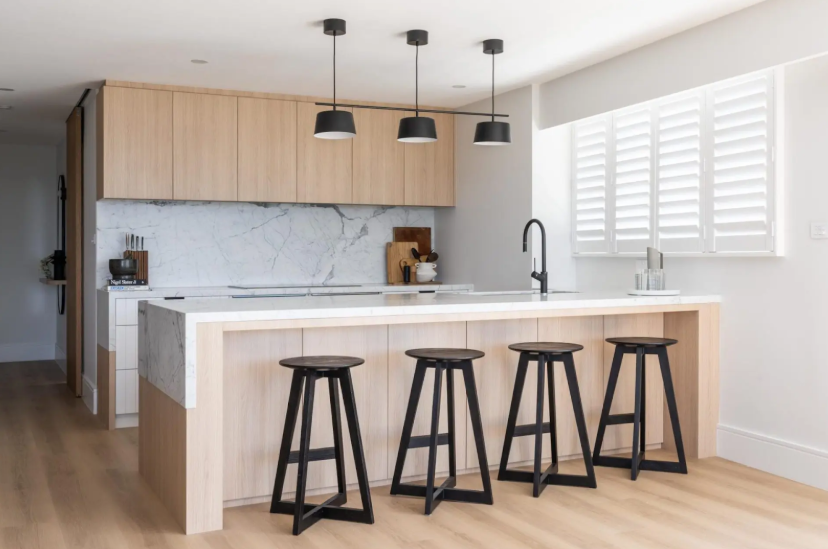
Kitchen renovation
Primary cost drivers are custom joinery, stone/benchtops, appliances, and trades (plumbing, electrical, tiling). Integrated and high end appliances, interior cabinet functionality, and premium stones push you into the high-end bracket.
Suggested allocation:
Trades: 15–25%
Bathroom renovation
Cost drivers are custom joinery, tiling, plumbing relocations, and the quality of your fixtures.
Suggested allocation:
If you’re planning floor-to-ceiling tiling, underfloor heating, custom vanities or layout changes, budget at the upper end.
Expect supply and labour to set the foundation. Materials price growth has cooled, but labour and exchange rates keep Sydney at a premium. Build a 10–15% contingency for renovations.

Let’s say you’re fully furnishing and styling an open-plan living/dining room in Freshwater and you are budgeting for lower mid-range quality.
Total plan: ≈ $42k all-in for furnishing and styling but excluding artwork – this depends on your preferences and interest in a particular artist.
Budgets aren’t about spending more – they’re about spending right. Choose a budget tier, set clear allowances by category, and stick to proportions that reflect how you actually live. If you want help mapping these numbers to your floor plan (and avoiding the usual budget traps), we’ll build a room-by-room plan with exact specifications and quotes to keep everything on track.
If you’re looking to refresh your home, you can book a consultation with us here or get in touch to arrange a free 15minute discovery call. We’d love to help!
29 Nov
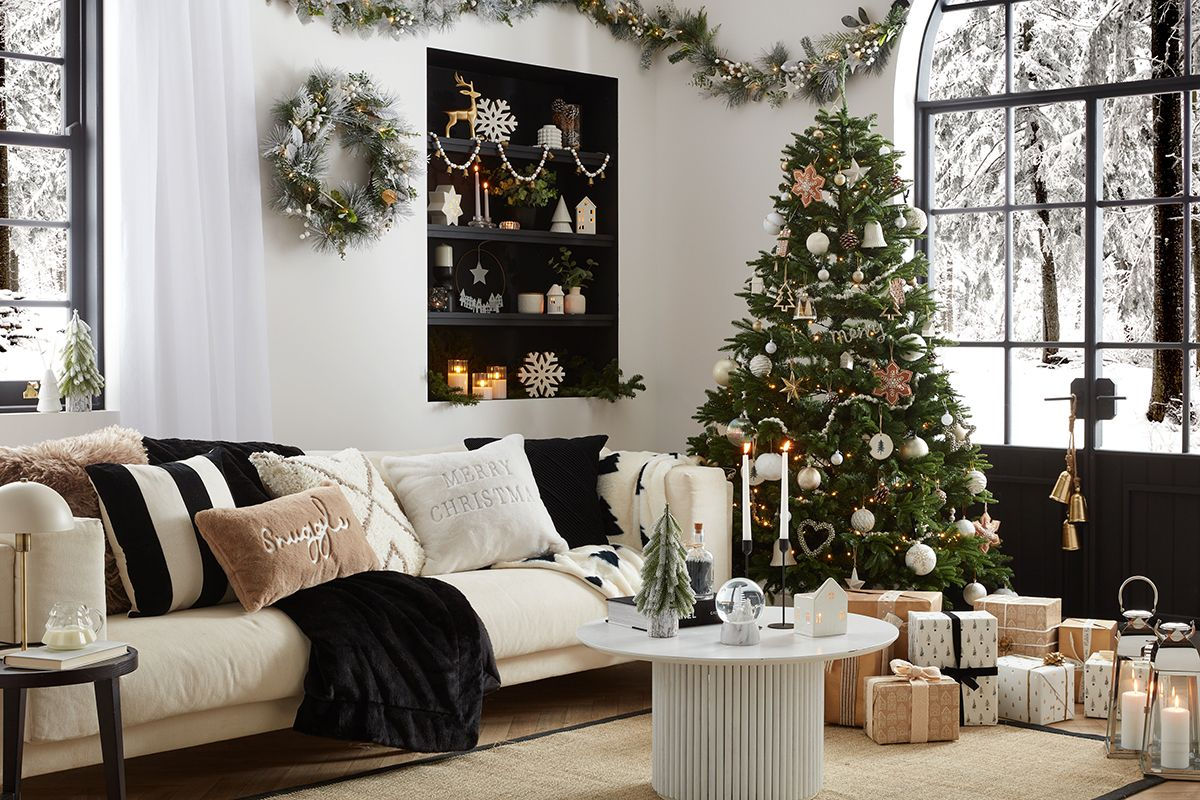
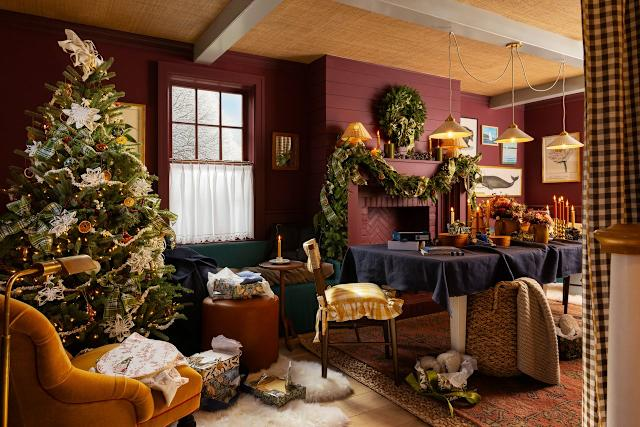
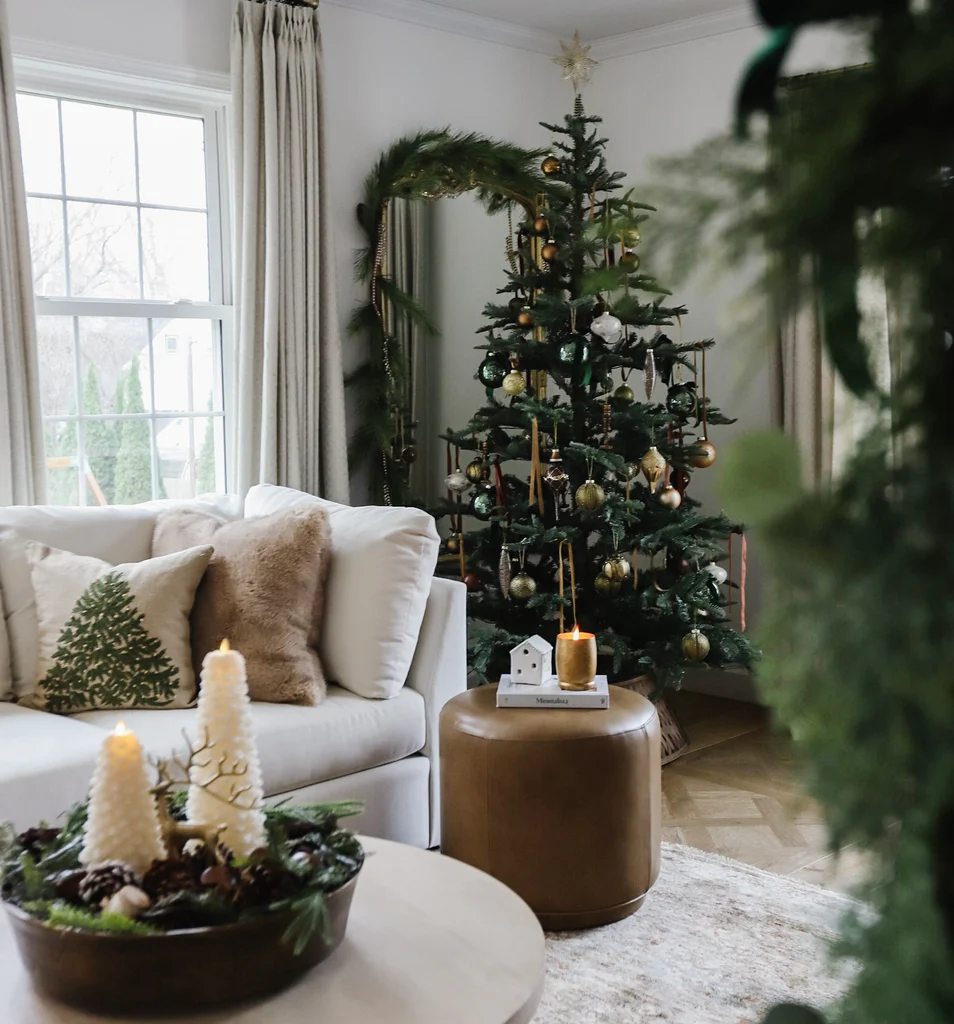
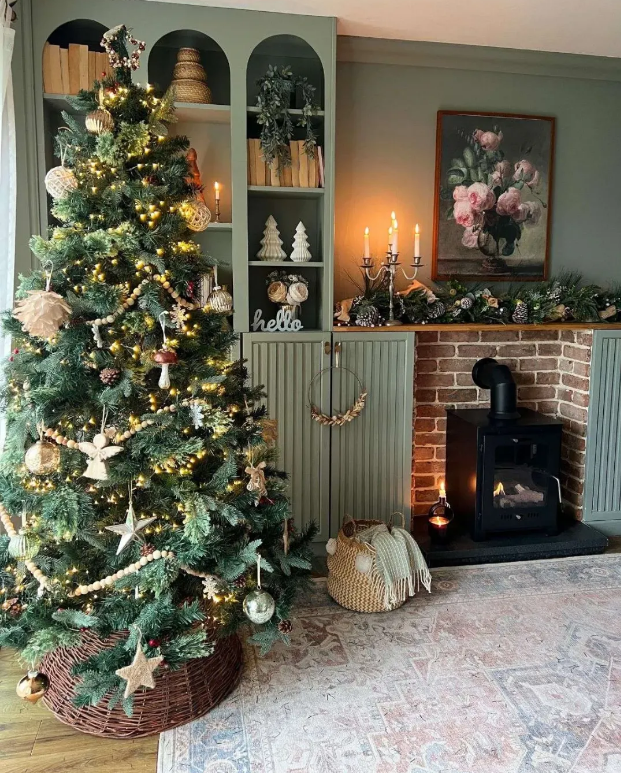
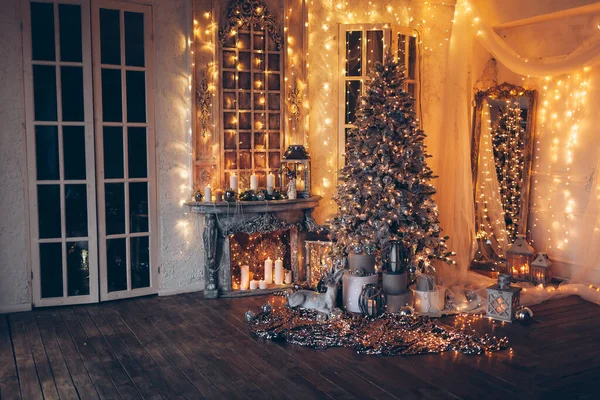
Christmas is Coming: How to Decorate Your Home for a Festive and Stylish Season
The festive season is almost here, and with it comes that familiar sense of excitement. Streets are lighting up, Christmas trees are going up, and homes begin their transformation into places that feel warm and inviting.
For design lovers, Christmas is a chance to express creativity and bring joy through thoughtful decoration. It’s not just about ornaments or fairy lights. It’s about creating a space that feels calm, elegant, and full of life. A beautifully styled home sets the mood for connection, celebration, and rest – everything the season is about.
Let’s explore how to make your home feel festive and stylish while keeping it true to your own design style.

Every beautiful interior starts with a clear idea, and Christmas is no different. Choosing a theme helps guide every decision so your home feels pulled together rather than busy.
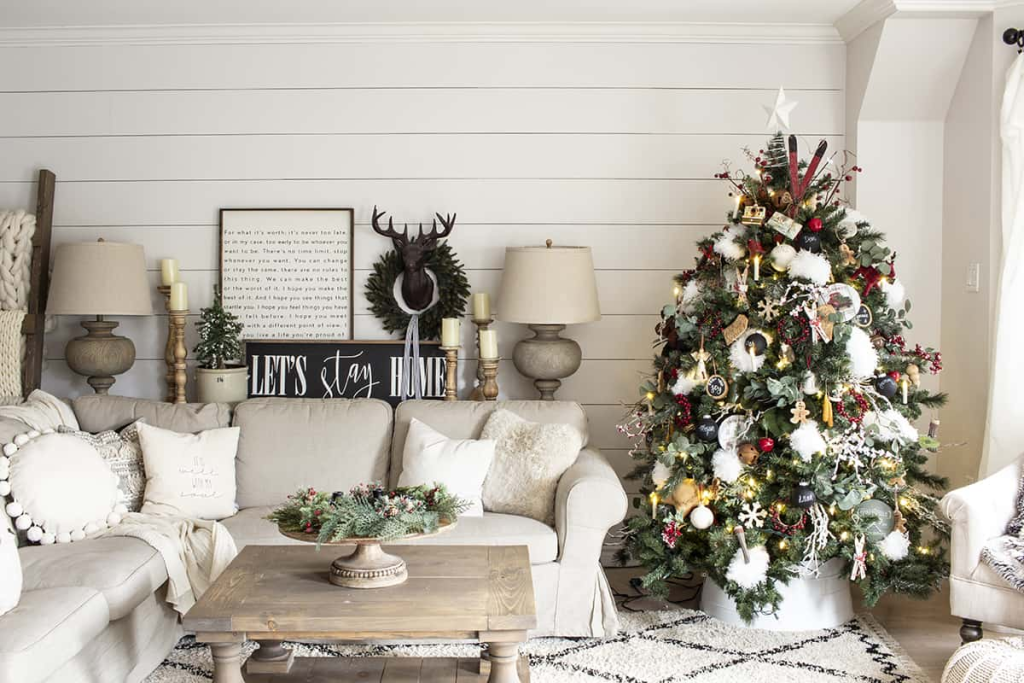
If you love tradition, lean into it. Think rich reds, forest greens, and warm golds. These colours bring instant nostalgia and warmth. Add gold candle holders, deep velvet ribbons, or glowing fairy lights to complete the look.
If your home is contemporary, keep things simple and refined. Use soft whites, muted neutrals, or metallic accents. Try glass ornaments, sculptural branches, and clean lines for a look that feels fresh and balanced.
If you prefer an organic feel, layer textures like linen, jute, and timber. Bring in native foliage, pinecones, or dried citrus for a natural scent and touch of warmth. This approach suits coastal and modern Australian homes beautifully.
Once your theme is set, everything from your Christmas tree to your table setting will feel intentional and connected.
When it comes to decorating, a few standout pieces can make the biggest impact.
Your Christmas tree is the heart of your festive interior, so make it count. Start with the lights, then layer your decorations by size and texture. Mixing matte, gloss, and natural finishes adds depth and interest. Finish with a ribbon or garland that ties back to your colour palette.
Don’t stop there. Add one or two hero moments around your home. A wreath at the front door, a styled console with candles and greenery, or a beautiful centrepiece on the dining table can all create that “wow” feeling without overdoing it.

Lighting and texture are what turn a home into a sanctuary at Christmas.

Avoid harsh overhead lights and focus on soft, layered glow. Fairy lights can frame windows, wrap around a banister, or add a gentle sparkle to your living room. Candles – whether real or battery-operated – instantly make a space feel more intimate. Lanterns or table lamps with warm bulbs can do the same.
This is the season for comfort. Think chunky knitted throws, velvet cushions, or a faux-fur rug underfoot. Mixing materials like linen, glass, timber, and brass brings dimension and warmth. These tactile layers invite people to sit down, relax, and stay a while.
The small touches often make the biggest difference.
Add scent to your design through candles or diffusers with notes of pine, cedar, or citrus. Use fresh greenery throughout the house – a garland along the staircase, a sprig of eucalyptus on the dining table, or a cluster of foliage in a vase on the kitchen bench.
Set your Christmas table with layers too. Linen napkins, natural textures, and simple name cards show care and thought. Even little areas like the entryway or powder room can join the celebration with subtle touches like a small wreath, a bowl of ornaments, or a hint of greenery on a shelf.
The best interiors do more than look good – they make people feel something. Christmas decorating is about creating an experience that feels joyful, relaxed, and personal.
Think about how the space feels when someone walks through the door. The soft glow of lights, the texture of fabrics, and the scent of pine or vanilla all come together to create atmosphere.
If your home has a light and coastal feel, you can still celebrate Christmas beautifully. A palette of white, champagne, sage, and natural wood feels festive but calm – perfect for warm Australian summers when celebrations often flow outdoors.
Your goal isn’t to impress. It’s to create a home that feels welcoming, layered, and full of life.

More people are moving toward sustainable decorating, and it’s easy to see why. Instead of buying new pieces every year, invest in quality items you’ll look forward to bringing out again and again.
Choose natural materials like timber, linen, and glass instead of plastic. Incorporate locally made decorations or handmade ornaments. Repurpose what you already have, or style it differently to feel fresh each season.
A small, considered collection of decorations can feel more personal and meaningful than a home filled with excess.
1. When should I start decorating for Christmas?
Most people begin in late November. It gives you time to plan, style, and enjoy the season without rushing.
2. What colours are trending this Christmas?
Soft neutrals, sage, champagne, and gold are very popular this year. They suit both modern and coastal homes while keeping things timeless and elegant.
3. How can I make my home feel festive without spending a lot?
Stick to a simple colour palette and use greenery, candles, and texture. Lighting and layering go a long way toward making a space feel special.
4. How do I make my Christmas decor sustainable?
Use natural materials, repurpose what you already have, and buy less but better. Fresh greenery and handmade pieces are always a lovely touch.
5. How do I make Christmas decor suit my interior style?
Work with what you already have. If your home is neutral and minimal, choose soft metallics and whites. If it’s warm and traditional, lean into deep tones and rich textures. The goal is for your decor to complement your space, not compete with it.
Christmas decorating doesn’t have to be overwhelming or over the top. It’s about creating a space that reflects your taste, feels calm and welcoming, and makes people feel at home.
Start with a theme, invest in a few statement pieces, play with texture and lighting, and enjoy the process. The most beautiful Christmas interiors are the ones that feel effortless – where every corner reflects care, creativity, and the spirit of the season.

22 Nov
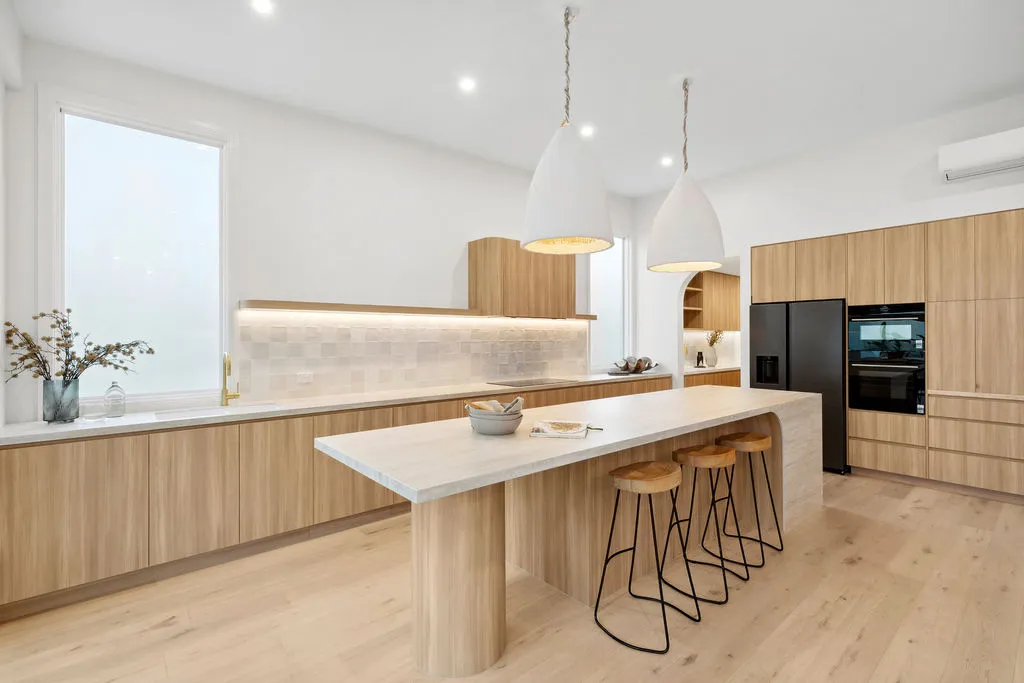
Creating Storage Space from Nothing
Many Sydney homes look generous on paper yet still feel cluttered. If that sounds familiar, you don’t have a space problem, you have a planning problem. The solution isn’t simply adding more cupboards. It’s about designing storage that fits your lifestyle and the rhythm of your day.
At Orli Interiors, we help Northern Beaches homeowners create calm, functional homes that work beautifully. Here’s how we design real storage capacity from “nothing” while keeping that effortless, coastal sense of space.

Start with moments, not metres. Before we measure anything, we map how you actually live. Every home has its own rhythm: school drop-offs, surf sessions, morning coffee rituals, and after-dinner resets. Bags should land where you walk in, homework needs a perch near the kitchen or in the bedroom, and towels belong close to the bathroom door, not three rooms away.
When storage sits where habits overlap, it works quietly in the background. You stop buying baskets, stop walking laps of the house, and start enjoying a calmer flow. Shoes stay put, chargers have a home, and mornings suddenly feel easier.
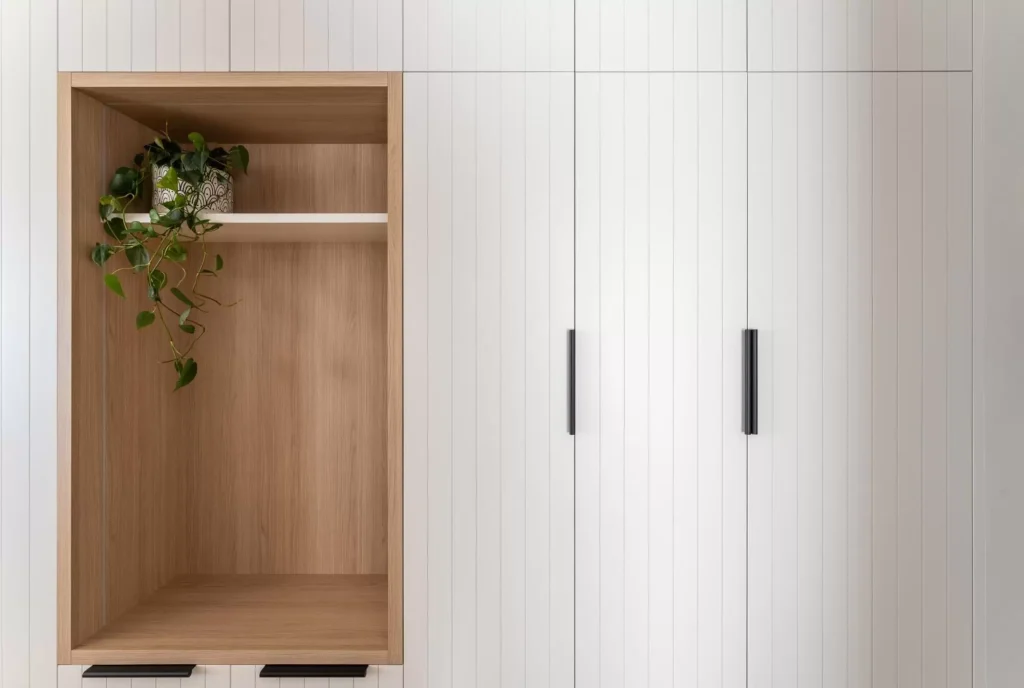
Deep cupboards seem practical until you lose things in the back. Shallow storage keeps everything visible and easy to reach. In living areas and hallways, wall units just 300 to 350 mm deep hold shoes, hats, tech, and books without weighing down the space.
In kitchens, a 450 to 500 mm pantry with full-extension drawers always beats a tall, deep void. You can see every jar and nothing goes to waste. Laundries benefit from slim cleaning lockers with vented doors that let mops and brooms dry properly.
Durability matters. We use HMR board for carcasses, 2-pac polyurethane or sealed timber veneer for doors, and quality runners such as Blum Legrabox. This level of detail makes everyday use feel quietly luxurious.
Some of the best storage hides in plain sight. Kickboard drawers add space for trays or seasonal platters. The area above internal doors can hold suitcases or winter blankets when built as a bridge cabinet painted to match the wall.
Even wall cavities can work harder. The 90 mm recess between studs can house a recessed spice rack, key cabinet, or fold-down ironing board. These small, efficient additions create surprising capacity without touching the footprint of your home.
We often gain valuable space by shifting a wall slightly or swapping a swing door for a cavity slider. Those small moves can deliver an entire wall of built-in storage.
At the entry, 400 mm of depth is enough for a mudroom wall with a bench seat, shoe drawers, charging shelves, and tall lockers for each family member. It contains sand, surf gear, and everyday clutter before it reaches the living room.
Under-stair zones are also goldmines and custom joinery will make the most of every centimetre. Drawers at the lower treads hold shoes, a mid-section cabinet fits a vacuum or mop, and the rear compartment stores off-season items. Traffic flows improve, storage doubles, and the home still feels light.
When appliances and workspaces can disappear, the home feels calmer. In kitchens, pocket-door appliance garages 400 to 500 mm deep keep coffee machines and toasters tucked away on a benchtop with its own power supply. Consider also what you might store behind a 400mm deep cabinet – if it’s at the end of the cabinetry run can you install a side access broom cupboard to house the stick vacuum and ironing board?
A compact work-from-home nook with a pocket door, pull-out keyboard, and printer drawer can vanish outside work hours. In living rooms, slim shelving can frame the TV while devices stay hidden behind ventilated doors below.
Hardware quality matters here too. Häfele and Blum pocket-door systems glide smoothly and quietly, holding up to daily use for years.

Poor lighting makes even the best joinery frustrating. We always specify warm white LED strips (2700–3000 K) set into an aluminium channel with an opal diffuser. Lights under shelves or inside tall units make storage easier to use and visually cleaner.
Motion sensors or reed switches are a simple upgrade that makes a big difference in pantries and linen cupboards. Plan early for driver locations so you don’t lose shelf space later. It’s a small investment that adds daily convenience.
Northern Beaches homes deal with salt air, humidity, and sand, so materials need to be tough. We use HMR carcasses with laser-edged sealing, low-sheen two-pac finishes, and corrosion-resistant hinges and runners, especially in entries and garages.
Textured finishes hide fingerprints and scuffs better than high-gloss options. Near external doors, powder-coated hooks and marine-grade hardware stay looking good through wet winters and sunscreen summers.
Many homeowners think more storage means better storage. It doesn’t. Deep cupboards make things harder to reach, and floor-to-ceiling cabinetry everywhere makes rooms feel smaller.
The secret is balance. Keep shelves shallow enough for single-layer storage, and allow some breathing space above joinery so the eye can rest. Plan ahead for robot vacuum docks, charging stations, and cable management so you’re not improvising later. And never cut costs on hardware. When hinges or runners fail, everything around them suffers.
In our Manly apartment, we designed a built-in bench at the entry with shoe drawers below and tall cabinets for bags and coats – with pull out perpendicular coat rails to handle the lack of cabinet depth. This way, everything’s put away before you reach the heart of the home. The joinery turns the corner to meet the fridge, pantry and breakfast cupboard, reading as one continuous element and subtly extending the storage zone.
In our Manly Vale renovation, a generous breakfast cupboard sits shallow to keep bench space open, while a broom cupboard hides behind it with discreet side access. That extra cabinet depth also allowed a highly efficient corner pantry: ~195cm of usable shelving, delivered behind just 90cm of door frontage. Clean lines outside; serious capacity inside.
Start by identifying your top five daily friction points. Where do things pile up? Which tasks feel harder than they should? Once those patterns are clear, we can design a storage plan that aligns with your home’s architecture and your lifestyle.
That’s how we create storage space from “nothing” while keeping the easy, refined calm that Northern Beaches homes are known for.
1. How can I add storage without making my rooms feel smaller?
Focus on shallow, well-placed joinery rather than bulky cupboards. Integrated cabinetry in hallways, under stairs, and around doors keeps sightlines open while adding useful space.
2. What materials are best for coastal homes?
Moisture-resistant HMR board, low-sheen two-pac finishes, and corrosion-resistant hardware perform best in salt air. Avoid high gloss or unsealed timber near exterior zones.
3. How much does custom joinery cost in Sydney?
Prices vary by design complexity, finish, and hardware. For a high-end Northern Beaches home, expect from $2,000 – $4,000 per linear metre for quality joinery built to last.
4. What lighting works best inside cupboards and wardrobes?
Warm LED strips at 2700–3000 K give even light without harsh glare. Always plan wiring early to avoid losing shelf space.
5. How can I make my entryway more functional?
A mudroom wall just 400 mm deep can transform your daily routine. Include closed shoe drawers, a bench seat, and one tall locker per person for bags and coats.

Creating more storage isn’t about adding bulk, it’s about adding thought. When every item in your home has a natural resting place, clutter fades into the background and daily life becomes lighter. Smart, considered storage improves more than just how your home looks, it transforms how it feels to live in it.
At Orli Interiors, our approach blends design intelligence with craftsmanship, delivering homes that are both beautiful and deeply functional. If you’re ready to discover how much space your home truly has to give, we’d love to help you plan it.
Our team handles everything, from design and joinery specification to build coordination and installation.
Explore our full-service renovations, browse our kitchen projects, and see more of our custom joinery.
You can also view our Collaroy project and our guide on designing a family mudroom.
When you’re ready to create calm and order in your home, book a consultation.

08 Nov
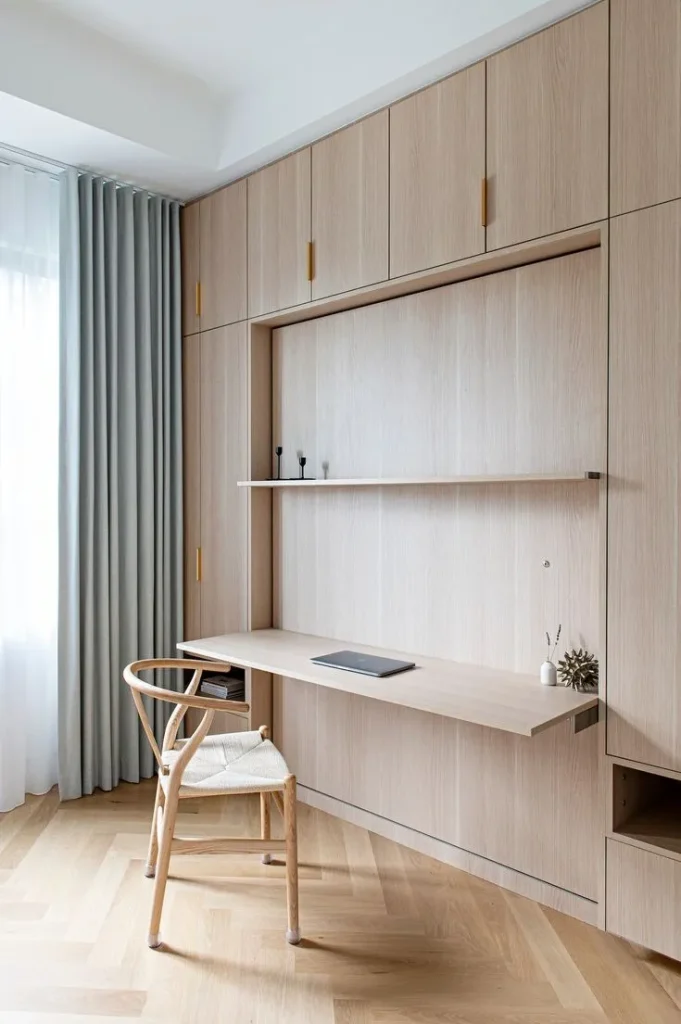
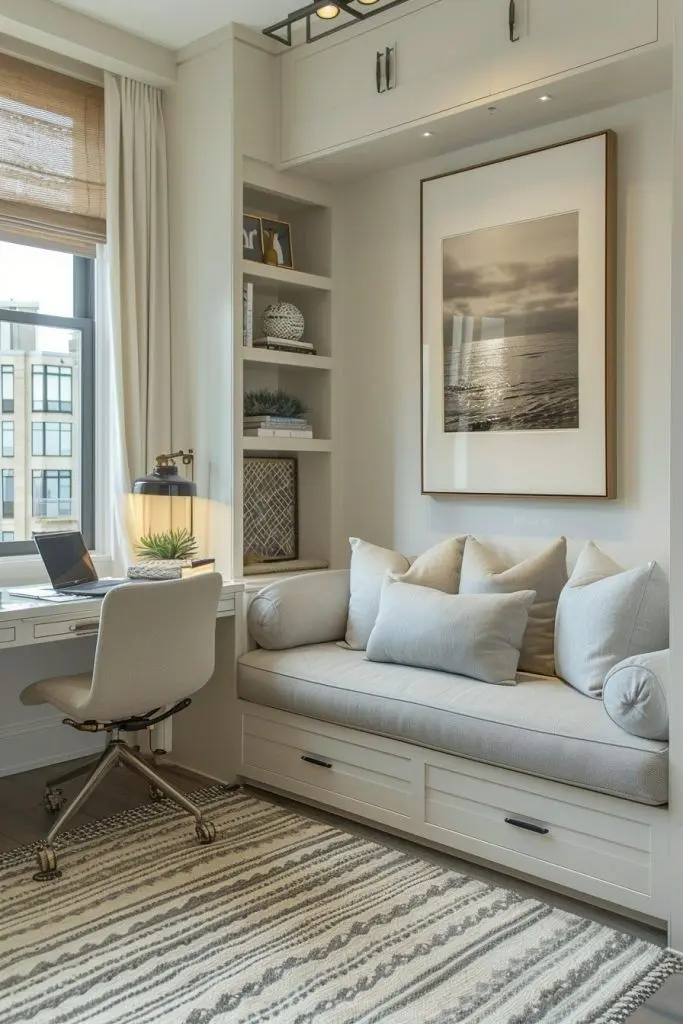
Maximising the Use of your Guest Bedroom: A Multi-Functional Approach to Northern Beaches Living
Guest bedrooms are a luxury many of us cherish, yet their full potential often goes unrealised. These spaces frequently become underutilised storage rooms or sit idle, waiting for occasional visitors. However, with thoughtful design and a little creativity, you can turn your guest bedroom into a multi-functional space that serves your needs year-round while still providing a warm and welcoming retreat for guests.
Here’s how to maximise space and functionality in your guest bedroom.
Before getting into design ideas, consider how you want to use the space when it’s not hosting guests. Is it a home office, a hobby room, a fitness zone, a secondary media room, or simply a quiet nook for reading and relaxation away from the rest of the home? Defining secondary functions allows you to make intentional design choices that align with your lifestyle.
The right furniture can be a game-changer in maximising a guest bedroom’s utility. Invest in pieces that serve dual purposes:
Sofa Beds or Daybeds: These allow the room to transition effortlessly between a lounge or workspace during the day and a cosy guest room at night, but be sure to invest in comfort!
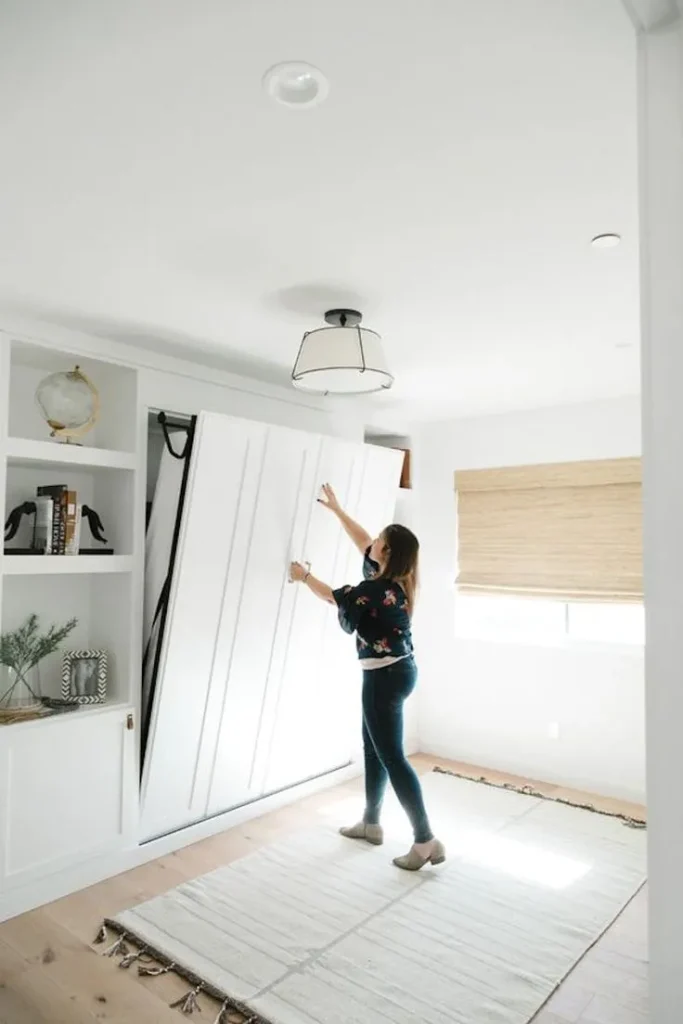
Murphy Beds: Wall-mounted fold-down beds free up valuable floor space when not in use. Modern designs integrate with bookshelves or desks for added functionality.
Ottomans and Benches with Storage: Use these for extra seating, footrests, or hidden storage for bedding and guest essentials.
Storage is often at a premium in smaller spaces, but custom joinery can create a polished and practical solution. Consider built-in wardrobes, window seats with hidden storage, or floating shelves to keep the room uncluttered.
If a sofa bed just won’t cut it, and the budget won’t stretch to a Murphy bed, simply adding power to the inside of a built in wardrobe with pocket doors will provide the option of a dual use guest and TV room.
At Orli Interiors, we specialise in designing bespoke storage solutions that balance aesthetics with practical functionality, ensuring your space remains both beautiful and purposeful.
When designing a multi-functional guest bedroom, the layout is key.
Foldable Desks or Drop-Leaf Tables: These can be tucked away when not in use, preserving valuable floor space.
Room Dividers: If privacy or a stronger sense of separation is needed, lightweight screens or shelving units can act as practical dividers, or be used to visually section off areas or hide items when not in use.
Doors and Windows: Their size and location have a big impact on a room’s layout so consider them carefully if planning a new build or renovation. It’s worth getting a second opinion on your plans from an Interior Designer to ensure you have thought of all the options.
A guest bedroom should appeal to various tastes while feeling homey. Opt for a neutral colour palette with warm undertones – think soft greys, creams, coastal blues or subtle green tones that evoke the serenity of Sydney’s Northern Beaches. Layer in textures like loose weave throws, linen bedding, and a mix of cushions for contrast and comfort.
When decorating, focus on timeless pieces that don’t clash with the room’s secondary function. For example, a sleek, minimal desk lamp can double as a bedside light.

Though the space will primarily serve your needs, it’s essential to make your guests feel valued. Keep these touches at the ready:
These thoughtful additions can be stored neatly in stylish baskets or behind closed cabinetry when not in use.
Lighting can transform a small space, making it feel more expansive and multi-functional.
Layered Lighting: Combine ambient, task, and accent lighting to suit different uses of the room.
Natural Light: Sheer curtains or blinds allow daylight to flood the room while maintaining privacy. Add a mirror to reflect light and create the illusion of more space.
Plants breathe life into any room. Opt for low-maintenance greenery such as a snake plant or a peace lily, which improve air quality and add a sense of calm. Place them strategically on shelves or in corners to soften the room’s edges.
Incorporate storage solutions that blend seamlessly into the decor:
To make the room feel bigger, keep clutter to a minimum and stick to a cohesive colour scheme. Use vertical space to your advantage with tall bookshelves or hanging decor. Avoid heavy furniture and instead opt for lighter, streamlined designs.


We believe in creating spaces that truly reflect your lifestyle while offering practicality and elegance. By reimagining your guest bedroom as a multifunctional space, you can maximise its potential and create an environment that enhances daily living. From custom joinery to tailored furniture selections, our expertise ensures every square metre works beautifully for you and your guests.
If you’re ready to transform your home, contact us at Orli Interiors for a consultation. Together we can create a guest bedroom that’s as functional as it is fabulous.
28 Oct
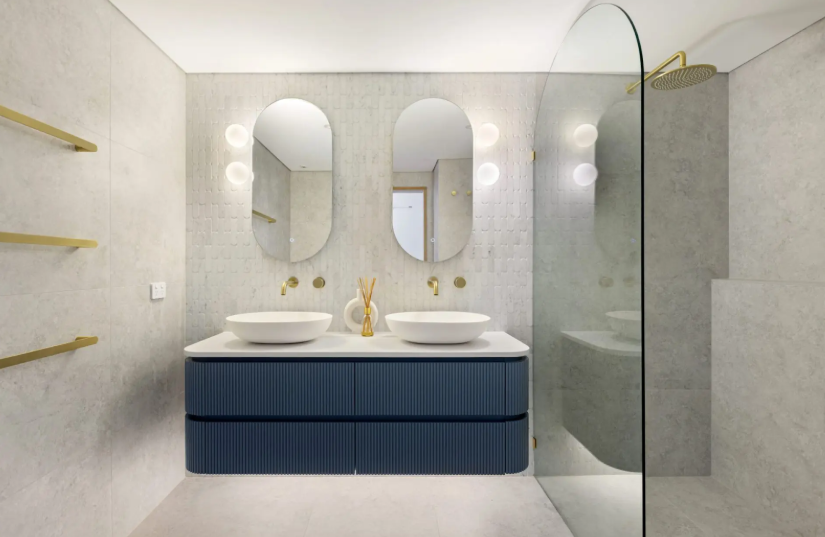
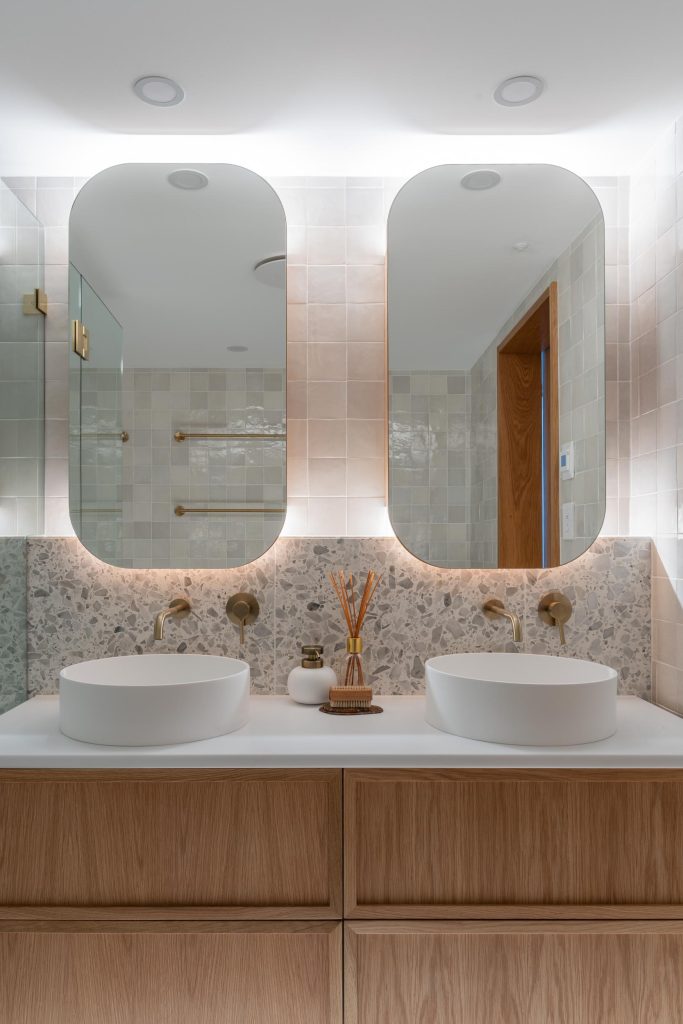
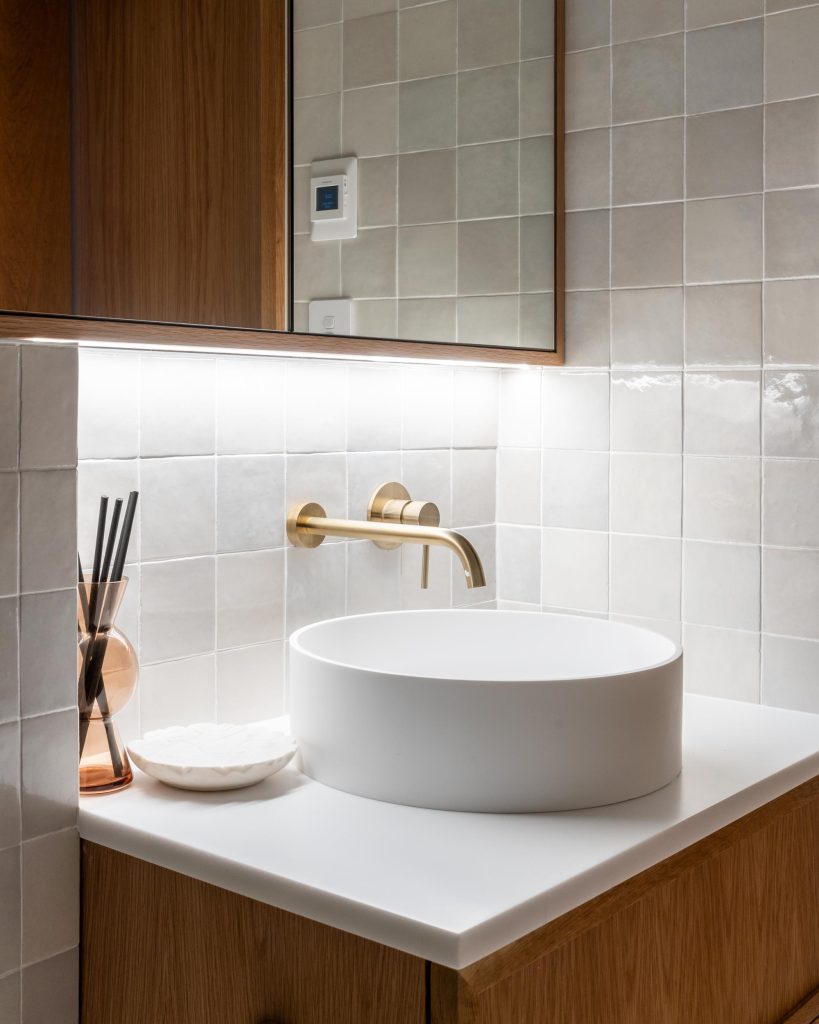
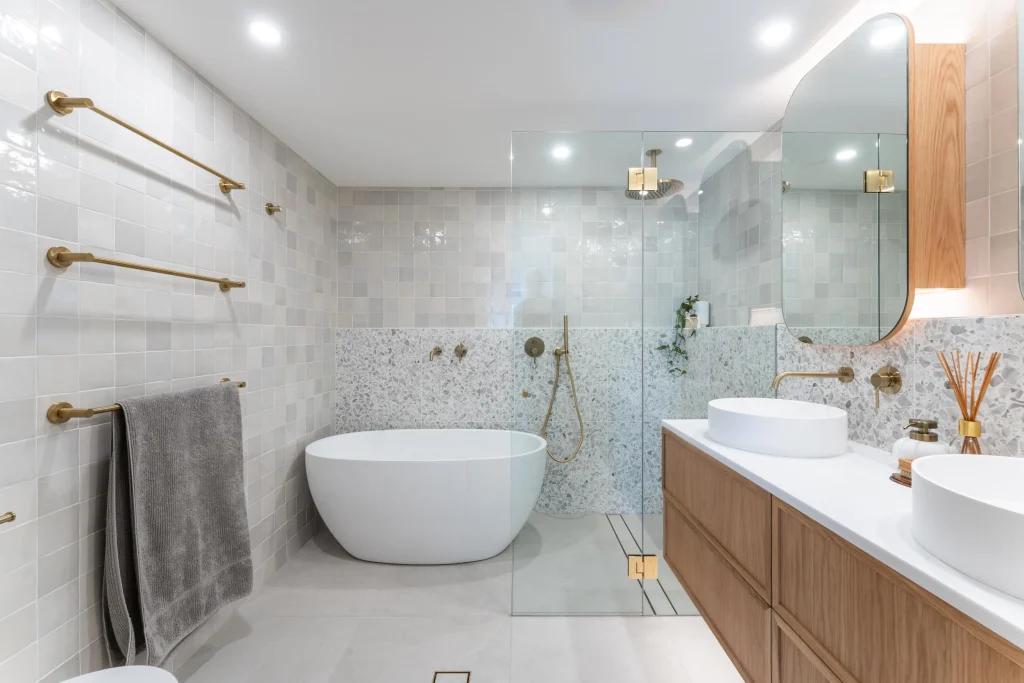
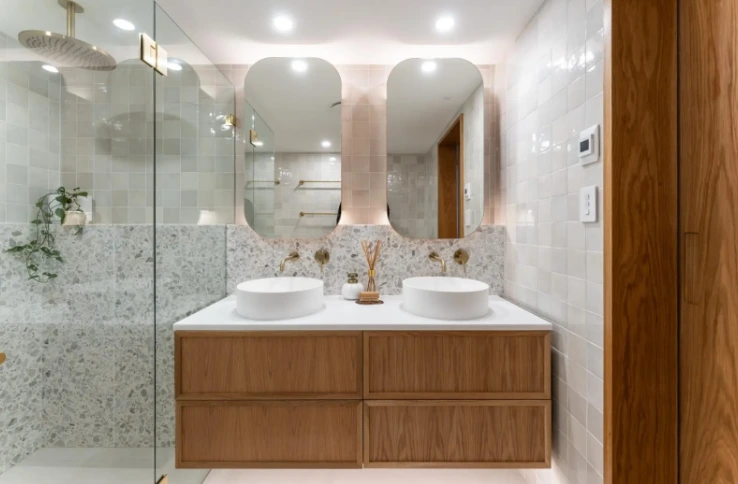
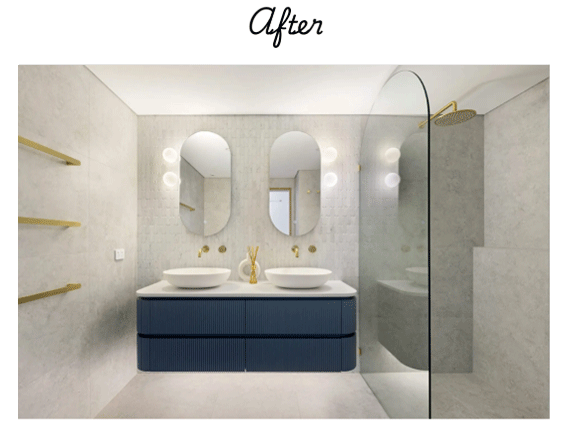
Bathroom Cabinetry: A Complete, Real-World Guide For Calm, Clever Bathrooms
Bathroom cabinetry does more than hold toothpaste and spare loo rolls – it sets the rhythm for your mornings, frames the look of the room, and determines how easy everything is to keep clean. At Orli Interiors, we often hear from clients who feel their bathrooms never quite keep up with daily life. The right bathroom cabinetry changes that story. Designed well, it turns clutter into calm and elevates the space from purely functional to quietly beautiful. This guide shares how we think about joinery for Sydney’s Northern Beaches homes, blending design-led decisions with practical detail so your bathroom not only photographs well but performs beautifully for years.
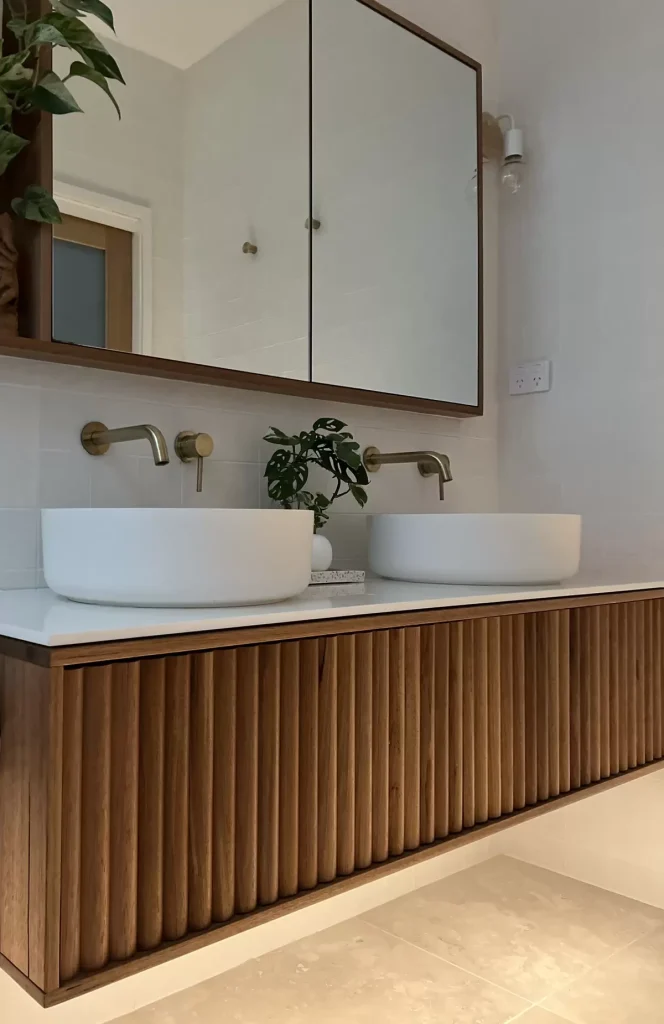
Before choosing colours or handle styles, map the routines that actually happen in your bathroom. Who uses the space and when. Which five items each person reaches for every day. Where hair tools cool down safely. How often you host guests. Once you understand these behaviours, it becomes obvious which zones need prime placement and which can be tucked away. A couple who gets ready at the same time may push for dual basins or a wider vanity, whereas a single basin positioned off-centre often creates a generous landing zone that keeps the benchtop workable.
The choice between wall-hung and floor-standing vanities is as much about mood as it is about storage. Wall-hung vanities create visual lightness, expose more floor for easy cleaning, and make compact rooms feel larger. They pair beautifully with a soft LED strip underneath, which doubles as a subtle night light. Floor-standing vanities bring a grounded, furniture-like presence and can eke out a touch more storage. In classic schemes, a solid plinth or a leg detail gives character without unnecessary fuss.
Beyond the vanity, consider the power of vertical storage. A slender linen tower can swallow bulky towels and paper goods, freeing the vanity for daily items. A well-proportioned mirror or shaving cabinet is a quiet hero: it keeps skincare and electric grooming tools at eye level and off the bench. If you can recess the cabinet, the result looks tailored and tidy. For open shelves, be choosy. Rolled towels and a woven basket or two can add softness, but open storage needs editing to stay calm rather than chaotic.
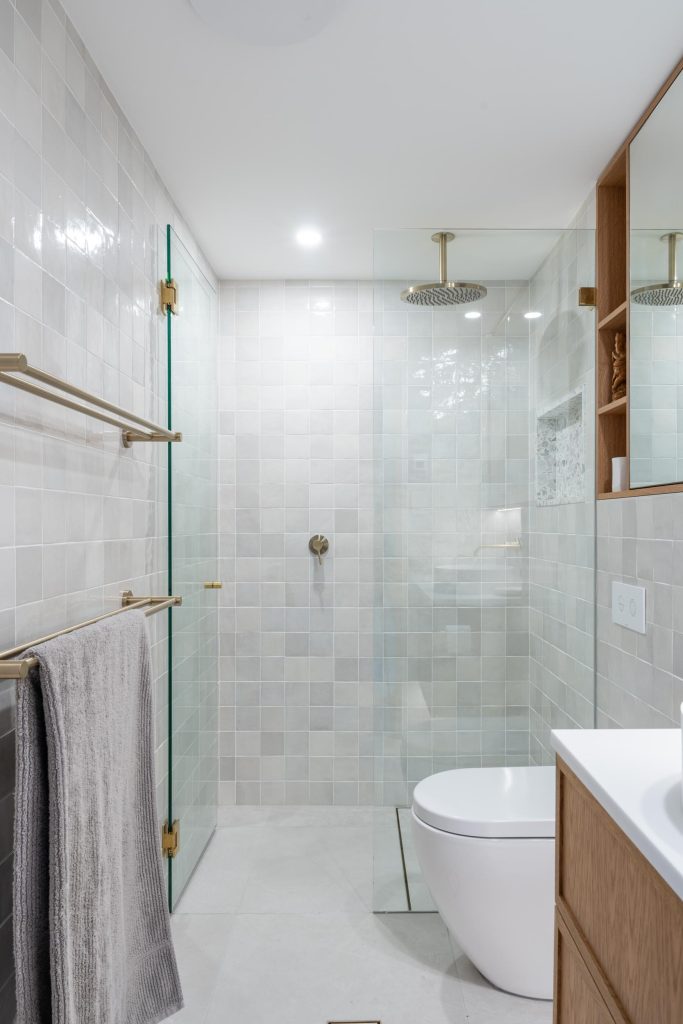
Custom bathroom cabinetry typically wins in wet areas because it respects your room’s quirks – the nib wall, the awkward return, the desire for a rounded corner near a walkway. Flat-pack solutions are fast and budget-friendly, but depth, height, and internal layouts are fixed, which can be limiting in smaller footprints. When humidity is a fact of life, the precision and material control of custom joinery usually pay for themselves in longevity.
“Quality matters—it’s the difference between replacing your vanity in a few years and forgetting about it for decades. I like Australian-made brands that use hard-wearing materials.” — Jason, Bathroom Collective
“The right vanity should work with your layout, not fight it. Get the proportions right and you’ll nail that mix of storage, comfort and flow.”
“Going custom is easier than you think: your vision, a designer to refine it, and local makers to build it. Simple.”
Bathrooms are humid by nature, so moisture resistance is not a nice-to-have. It is essential. Specify moisture-resistant board for carcasses and shelves, and insist that every cut edge is properly sealed during fabrication and on site. This is the kind of detail you do not notice on day one, but it quietly prevents swelling and delamination over time.
For fronts, high-pressure laminate is a hardworking option that has grown up significantly in recent years, with convincing timber looks and durable solid colours. Two-pack polyurethane offers crisp lines and custom colour, with a matte or satin sheen that minimises fingerprints and reads softly in natural light. Timber veneer brings warmth and texture without the structural movement of solid timber, provided it is finished with a water-resistant topcoat and carefully sealed at cut-outs.
Benchtops deserve the same level of scrutiny. Porcelain is exceptionally resistant to heat, stains, and scratches, and its slim profile suits contemporary schemes. Sintered stone (think Dekton or Neolith) offers similar durability with excellent UV and stain resistance, making it brilliant for bathrooms and even outdoor zones – just note edges and joins are more defined than natural stone. Solid surface, like Corian, is seamless and non-porous with the option for integrated basins and coved upstands – a calm, continuous look that’s easy to keep spotless – though it can show fine scratches that are typically refinished away. Engineered stone remains a dependable all-rounder with consistent patterning and a broad palette. Natural stone is unmatched for individuality and character, but it asks for sealing and a gentle cleaning routine. If you love the patina of real stone, accept that a little care is part of the romance.
Hardware is the handshake you feel every day, so do not skimp. Full-extension, soft-close runners and quality hinges make drawers glide and doors land quietly. Handle choice shapes the joinery’s expression. Integrated finger pulls and shadow rails deliver a clean, minimal line that is easy to wipe down. Slim bars add a tailored note and are an opportunity to echo or intentionally contrast your tapware finish. Curved corners on a vanity can soften tight bathrooms and save hips – a small gesture with a big effect in family homes.

We are unapologetically pro-drawer in bathroom cabinetry. Drawers bring contents to you and stop the awkward crouch to the back of a dark cupboard. Reserve cupboards for tall items like bulk cleaners or install a pull-out to keep them practical. A U-shaped top drawer that routes around plumbing preserves valuable space where you need it most. Adjustable dividers stop everyday items from migrating, and a heat-resistant mat creates a safe bay for hot tools to cool down. When power is integrated inside a drawer or mirror cabinet – specified by a licensed electrician and set up with an appropriate safety cut-off – electric toothbrushes and shavers can live out of sight, charging quietly while the benchtop stays clear.
For family bathrooms, set essentials at child-friendly heights so independence is encouraged without turning the room upside down. In guest bathrooms, keep storage simple and obvious. A modest vanity, a compact mirror cabinet, and a clear landing area help visitors feel welcome and keep visual clutter in check.

The relationship between basin, tap reach, and drawer internals can make or break usability. Under-mount basins offer more usable surface and a clean edge. Counter-top bowls are sculptural and photogenic, but they steal depth, so pair them with a slightly deeper vanity and confirm that the spout reach lands water inside the bowl rather than on the benchtop. Wall-mounted taps free up benchtop space and simplify cleaning, but they must be coordinated early with cabinetry and splashback heights.
Clearances matter. Doors and drawers should open fully without colliding with shower screens, towel rails, or knees. While standard vanity heights suit most adults, taller clients often prefer a touch more height for comfort, especially with under-mount basins. Mirror cabinets should sit at a natural eye line so you do not crane your neck to use them. In small rooms, off-centre the basin to create one generous prep zone, recess the mirror cabinet for a flush profile, and take advantage of the vertical plane with a slender tower rather than spreading storage shallowly across the floor.
Good lighting turns bathroom cabinetry into a true workstation. Aim for front-facing illumination at face level so shadows do not sabotage grooming. Sconces flanking the mirror or integrated lighting within a mirror cabinet deliver even, flattering light, while ceiling downlights can then focus on ambience and overall brightness. A discreet LED strip under a floating vanity creates a soft night light and highlights the airy gap beneath, which is especially helpful in compact rooms. Internal power within cabinetry keeps the bench clear of chargers and cords, but always respect wet-zone rules and engage a licensed electrician. Planning these details early avoids awkward cut-outs and retrofitted solutions that never look quite right.
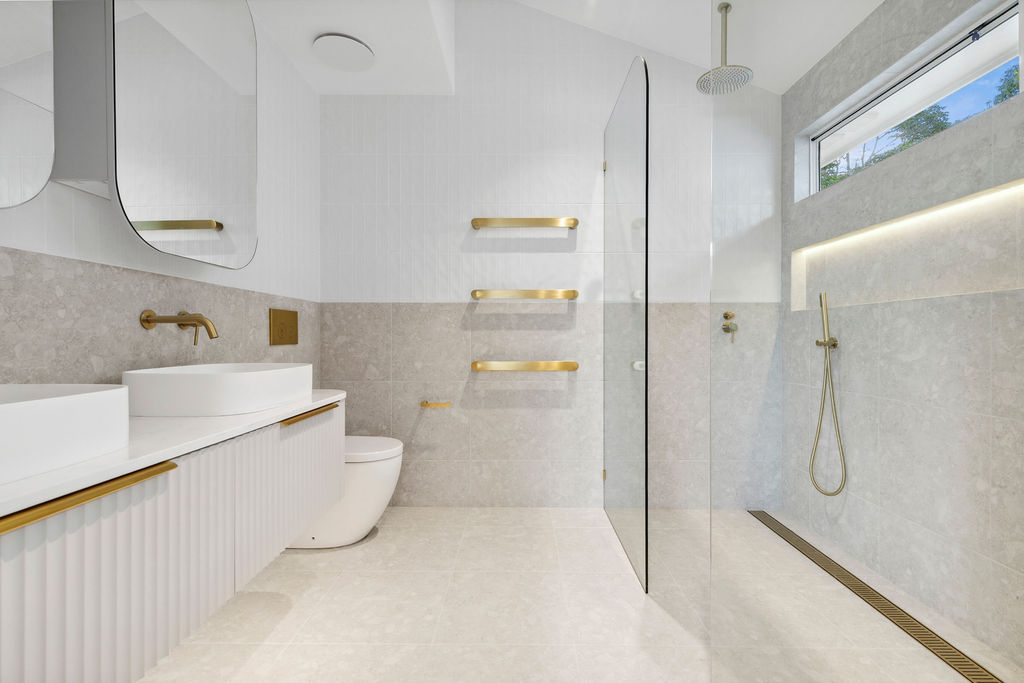
On warmth, I’ll always pick underfloor heating over a heated towel rail. UFH gently warms the whole room, keeps surfaces dry, and cuts condensation – so towels dry anyway – whereas a rail mostly warms the towels themselves and can leave the space feeling cool. With good planning you can even run the UFH up the wall behind your towel stack for radiant drying, then use an unheated rail purely for hanging. Just lock in the exact rail position early so your builder and electrician can avoid the heating cables and waterproofing when installing fixings, and set the UFH on a simple thermostat/timer for that quiet, always-comfortable bathroom.
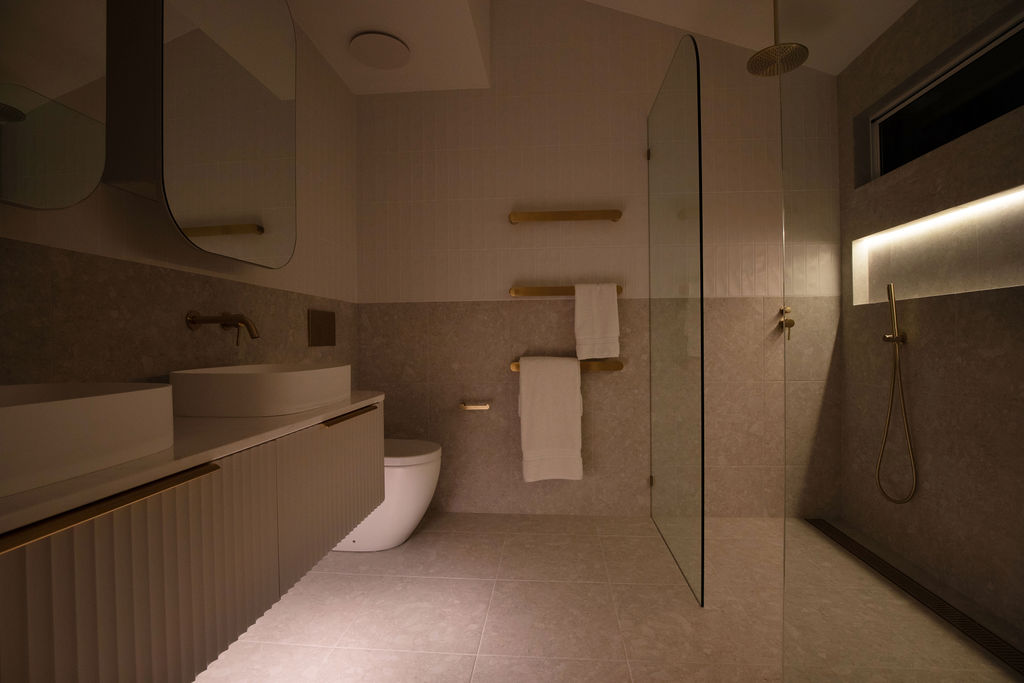
Even the best bathroom cabinetry struggles without proper ventilation. A quality exhaust fan sized for the room and used consistently is your first line of defence against humidity. Sealing is the second. The junctions where benchtops meet walls and where sinks meet tops should be finished with sanitary-grade silicone, neat and continuous. During installation, ask your builder to protect raw edges and to avoid over-tightening fixings, which can damage finishes. Day to day, a soft cloth and pH-neutral cleaner is enough. Avoid abrasive pads and harsh chemicals that can dull surfaces or attack seals, and wipe standing water from edges so it doesn’t sit where it should not.
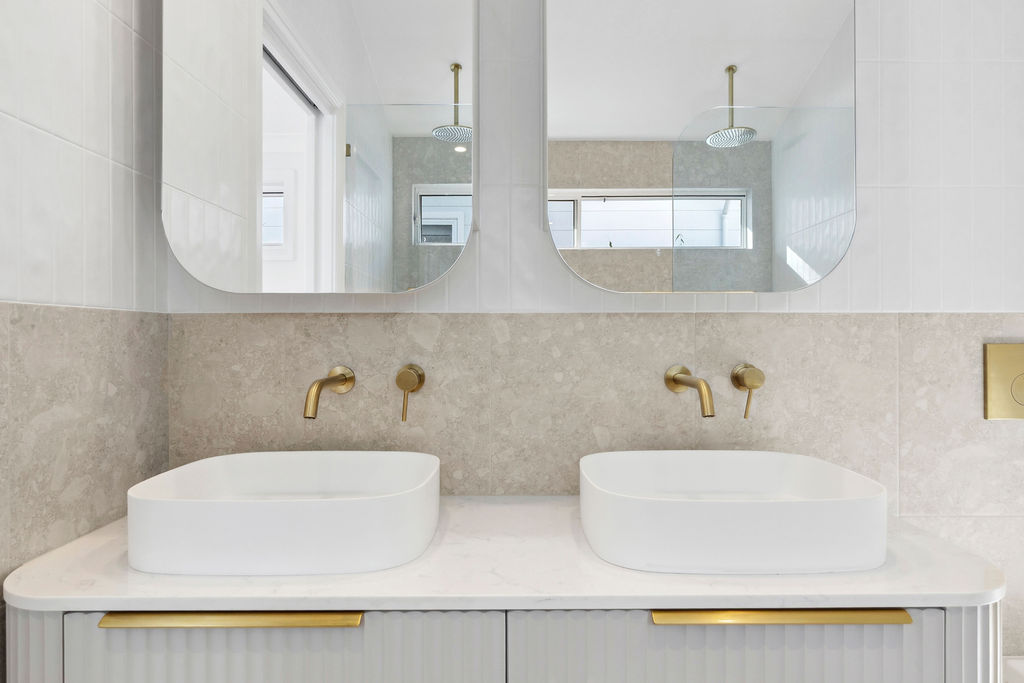
The most successful bathrooms tend to prioritise quiet, enduring elements over flash-in-the-pan features. On the Northern Beaches, coastal calm remains a favourite: light oak veneer or soft white two-pac fronts, a porcelain benchtop, and a restrained handle profile that lets proportion and texture do the talking. Contemporary minimalism benefits from shadow rails, matte finishes, and integrated lighting that emphasises clean lines. A classic shaker look can feel wonderfully current when the profiles are slim, the corners are gently softened, and the hardware brings a warm metal note rather than heavy ornament. Whichever way you lean, let materials be the heroes and keep the palette concise so the room feels collected, not busy.
If you are wondering where the smart money goes, prioritise what you touch and what will actually face the steam – moisture-resistant carcasses, quality runners and hinges, and professional installation. These are the parts you feel every day, and they are the first to complain if you cut corners. Save tactically with melamine internals or a cost-effective laminate in a powder room or secondary bathroom. If you crave impact, concentrate your spend on one hero moment rather than diluting it across the room: ribbed drawer fronts that catch the light, a sculptural handle that feels jewellery-like, or that slender porcelain top you keep coming back to. One confident choice tends to read as luxury where five half-steps can feel noisy.
Designing without a clear brief is the fastest route to an over-designed, underperforming bathroom. We also see projects falter when storage for tall bottles and bulk items is forgotten, forcing them onto the benchtop later. Ventilation is another frequent casualty – until swelling or mould appears and the fix becomes more involved than an exhaust upgrade. Glossy finishes can look fantastic in photos but may prove unforgiving in busy family spaces where fingerprints and micro-scratches are inevitable. Finally, a mismatch between basin placement, spout reach, and drawer internals can create splash zones and block access to the very storage you specified. Each of these issues is avoidable with a little planning and an honest conversation about how you live.
Sustainable bathroom cabinetry begins with choosing durable, repairable materials and finishes that will still look good in ten years. Responsibly sourced substrates, low-VOC paints and adhesives, and LED lighting form a solid baseline. The greenest decision, however, is often the most considered one: design what you genuinely need, build it properly, and maintain it with care. A bathroom that does not need replacing is the most sustainable bathroom of all.
If you have ever stood in your bathroom wishing it were calmer and easier to use, you are not alone – and you are exactly who we design for. At Orli Interiors, we blend practical functionality with elegant, timeless bathroom cabinetry, and we speak fluent “builder” so everything on paper becomes everything you hoped for in real life. If you are planning a renovation on the Northern Beaches, we would love to help you make every decision with confidence. Get in touch.
14 Oct
Flooring Done Right: How to Avoid Common Mistakes in Your Sydney Renovation
When most people plan a renovation, they dive straight into the fun stuff – kitchen layouts, bathroom finishes, colour palettes. Flooring tends to come further down the list. But here’s the thing: flooring isn’t just a backdrop. It’s the foundation that sets the tone for your entire home. The right choice feels effortless, lasting, and beautiful. The wrong one can become a daily frustration you notice with every step.
Across our Northern Beaches projects, flooring is where small decisions have big consequences. With a solid plan, most problems never show up. Here’s what to watch for – the pitfalls that trip up many projects, the technical details that matter more than they seem, and how considered design sets the whole home up to feel calm and cohesive.
Renovations are full of decisions, but flooring specifications should not be rushed. These are the most common missteps I see:
Every single one of these can be avoided with a well-documented floor specification. That’s where a designer’s eye (and experience) makes all the difference.
Underlay is one of those invisible details that makes a huge difference to how your floor looks and feels day-to-day. Think of it as the buffer between the floor and the base beneath. The right underlay:
Homeowners often overlook underlay or go for the cheapest option. But it’s one of those areas where cutting corners almost always leads to disappointment.
The substrate is the surface beneath your floor, and it’s easy to forget it exists until something goes wrong. A poorly prepared substrate can sabotage even the most expensive flooring.
This stage isn’t glamorous, but it’s critical. A good interior designer will collaborate with your builder to make sure the substrate is prepared to the right standard, saving you headaches (and money) later.
Floorboards aren’t just planks – they’re lines that guide your eye through a room. Run them lengthwise and they elongate the space. Run them the wrong way and the room can feel chopped up or awkward.
Transitions between rooms also need to be carefully planned. Sometimes it makes sense to continue the direction throughout the house. Other times, particularly in multi-level homes, a change of direction feels more natural. The key is that it should always be deliberate, not accidental.

One of the most beautiful qualities of natural timber is variation. But too much contrast can look chaotic. With engineered timber or hybrids, repeating patterns can also look obvious unless installed thoughtfully.
It’s important to spend time selecting boards from a batch and planning how they’ll be laid. It’s the kind of detail most homeowners don’t think about, but it’s what separates a floor that feels “builder basic” from one that feels truly bespoke.
Tile choice is important, but layout is where the magic happens. A herringbone pattern feels classic and sophisticated, chevron adds dynamism, and brick bond is timelessly practical.
The trick is planning the layout before installation. That means drawing it on paper (or CAD) so you can see exactly where cuts will fall. Done right, it feels intentional and balanced. Done wrong, you’ll end up staring at an awkward sliver of tile every time you walk into the bathroom.
Grout doesn’t just fill gaps – it’s part of the design. With rectified tiles (sharp, machine-cut edges), grout lines can be kept minimal. But the colour choice is what makes or breaks the look.
A contrasting grout emphasises the pattern and rhythm of the tiles. A tonal grout blends them into a seamless surface. Both approaches can be stunning – but only if they’re considered alongside the overall design, not chosen last minute on site.
Flooring is often installed late in a renovation, but ordered early. Some of the most popular products – wide engineered oak boards, large-format porcelain tiles – are imported with long lead times. Forgetting this can delay your entire project.
A designer factors flooring into the schedule right from the start, ensuring the product is ordered in time and stored safely until installation.
Attic stock” sounds old-fashioned, but it simply means having extra flooring from the same batch tucked away. Timber will change – sunlight, kitchen traffic and even rug “shadows” can shift the colour over time. In spite of that, it’s still best to keep attic stock from the same batch so any future repair blends. And there’s a practical kicker: suppliers discontinue ranges and dye lots change. If it’s gone, it’s gone – so order a little extra now and save yourself the mismatch later.
Floors aren’t just about aesthetics. In wet areas and outdoor zones, slip resistance matters. Australian standards exist for a reason, and a responsible designer will always check them before specifying a product. A floor can be beautiful and safe at the same time.
Flooring isn’t a finish you pick at the last minute. It’s one of the most important elements of your renovation – the detail you live with every single day. From underlays and substrates to grain patterns, grout colours, and lead times, these decisions deserve care and expertise.
Working with a designer ensures you don’t just get a floor that looks good on day one, but one that performs beautifully for years to come. When you invest in getting flooring right, the whole home benefits.

23 Sep
The Ultimate Guide to Smart Home Technology: How It’s Changing the Way We Live
Smart home technology has moved from a “nice-to-have” to an essential consideration in modern home design. For our clients on Sydney’s Northern Beaches, it’s not about filling your house with gadgets — it’s about integrating technology seamlessly into your lifestyle so that comfort, security, and efficiency are built in from day one.

Photo from: Illustrarch
At its simplest, smart home technology means internet-connected devices that you can control remotely — usually through your phone, tablet, or voice assistant. But in practice, it’s about more than convenience. When considered at the design stage of a renovation or new build, smart technology can be hardwired, centralised, and future-proofed, avoiding the “patchwork” feel of plug-in devices.
Imagine arriving home from work to a house that has already adjusted the lighting, cooled the living area, and queued up your evening playlist. Smart home systems allow scenes like this to be pre-programmed to match your family’s daily rhythm.
A smart thermostat can save up to 20–25% on heating and cooling bills by automatically adjusting temperatures when the house is unoccupied. Smart lighting with motion sensors can shave another 10–15% off your energy spend.
From video doorbells to perimeter cameras and biometric locks, smart security systems now rival commercial-grade setups. A fully integrated system for a family home typically costs between $5,000–$15,000, depending on coverage and camera quality.
Think of off-the-shelf systems as a quick entry point, Pixie as a professional retrofit upgrade, and fully integrated systems as the long-term foundation for a smart home.

Cost & Value
For a typical four-bedroom family home in Sydney, what’s a realistic budget range for a whole-home automation system, and which features give homeowners the best return on investment?
Most families spend $30,000–$60,000 on a robust system that covers lighting, security, CCTV, and HVAC. The best return on investment comes from lighting control and security, as they deliver both lifestyle convenience and peace of mind. Audio-visual systems are often seen as the premium add-on that elevates the experience, but they also represent the largest budget increase.
Integration & Future-Proofing
When wiring a home for automation, what’s the one thing you wish designers or builders would plan for earlier in the renovation process?
Without doubt: extra provisional cabling. Too often, homes are built without enough capacity for future technology, which makes upgrades costly later. Running additional cables and leaving conduits in key areas ensures your home can adapt to new technology with minimal disruption.
Trends & Must-Haves
What smart technologies are you seeing most of your clients ask for right now, and what upcoming trends should homeowners be aware of if they want to future-proof their renovation?
The most common requests are for smart lighting, whole-home Wi-Fi networking, and CCTV security systems. Many clients also want intercoms and access control that link directly to their phones.
One standout trend in the high-end residential market is the rise of Sonance Invisible Series speakers. Architects and designers love them because they deliver outstanding sound while remaining completely hidden within walls or ceilings. These speakers have taken the premium home market by storm, offering a seamless blend of performance and aesthetics that’s hard to beat.
In terms of future-proofing, the best approach is to allow for flexibility. Even if you don’t add every feature now, provisional cabling ensures your home is ready to expand as your lifestyle evolves.
Smart homes are moving beyond isolated devices into whole-home ecosystems. With everything from lighting and HVAC to audio-visual and security working together, the focus is on creating seamless, intuitive experiences. Homes that plan for this integration today are better positioned to adapt as new technologies emerge.
Smart home technology is no longer just about gadgets; it’s about creating a home that works with you. Whether through simple DIY devices, professional retrofit systems, or fully integrated automation, the benefits are clear: greater comfort, security, efficiency, and long-term flexibility.
The best results come when technology is considered early in the design process, ensuring every detail is integrated seamlessly into the home’s architecture and interiors. For homeowners planning a renovation or new build, smart home systems are no longer an optional extra — they’re becoming part of the foundation for modern living.
And for those seeking the very best, consider solutions such as ICT Protege for security, Savant or Sonos for audio, and Sonance Invisible Series speakers for a finish that’s as beautiful as it is intelligent.
How much does a smart home cost in Sydney?
Budgets typically range from $30,000–$60,000 for lighting, security, CCTV, and HVAC. Adding audio-visual systems such as multi-room audio or theatres can push the budget toward $100,000 or more.
Can I add smart technology to an existing home?
Yes. DIY devices like Philips Hue or Ring are perfect for small retrofits. For a more professional retrofit, Pixie offers greater reliability and performance but must be installed by a qualified professional.
Which is better: DIY smart devices or professional systems?
DIY products are cost-effective for quick upgrades, but professional systems provide scalability, long-term reliability, and integration across the whole home.What systems are recommended for new builds?
For lighting, platforms like C-Bus, Dynalite, and KNX are proven options that deliver scalability, reliability, and design flexibility. For centralised control, Savant is a premium solution. For security, hardwired systems or ICT Protege provide robust protection, while UniFi Protect delivers enterprise-grade networking. For audio, Sonos remains a favourite, and Sonance Invisible Series speakers continue to lead the high-end market.

02 Sep
From Fixer-Upper to Million-Dollar Home: Why Renovating Can Outperform Buying Turnkey
This Collaroy project started with an outdated property split into two apartments. The mission was clear: turn it into a high-end family home designed for coastal living. The result? A contemporary home that not only transformed how the owners lived day to day, but also created enormous value in the process. In this post, we’ll dive into how smart renovations, paired with the right design and financing strategies, can unlock tremendous potential.
Renovating offers a level of flexibility that buying a finished home simply can’t match. It’s an opportunity to create a space that perfectly fits your lifestyle and preferences, all while adding significant value. When you renovate, you’re not just inheriting someone else’s design—you’re crafting your own vision.
Another benefit is cost efficiency. You can often save on stamp duty compared to purchasing a new property, which can make a big difference in today’s real estate market. If you rent out the property before selling, you could also see stronger long-term returns, making renovation a smart financial move.
If you’re considering selling, a well-executed renovation can be the difference between an average price and a premium result. Buyers today are drawn to homes that are move-in ready and reflect a modern lifestyle. A thoughtfully designed renovation can give your property that turn-key appeal while also broadening its buyer pool.
Even modest updates to kitchens, bathrooms, or outdoor living spaces can deliver outsized returns. Strategic renovations not only enhance first impressions but also remove objections from buyers who might otherwise factor in the cost of updating.
There are several ways to finance a renovation, including investment loans, construction loans, or even tapping into an existing mortgage. Instead of draining your savings, financing allows you to keep flexibility and spread costs in a manageable way.
It’s wise to talk to a mortgage broker early in the process, not just once you’ve finalised plans. This helps you understand your capacity upfront, avoid surprises later, and align your renovation goals with your financial strategy.
From a mortgage perspective, renovating an established property often delivers advantages that go beyond the numbers.
“Older homes are usually in better locations. That is why every property show comes back to the mantra: location, location, location. Established homes sit in areas with character, stronger amenities, and long-term scarcity value. Renovating builds on that foundation” says local broker Chris Dodson of Manly based Mortgages Plus.
“Build quality is another advantage. Many older homes were constructed with materials and craftsmanship you rarely see today. Double brick, Art Deco detailing, or architectural features that modern estates cannot replicate. Buyers recognise this, and the uniqueness creates emotional appeal. Scarcity drives demand.”
“Bank valuations also work in your favour. Lenders base their assessments on comparable sales, and a major component of this is land value. Renovating an established property in a prime location means you are improving an asset that already carries strong underlying land value, which supports the valuation uplift. This in turn brings down the loan-to-value ratio, allowing access to sharper interest rates.”
Chris adds; “The final piece is how you finance it. Smart structuring, whether through equity release, construction finance, or splitting loans for flexibility, ensures you not only unlock the property’s potential now but also set yourself up for future opportunities. Done right, a renovation does not just give you a better home, it gives you a stronger balance sheet for the long run.”
Design is where lifestyle and investment intersect. While adding square footage can increase value, the real difference often comes from how the home functions day to day. A designer ensures every element—layout, flow, storage, light, and finishes—works together seamlessly.
Many people worry about budget blowouts when renovating. Having a designer involved from the outset ensures selections and design decisions are made according to your budget, keeping tight control of costs throughout the process. With professional documentation, builders can quote accurately, which reduces the risk of unexpected expenses or costly variations.
“Good design really does make a difference when you’re selling,” says local real estate agent Matt Turner from Cunninghams. “Presentation isn’t just about making a place look nice — it’s what helps a home stand out and get buyers emotionally hooked. That’s when you see the competition kick in and prices start climbing.”
He adds, “The real magic is when more than one buyer feels that strong connection with a property. Suddenly it’s not just a house for sale, it’s the one they want. That’s what creates momentum.”
“And it’s not only the styling — it’s the whole package. From the photos to the way the story is told in the campaign, everything is about showing off the lifestyle on offer. That’s what turns a good result into a great one.”
The Collaroy project is a prime example of how strategic renovations can significantly increase a property’s appeal and value. What began as a dated coastal home was transformed into a contemporary five-bedroom, three-bathroom residence designed for modern family living.
Expansive indoor–outdoor connections, a butler’s pantry, generous laundry, abundant storage, and a pool now capture the essence of relaxed yet elevated coastal life. Comparable properties without these upgrades achieved far lower results, showing how thoughtful design can deliver both lifestyle and financial rewards.
Our North Steyne project in Manly tells a very different story but highlights the same principle: the power of strategic renovation.
This beachfront property had been owned by the same family since it was built and hadn’t been updated since it was first purchased in the early 1990s. When it was inherited, the family decided to unlock its true potential rather than sell it in its outdated state.
In 2023, real estate agents valued the home at around $4 million, largely thanks to its prime location. After a $600,000 renovation, the property was revalued at approximately $6.5 million — a remarkable return on investment.
This project demonstrates how inherited properties, particularly those in desirable locations, can offer enormous potential. Instead of passing on an outdated home or selling it below its peak value, a well-planned renovation can transform it into a modern, high-value asset that benefits the whole family.
The most powerful aspect of a renovation is how it can be tailored to your specific lifestyle. Unlike buying an already finished property, renovating means you’re in control of the details—whether that’s maximising storage for a growing family, creating an entertainer’s kitchen, or designing a low-maintenance home for retirement living.
When your home is designed around your routines and preferences, it becomes more than just a financial investment—it elevates your everyday life.

To maximise your renovation’s value, make strategic decisions from the outset:
Secure planning approvals early to prevent costly delays.
And if you’re considering buying a dated home with renovation potential, speak with a designer and builder first to understand the scope and costs. Then talk to your mortgage broker about your capacity to bring your vision to life.
With the right design and financial strategy, a renovation can turn an outdated property into a home that’s both a joy to live in and a high-performing asset. Whether you’re upgrading your current home or eyeing a fixer-upper, consulting with a designer and broker early will help you avoid surprises, protect your budget, and unlock the true potential of your property.
Further Reading:
Check out this article on how architectural expertise can boost a home’s value by $700K: Designing for Profit.
16 Aug
The Secrets Behind Great Design: What are the 7 elements of Interior Design and how do you apply them?

You know that feeling when you walk into a space and it just feels right? That’s no accident. Behind every calm, cohesive, beautifully functional room lies a mix of intuition and design theory.
At Orli Interiors, a boutique interior design studio in Sydney’s Northern Beaches, we use the timeless principles and elements of design to shape homes that feel effortless, elevated, and uniquely you.
Let’s take a look at how these concepts guide our process and how they show up in real homes we design across Avalon, Manly, and beyond.
1. Space
We begin with space; the three-dimensional canvas of your home. That includes positive space (your furniture and fixtures) and negative space (the breathing room around them). In well-designed homes, both are intentionally balanced. For example, leaving negative space around a sculptural armchair allows it to stand out while keeping the room open and airy – a key consideration in modern home design.
2. Line
Lines guide the eye and shape the energy of a room.
3. Shape (Form)
We play with a mix of geometric structure and organic softness. A rectangular dining table grounds the space, while a rounded mirror or curved banquette introduces fluidity. This interplay adds balance and dimension to any space.
4. Colour
Colour is emotional. In our Northern Beaches projects, we often draw from nature: sea greens, coastal blues, warm sands. We use colour to influence mood, define zones, and create flow between rooms, it is one of the most powerful tools in any interior designer’s arsenal.
5. Texture
Layering textures creates depth and warmth. We combine matte ceramics, timber, rattan, linen, and metal finishes to make each room feel tactile and inviting. Texture is especially important in neutral schemes where contrast comes from materiality rather than colour.
6. Light
Both natural and artificial light shape how a room is experienced. From pendant lighting over a dining table to wall sconces for mood, we use light to enhance form and function. We also design to maximise daylight which is essential in Australian coastal interiors.
7. Pattern
Used sparingly or boldly, patterns give character. We might introduce it through a herringbone floor, tiled splashback, or layered soft furnishings, all contributing to rhythm and personality in a space.
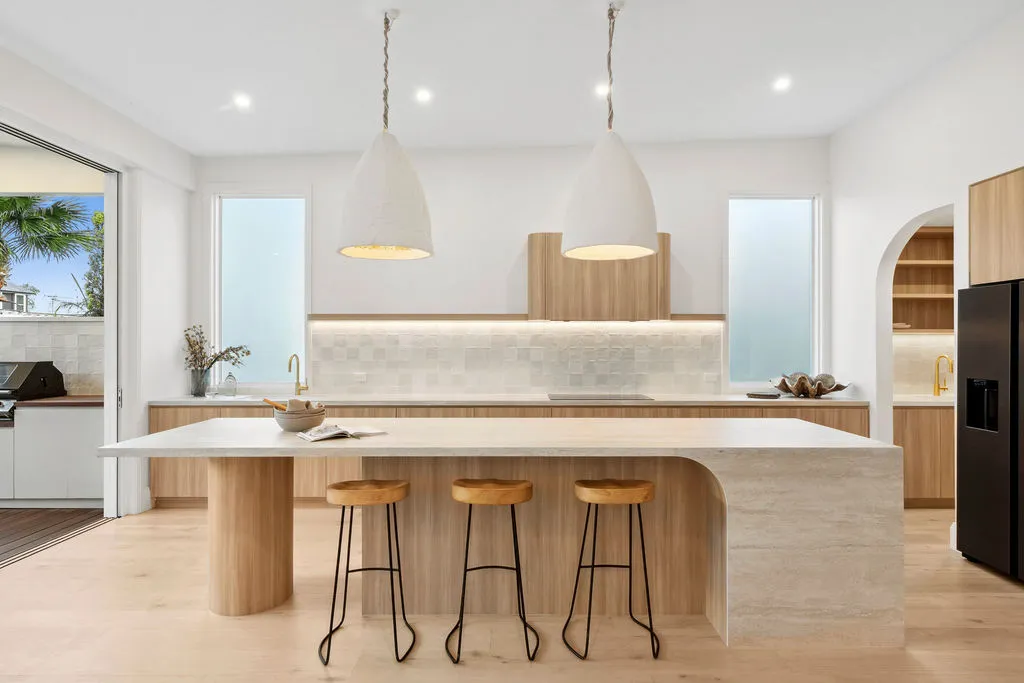
1. Balance
Balance creates visual harmony. We might use symmetry with matching armchairs or create contrast with an asymmetrical arrangement of artwork and lighting. The goal is always to avoid visual overload while keeping the design dynamic.
2. Rhythm
Repetition of colour, material or shape throughout the home builds cohesion. Using the same warm timber tone in your kitchen joinery, floating shelves, and occasional tables helps tie open-plan spaces together seamlessly.
3. Emphasis
Every room benefits from a focal point – a fireplace, a sculptural pendant, or a custom joinery moment. This is what draws the eye and anchors the space.
4. Proportion & Scale
Choosing furniture and decor that fits the space properly is non-negotiable. An oversized sectional sofa or a too-small rug can throw everything off. We make sure every item, from artwork to side tables, is scaled to suit the room it lives in.
5. Harmony
This is where everything comes together. Harmony is the feeling of unity across spaces and is achieved through consistent materials, thoughtful transitions, and aligned design language. In one of our coastal home projects in Sydney, we used oak flooring, warm white walls, soft linens, curvilinear forms and brushed brass accents across living, bedroom, and alfresco zones, ensuring a calm, cohesive experience from one room to the next.
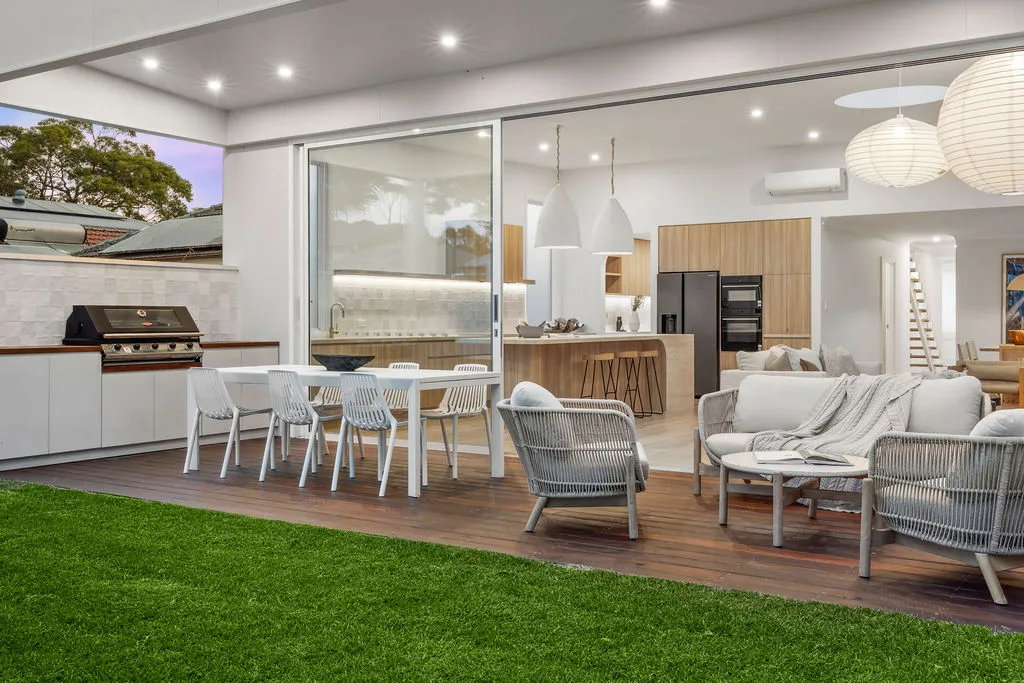
In open-plan homes, zoning is essential. We often use rugs to define living areas, pendants to mark dining zones, and shifts in ceiling detail to gently divide functions without walls.
Rugs, in particular, are powerful layout tools. We follow the two-thirds rule as a minimum – rugs should sit under all major furniture pieces, either fully or with at least the front legs on and space to spare at the edges. This grounds the room and helps it feel larger, not smaller.
We also treat outdoor living areas with the same design intent as interiors, layering furniture, lighting, and styling pieces so your alfresco space feels like a natural extension of the home, not an afterthought.

At Orli Interiors, we believe a bedroom should be more than just a place to sleep – it’s a sanctuary. In this Northern Beaches project, we transformed a standard 3x4m room into a restful retreat through deliberate use of the elements and principles of design.
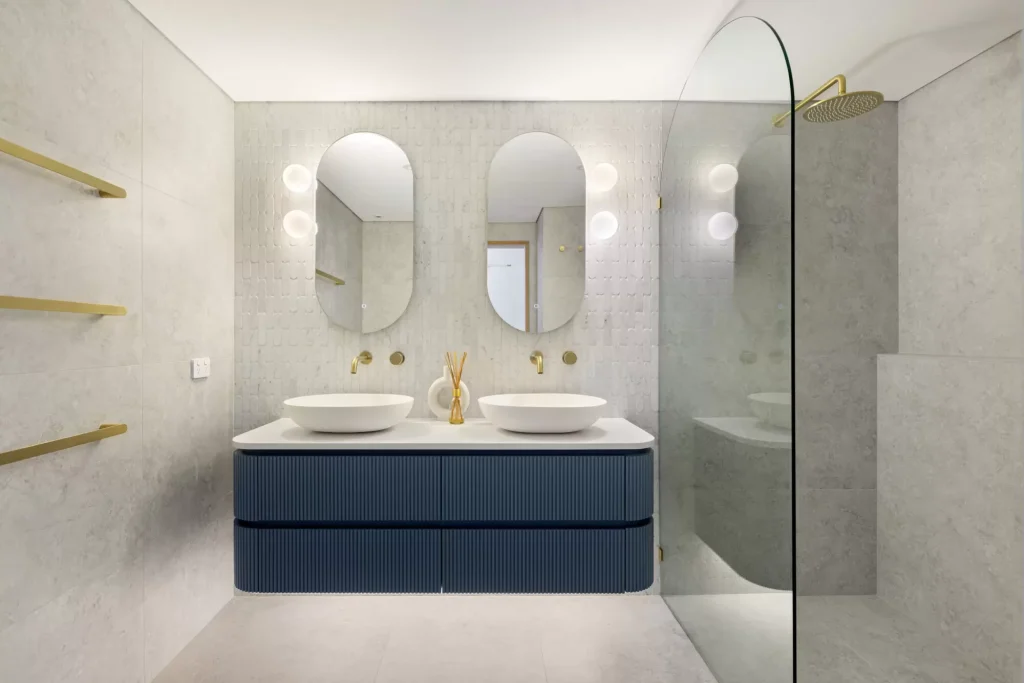
Bathrooms often serve multiple functions, from practical morning prep to peaceful night-time unwinding. This Dee Why ensuite is a masterclass in using design elements to elevate function with elegance.
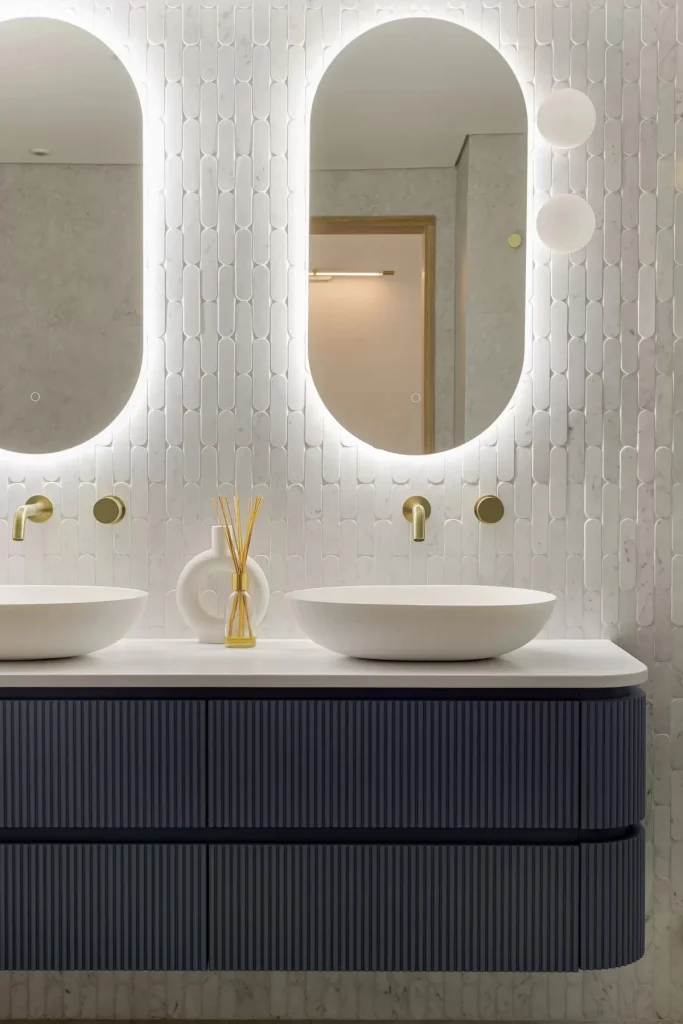
You don’t need to memorise every principle of design to have a beautiful home – that’s our job. But understanding what’s behind the choices helps clients make decisions with more confidence, and appreciate the design process even more.
At Orli Interiors, we blend creativity, theory, and lifestyle insight to create homes that don’t just look good – they feel like you.
Thinking about your own home transformation?
Let’s chat. We’d love to bring these principles to life in your space. Drop us a line here

02 Aug
How to Choose Paint Colours Like a Designer: A Guide for Northern Beaches Home Owners
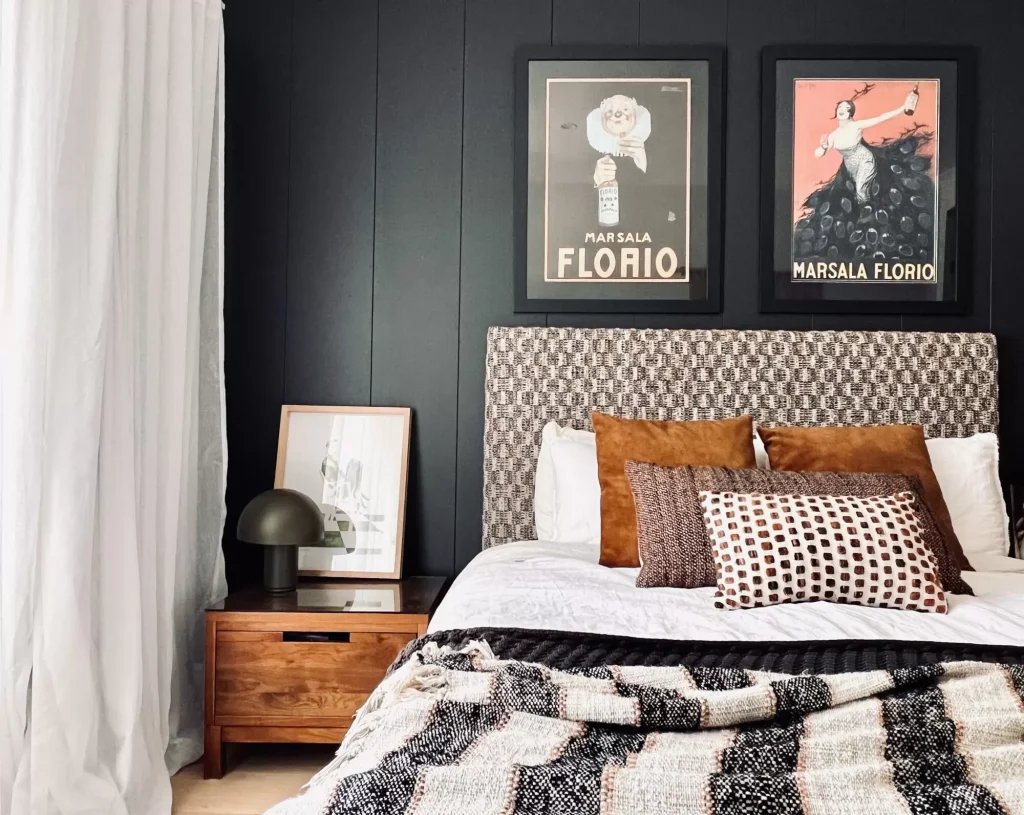
When it comes to creating a home that feels elevated yet deeply personal, choosing the right paint colours is one of the most important decisions you’ll make. And while a trip to the hardware store might make it seem as easy as picking a few swatches, any designer (or homeowner who’s had to repaint) will tell you—this decision deserves thought, context, and a little restraint.
At Orli Interiors, we believe your walls should do more than just sit quietly in the background—they should create atmosphere, enhance light, and feel effortlessly cohesive with your architecture, your furniture, and your lifestyle. Whether you’re styling a new build in Freshwater, renovating a Federation home in Manly, or refreshing a beachside apartment in Collaroy, here’s how to choose the right paint colour with confidence.

Here’s the short answer: Start with how you want the space to feel, then work backwards from there.
The long answer? Choosing paint colours isn’t just about preference—it’s about creating harmony between natural light, architecture, furniture, and the lifestyle you want to live in that room. Below are the three core principles we use at Orli Interiors when guiding our clients on colour selection:
Most Northern Beaches homes are blessed with a lot of natural light—but the quality and orientation of that light will change everything about how a colour looks. A crisp white might look bright and clean in a north-facing living room in Balgowlah, but fall flat and grey in a shaded south-facing bedroom in Seaforth.
Orli Tip: Before committing, test large painted samples on your actual wall. Look at them at different times of day—morning, midday, and late afternoon—over at least 48 hours.

Are you working with coastal contemporary, mid-century, or a more traditional weatherboard aesthetic? The best paint choices support your architecture, not fight against it. For example:
A common mistake is choosing a colour in isolation. Instead, ask: What undertone is this colour carrying? Is it warm or cool? Will it sit comfortably with my flooring, benchtops, and upholstery?
Warm whites (with yellow or pink undertones) feel soft and enveloping, perfect for creating a sense of intimacy. Cool whites (with grey or blue undertones) feel fresher and more architectural—ideal for a sleek, minimal look. Neutrals with green undertones often feel the most adaptable in Northern Beaches light, especially when paired with timber, stone, or greenery.

There are several ‘rules’—but the most useful one? Keep your base colour consistent and introduce variation through depth, finish, and subtle contrast.
Here are a few designer-approved principles we follow:
To create flow throughout your home, select one base colour and adjust its intensity depending on the room. Use the full-strength version in living zones, half-strength in hallways, and quarter-strength in bedrooms. This creates a seamless sense of calm and cohesion.
If you want to introduce contrast—say, a feature wall or darker cabinetry—it works best when it relates to something else in the space. A navy blue feature wall in a room with ocean views? Perfection. The same wall in a windowless hallway? Likely too heavy. Choose contrast where it makes spatial or emotional sense.
Don’t underestimate the power of finish. Here’s a quick guide:
Bonus Tip: In high-traffic family areas like the kitchen or hallway, opt for a washable low-sheen finish like Dulux Wash&Wear—it will keep your walls looking fresh with far less effort.
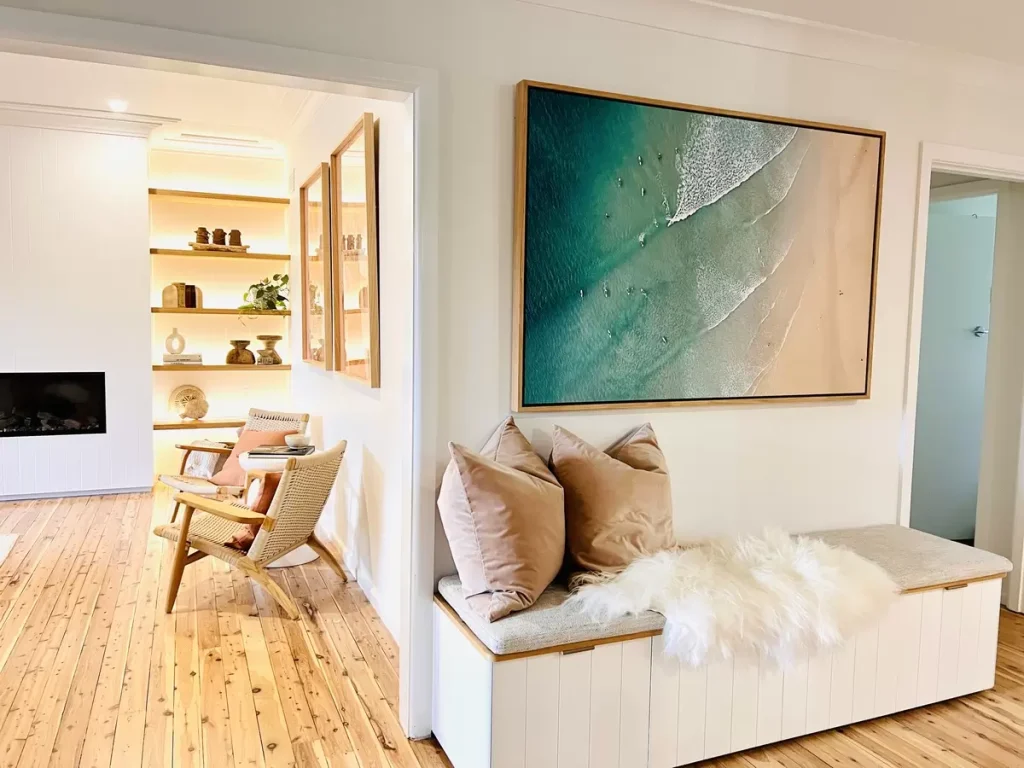
If you’re aiming for true sophistication, go beyond the paint chart. Here’s where deeper thinking can take your colour decisions to the next level:
Homes on the Northern Beaches often blur the lines between indoors and outdoors. Your wall colour should complement—not compete with—what’s happening just outside your windows. For example, a soft eucalypt green or muted taupe can echo the gum trees and sandstone seen from your living room.
A family media room in Newport might call for a deep, cocooning tone like Dulux ‘Mangaweka’ or Porter’s ‘Black Cockatoo’ to enhance intimacy and sound absorption. A north-facing studio in Fairlight, however, might need a calming white with warm undertones to encourage creativity and calm.
Your ceiling is the fifth wall. Don’t default to generic ceiling white—consider matching it to your wall colour at quarter strength for softness and cohesion, or use a slightly darker tone to create intimacy in larger spaces.
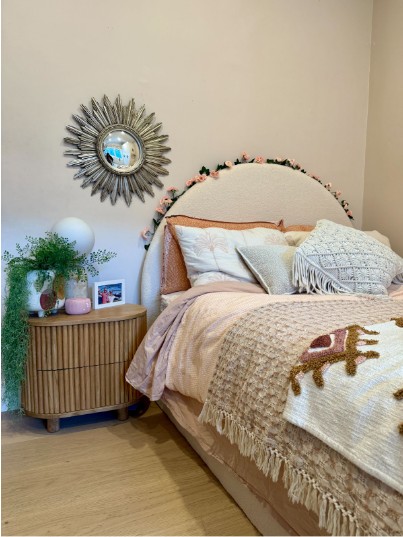
One of the most striking trends in contemporary interiors is colour drenching—where a single shade is used across walls, ceilings, and even trims or cabinetry. Far from feeling overwhelming, this approach can create a deeply cohesive and cocooning effect. It works especially well in smaller rooms like home offices, powder rooms, or bedrooms, where the lack of contrast gives a soothing, enveloping atmosphere.
To do it well:
Colour drenching isn’t about being loud—it’s about being confident in a unified, expressive palette.
If you’re craving a little personality but don’t want to commit to an entirely coloured room, consider painting your skirtings, architraves, doors or window trims in a contrasting or unexpected colour. Against classic white walls, a muted mustard, navy, or sage green can add a whisper of playfulness without overwhelming the space.
It’s a particularly clever strategy in:
Tip: For a more contemporary look, paint the door and its trim the same colour—this simplifies the visual breaks and creates a clean silhouette.

Joinery is one of the most high-touch, high-use elements of a home—and it’s often a missed opportunity for injecting character. While neutral cabinetry is timeless, adding colour in your kitchen, bathroom, or laundry joinery can elevate the room and reflect your personal style.
Smart ways to incorporate colour in cabinetry:
Think of cabinetry colour as a design bridge—it should harmonise with the broader scheme but confidently stand on its own. The goal is character, not chaos.
If you’re looking to move beyond standard paint finishes, there’s a growing appetite for decorative surfaces that bring tactile richness and visual nuance to a space—without relying solely on colour contrast. Finishes like limewash, microcement, and wallpaper are beautiful alternatives that add character, texture, and depth.
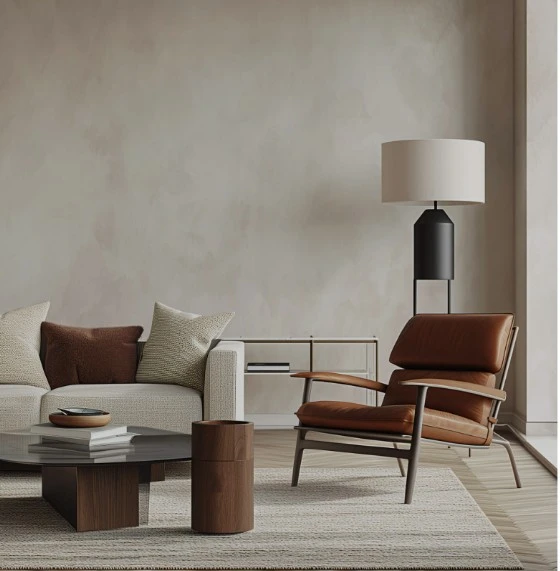
Limewashing is a centuries-old technique that’s found its way back into contemporary homes for good reason. It creates a soft, chalky finish with gentle movement—almost like a watercolour for your walls. The result is subtle texture, organic depth, and an elegant patina that evolves beautifully with light throughout the day.
Perfect for:
Limewash looks especially striking in soft neutrals, warm greys, or earthy tones, and pairs beautifully with natural stone, oak flooring, or sheer linen curtains.
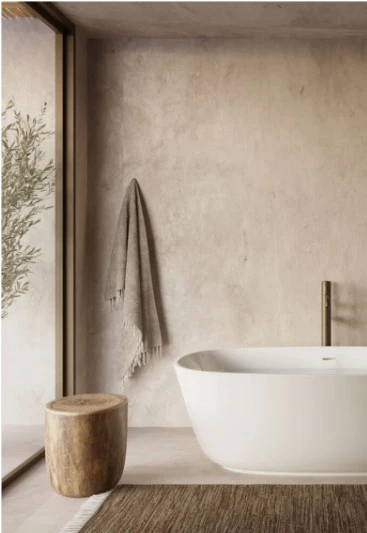
Microcement offers a smooth, continuous surface that feels architectural and clean, with a raw yet refined aesthetic. It’s incredibly versatile—equally at home in bathrooms, fireplaces, and kitchens—and works brilliantly when you want minimal visual clutter but maximum texture.
Best used in:
Choose soft, neutral tones like dove grey, putty, or sandstone to complement the layered finishes Orli Interiors is known for.
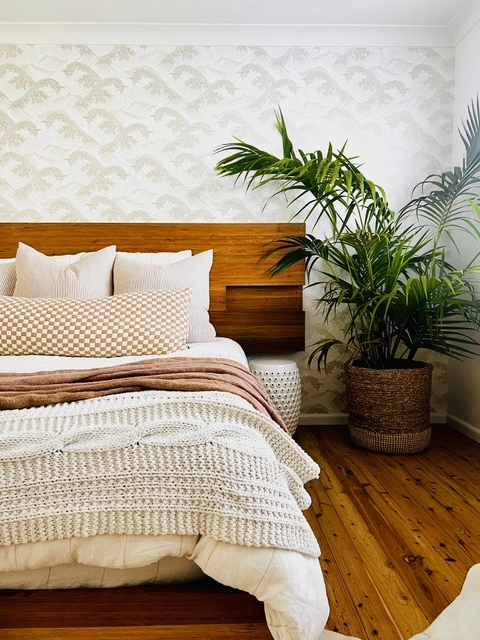
Wallpaper is an easy and impactful way to introduce pattern, storytelling, or a sense of surprise. Today’s designs go far beyond florals, offering everything from large-scale botanicals and abstract murals to tactile grasscloths and architectural grids.
Great for:
Wallpaper is also a great option if you want to inject character without introducing more furniture or decorative objects.
When clients ask us, “What’s the best white?”, the answer is always: It depends on your home, your light, and your lifestyle.
Having said that, our favourite warm white has for a long time been Dulux’s ‘Casper White’ whereas ‘Lexicon’ remains a staple for cool white homes. But don’t take our word for it – test those sample swatches!
Great design isn’t just about choosing beautiful things—it’s about choosing the right things for your home. That’s where we come in. At Orli Interiors, we guide our clients through the full design process, including tailored paint and colour selections that suit their architecture, their furnishings, and the way they want to live in their space.
Need Help Choosing Paint Colours?
If you’re building or renovating on Sydney’s Northern Beaches and want a home that feels effortlessly elegant, we’d love to help. Whether you’re after a full-service design experience or simply need help selecting the right finishes, get in touch to book a consultation.
Read more: The Best Kitchen & Bathroom Materials for a Timeless Look
Or explore: Our Services – to find the right solution for you.

19 Jul
What Do You Need to Invest to Hire a Professional Interior Designer and What is the Process? A Transparent Look at Renovation Pricing on Sydney’s Northern Beaches
If you’re planning to renovate your home, it’s easy to underestimate just how many decisions go into creating a space that feels not only beautiful—but cohesive, functional, and truly tailored to the way you live. And if you’re investing hundreds of thousands into a build, it only makes sense to get the design right. At Orli Interiors, we believe great design pays for itself—not just in style, but in clarity, confidence and long-term value.
Design is often the smallest percentage of your overall renovation budget but it has the biggest impact on how your home looks, feels, functions AND on its resale value.
We recommend allocating 10–15% of your total renovation budget for high-quality, well-considered design work.
Why? Because it ensures:
Think of it as design insurance—protecting your time, budget, and sanity.
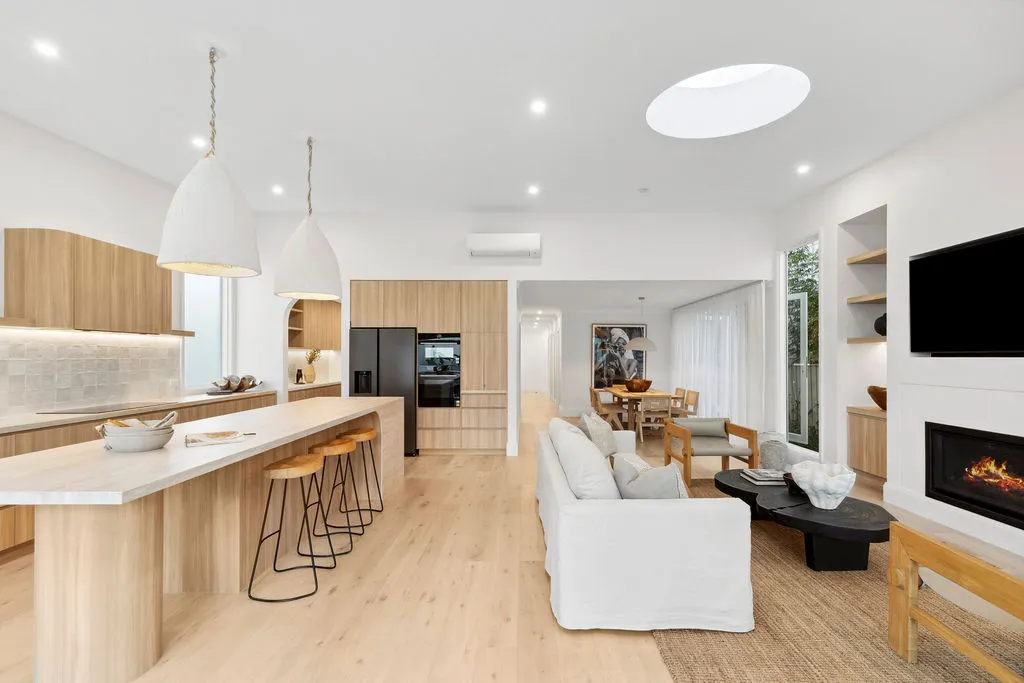
For a recent 4-bed, 3-bath home on the Northern Beaches with two living zones, a kitchen, butler’s pantry, mudroom and media wall, we delivered a full-service design package covering every detail from space planning to the final light switch.
Interior Design Fee: $55,000 – $70,000 + GST
Estimated Design Hours: 275+ over 4–6 months

Renovating an apartment may seem more simple but in many ways, it demands more precision. You’re working within tighter spatial constraints, with fewer opportunities for layout changes, not to mention any restrictions that may be placed on the property via Strata —so every detail matters.
For a 2–3 bed, 2-bath apartment in Manly:
Interior Design Fee: $35,000 – $50,000 + GST
Estimated Design Hours: 175+ hours over 4–6 months
This included kitchen, laundry and bathroom redesign, custom joinery (wardrobes, media wall), and full specification of finishes from flooring and window treatments to interior doors and hardware, and lighting and electrical selections.
If you’re planning a full apartment overhaul, including new flooring, bathrooms, kitchen, lighting and finishes, you should be budgeting upwards of $450K all-in.

Not every renovation involves an entire home. We also support clients on smaller, more focused scopes. Our kitchen and bathroom-only services are ideal for homeowners wanting to refresh specific areas while still accessing the benefits of thoughtful, professional design.
Even in a single room, the right layout, materials and detailing can transform not just how a space looks—but how it works.

If you don’t need full design documentation but want help pulling everything together, our Signature Finishes Selection Service is the perfect fit.
For $2,000 + GST, we create a personalised Finishes Schedule that includes:
This is a great option for DIY renovators or clients working with a builder or architect but want help creating a cohesive, elevated look.
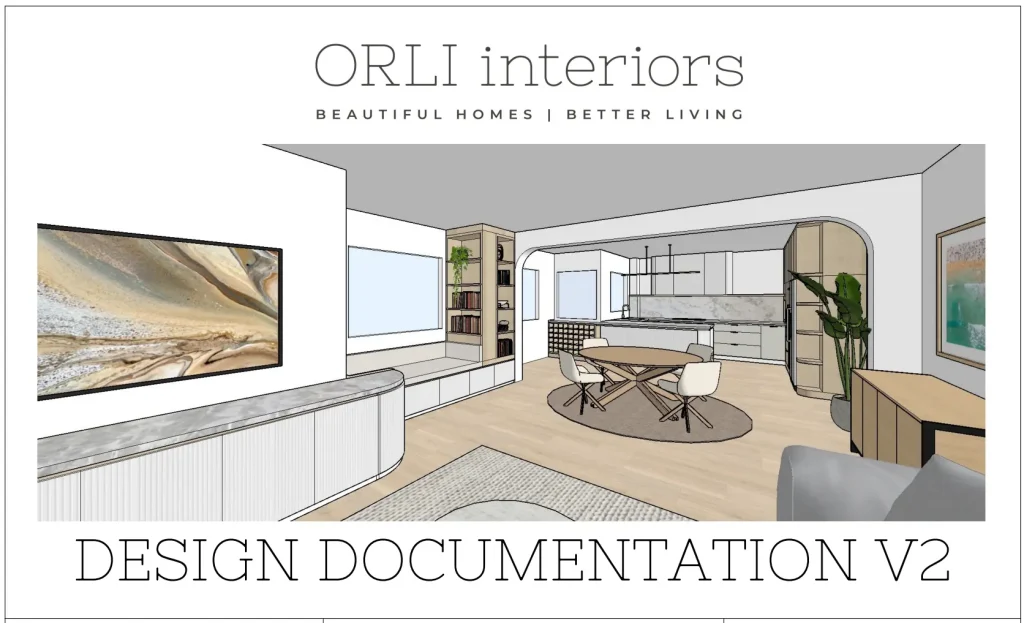
Working with Orli Interiors means we take care of the big picture and the small details. Our process is broken into six structured phases:
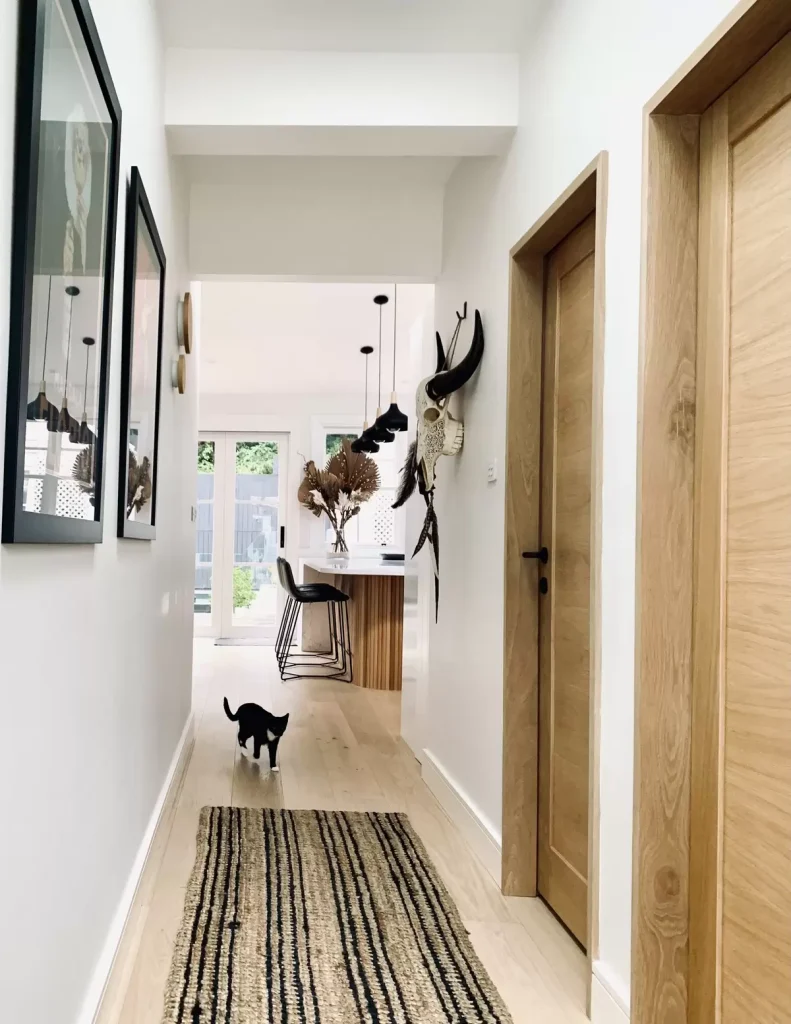
We start by understanding how you live and what you love. Through moodboards, layouts and 3D modelling, we create a clear design direction that balances form, function and feel.
✔ Collaborative, feedback-driven design process
✔ Early clarity to minimise indecision later

Once approved, we prepare detailed documentation to support pricing and construction. This includes:
✔ Builders and joiners quote more accurately
✔ Trades execute the vision without confusion

We handle ordering, supplier coordination and pass on 50% of our trade discounts (usually 5–15% off RRP). Clients often save between $3,000–$10,000 on their purchases which helps to offset design fees.
✔ Access to quality products at trade prices
✔ Time saved managing suppliers and coordinating deliveries
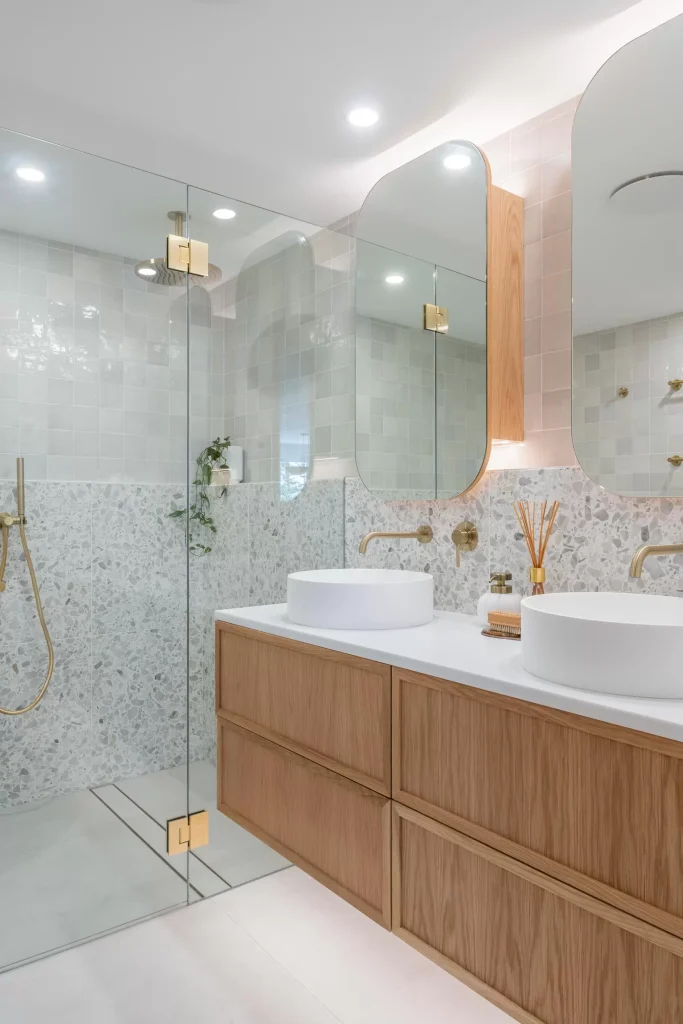
We remain available throughout your build to liaise with trades, answer queries and ensure the design intent is upheld.✔ Monthly retainer or hourly options available
✔ A smoother build with fewer surprises

We coordinate final deliveries and help bring it all together with styling, art, and accessories for a warm, finished feel.
✔ A designer’s eye for placement and detail
✔ A sense of home from day one
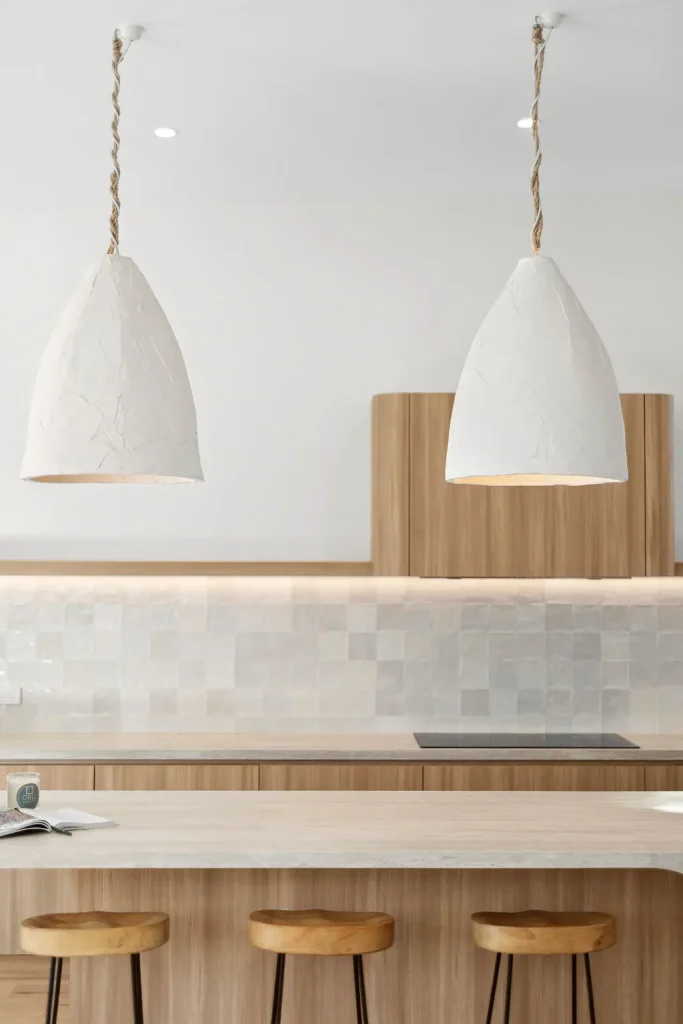
You’ll receive a full handover pack with care instructions, trade details and warranty documents—plus a photography session (if you’re open to it) to celebrate the results.
✔ Peace of mind post-project
✔ A beautiful project we can both be proud of

Interior design is about more than aesthetics—it’s about making your home work better for you, now and into the future. Our role is part creative, part strategic, and always client-led.
When you invest in good design, you get:
We often hear from past clients that their favourite part of the build was having someone they trusted guide the process from start to finish.
If that’s the kind of experience you’re looking for, we’d love to work with you.
Want to chat? Book a call here or explore our service packages.
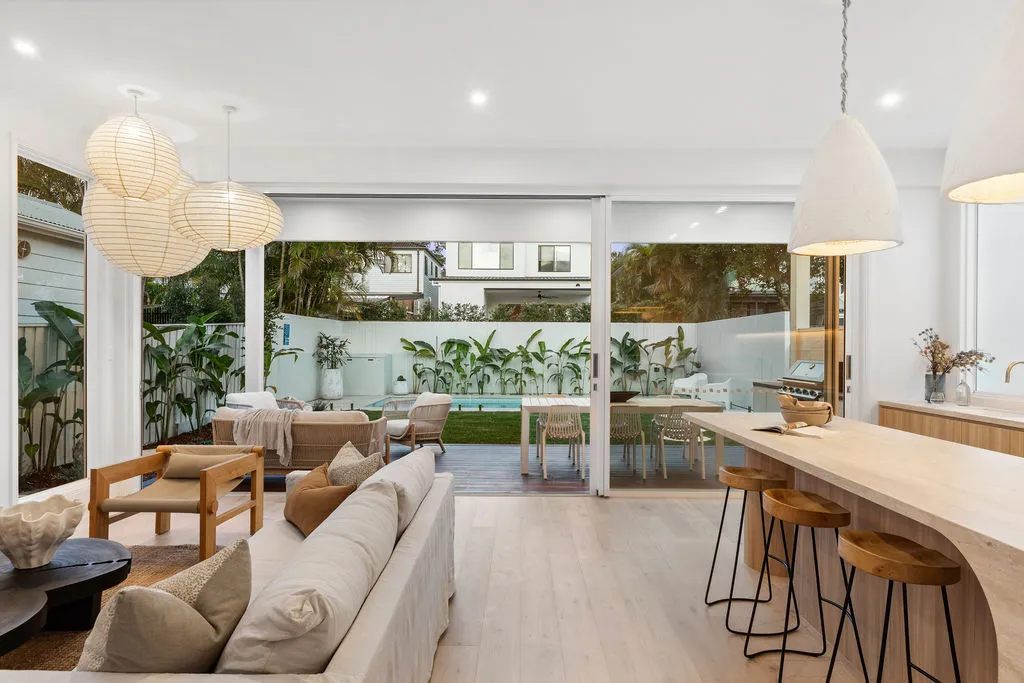
05 Jul
How to Find the Best Layout for Your Room: An Interior Designer’s Guide to Effortless Elegance
Designing a room layout is like conducting a symphony—every piece must play in harmony, from the furniture placement to the flow of natural light. For homeowners on Sydney’s Northern Beaches, who value quality, comfort, and connection, mastering your room layout is a key step toward achieving a beautiful and liveable home.
Whether you’re transforming a tired living area or breathing life into a coastal apartment, finding the right layout is the foundation of good design. In this week’s blog we explore how to arrange your room properly, unlock the magic of the 2/3 rule, and discover advanced layout tips to elevate your interiors from the merely beautiful to the effortlessly luxurious.

If you’ve ever searched “how to arrange a room properly,” chances are you’re stuck on layout challenges that affect flow, comfort, or visual appeal. Here’s how to nail it:
1. Start with Your Lifestyle, Not the Furniture
Think about how you use the space. A living room meant for Netflix and quiet evenings will need a different layout than one designed for cocktail parties or family gatherings. Begin with purpose—then layer in form.
2. Design Around a Focal Point
Every beautifully arranged room needs a centrepiece. It could be a fireplace, a media wall, a stunning window view, a marble coffee table or a large piece of art. Anchor your layout around this feature to create flow and visual balance.
3. Ensure Easy Movement
One of the most common design mistakes is overcrowding. Leave at least 80–100 cm between larger furniture pieces to allow comfortable circulation. This is especially important in open-plan homes—a Northern Beaches staple—where multiple zones need to feel connected yet distinct.
The 2/3 rule helps ensure harmony in living room layouts by guiding proportionality:
Why this works: Our eyes naturally seek balance, and the 2/3 ratio creates just enough negative space for a room to feel considered but not contrived. For high-end interior design, these proportional cues distinguish professionally curated spaces from haphazard arrangements.

At Orli Interiors, we create custom layouts that reflect your lifestyle and elevate your everyday life. Here are deeper insights into how we approach room layouts for our Sydney-based clientele:
A well-proportioned rug does more than add softness — it anchors the entire layout. Rugs help define invisible zones in open-plan homes and bring visual cohesion to a furniture grouping. To avoid the space feeling chopped up or undersized, rugs should fit all key furniture pieces either completely on top or with all front legs on and some breathing space at the edges. Too-small rugs make the room feel smaller and disrupt the design flow.

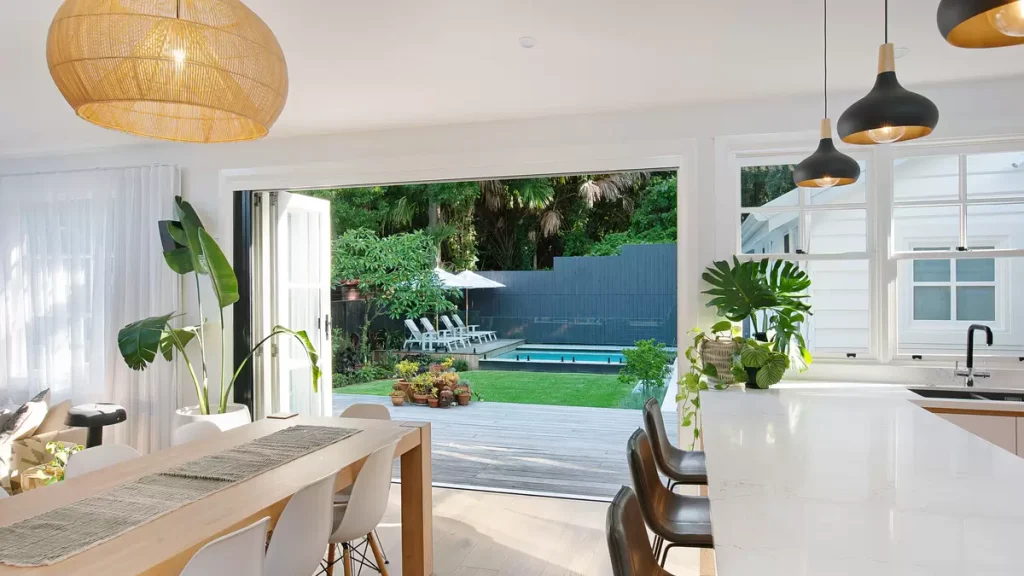
For our clients in Avalon, Manly, or Freshwater, lifestyle is a major influence on design. Here’s how we tailor layouts to suit our local, coastal lifestyle:
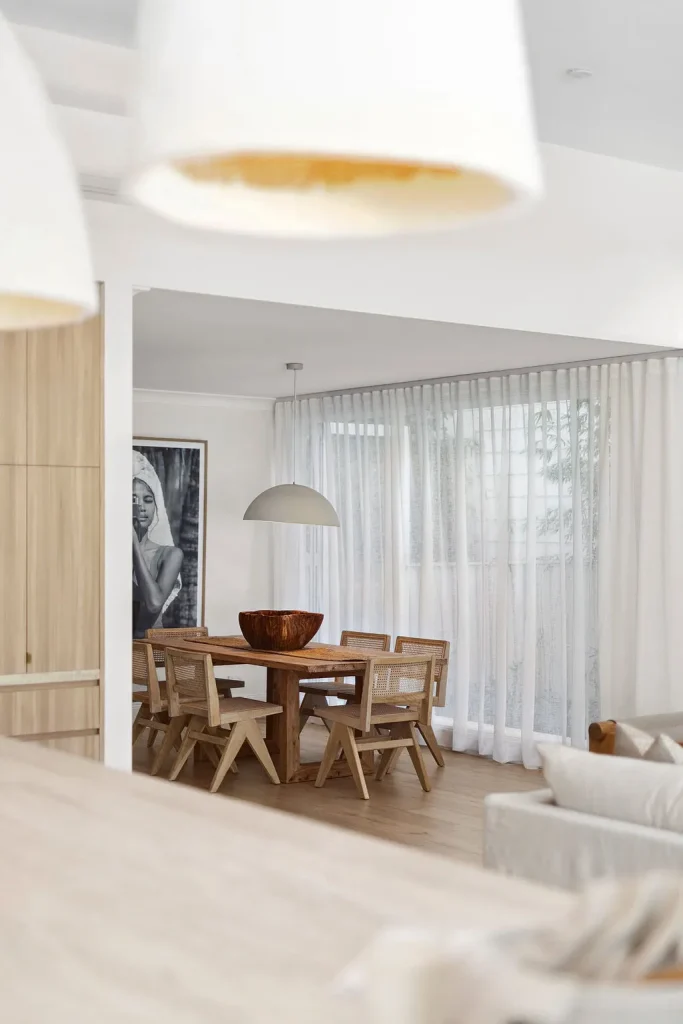
A well-planned layout doesn’t just make a room more functional—it creates an emotional experience. It’s what makes people say, “I feel so calm here,” or “This just feels right.”
At Orli Interiors, our design process starts with you—your lifestyle, your vision, and how you want to live in your home. Whether you’re updating a single room or undertaking a full renovation, our design expertise ensures every square metre works beautifully and intentionally.
Book Your Consultation
If your home feels out of balance or you’re dreaming of a redesign, contact us here to find out how we can help. Orli Interiors combines timeless design, practical functionality, and a personalised approach to help you live beautifully—every day.
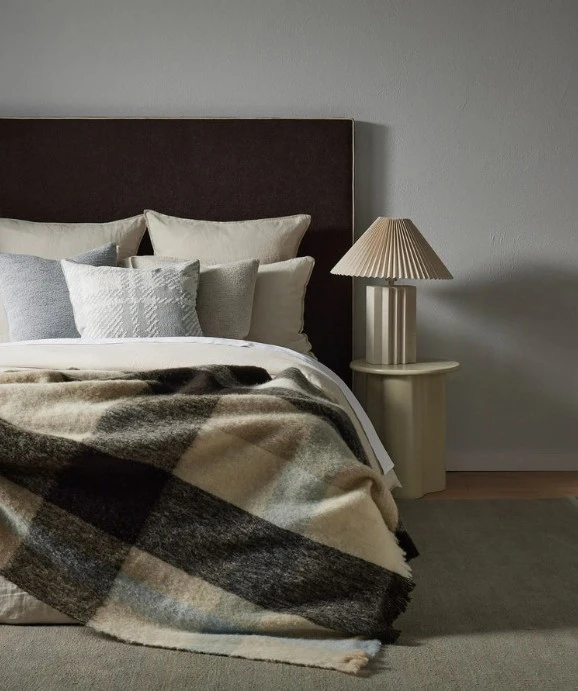
21 Jun
Warmth Without Compromise: How to Elevate Your Home with Soft Furnishings This Winter
By Nikki at Orli Interiors – Interior Designer Sydney
There’s something about winter that invites us to slow down. Mornings feel quieter, evenings arrive earlier, and home becomes more than a place—it becomes a sanctuary. At Orli Interiors, we believe great interior design is about more than aesthetics; it’s about creating spaces that feel grounding, comforting, and deeply personal—especially in the colder months.
Yet winter styling often gets reduced to a pile of cushions and a throw tossed on the couch. For the discerning homeowner, it’s not about layering for the sake of it—it’s about curating a refined, sensory experience that enhances the way you live.
(image Weave Home)
Unlike structural changes, soft furnishings offer flexibility. But their impact goes far beyond that—they shape how a space feels. They soften acoustics, create warmth, and make a home feel lived-in rather than showroom-staged.
In winter, your environment plays a bigger role in your emotional wellbeing, which is why thoughtful furnishing becomes even more essential. Here’s how to approach winter decorating with purpose, elegance, and longevity.
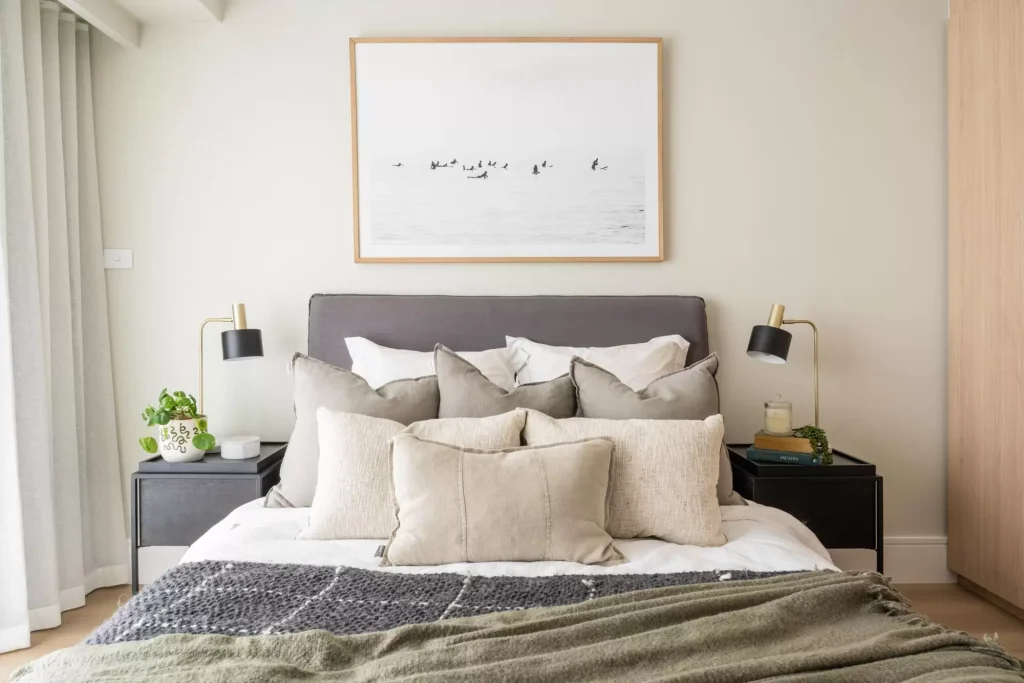
Cosy doesn’t have to mean clichéd. True luxury is found in comfort with sophistication.
Swap out bright seasonal trends for a restrained winter palette—think rich caramels, deep olive, muted navy, or earthy charcoal. Then layer in tactile fabrics like bouclé, felted wool, brushed cotton, or heavy linen.
Design tip from our Sydney interior design studio:
Tone-on-tone and textural layering across cushions, throws, and curtains adds depth without overwhelming a room with colour. Luciana Wallis, Head of Design at Weave Homve
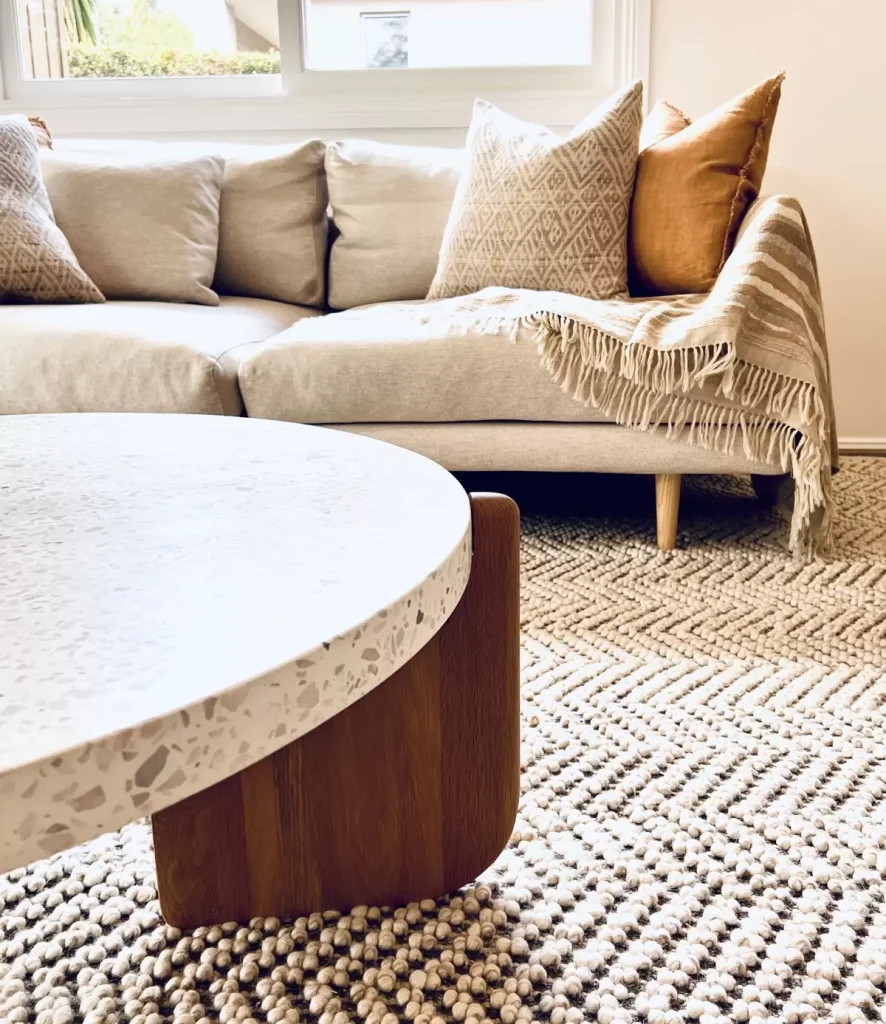
Soft furnishings should be soft, yes—but also substantial. Texture, weight, and weave are what give a room visual balance and physical comfort.
We love sourcing from Weave Home, whose pieces are beautifully crafted with long-lasting, touchable textures. Their handwoven rugs, heavy linen cushions, and luxurious throws bring structure and softness in equal measure.
Weave Home’s Laurent cushion is a perfect example, described by the company’s Head of Design, Luciana Wallis, as “a modern essential rich in texture and perfect for cooler weather styling. Woven from soft chenille with a refined sheen, it creates warmth and depth with its chunky texture. The subtle detailing in Laurent adds a sophistication, and it comes in a variety of on-trend colours and neutrals making it an effortless piece to style and coordinate with bold patterns like our Sienne or with the luxe velvet look of our Ava.”
Interior design is about function as much as form. Ask yourself:
In winter, a good design strategy may include:
✓ Heavier window treatments to reduce thermal loss
✓ Layered rugs in transition zones like entries or hallways
✓ “Landing zones” styled with an ottoman and throw to invite pause
As Luciana from Weave Home notes: “Adding a throw whether on the couch or bed is another way to layer texture into a space. Many underestimate the need for a throw through colder months—whether it’s for a little more warmth at night while you sleep, or to reduce the chill while watching TV. Our Nevis throw is a classic style that will last for many years and is made using 100% wool with a feature fringe. It has a tighter weave for a smoother, more refined look making it versatile and effortlessly complementary to our entire range of cushions and rugs.”
This lived-in approach is what distinguishes truly luxurious interior decoration from seasonal styling.

When it comes to winter styling, more isn’t always more. True elegance lies in intentional restraint—selecting just a few standout pieces and giving them room to shine.
Choose one or two hero items per room—perhaps a handwoven cushion, an oversized wool throw, or a layered, textured rug—and allow them to anchor the space without overwhelming it. This approach is especially important in open-plan homes, common in areas like Manly, Balgowlah, or Seaforth, where visual clutter can easily disrupt a calm atmosphere.
Keep your colour palette tight and refined: establish one dominant tone and complement it with a couple of soft, accent hues. Layer subtle patterns like stripes or checks over block colours to create visual interest without excess. And don’t forget the power of contrasting textures—think boucle with linen, or wool against loose weaves—for a look that feels layered, tactile, and thoughtfully pulled together.
Luciana Wallis, Head of Design, for Weave Home explains: “We love layering contrasting textures when styling, it’s a simple way to add depth and create a more curated look. Pairing the smooth, rich finish of Ava’s velvet-inspired fabric with the relaxed, tactile feel of Laurent adds dimension and visual interest, and Ava comes in so many beautiful colours it’s great for mixing and matching all year round.”

Luxury is in the details. At Orli Interiors, we seek out brands like Weave Home, whose pieces are crafted with intention—using techniques like hand-looming, tassel edging, and natural dyeing.
The result? Soft furnishings that feel both elevated and authentic.
Whether it’s the tonal variation of the Como linen cushion range or the tactile richness of the Piazza Woven throws, these are the pieces that bring warmth without compromise.
At the heart of it, winter styling isn’t about décor. It’s about how your home supports your lifestyle.
If not, updating your soft furnishings might be the simplest, most impactful way to shift that.
Explore our Winter Edit with Weave Home here →
Image: Weave Home
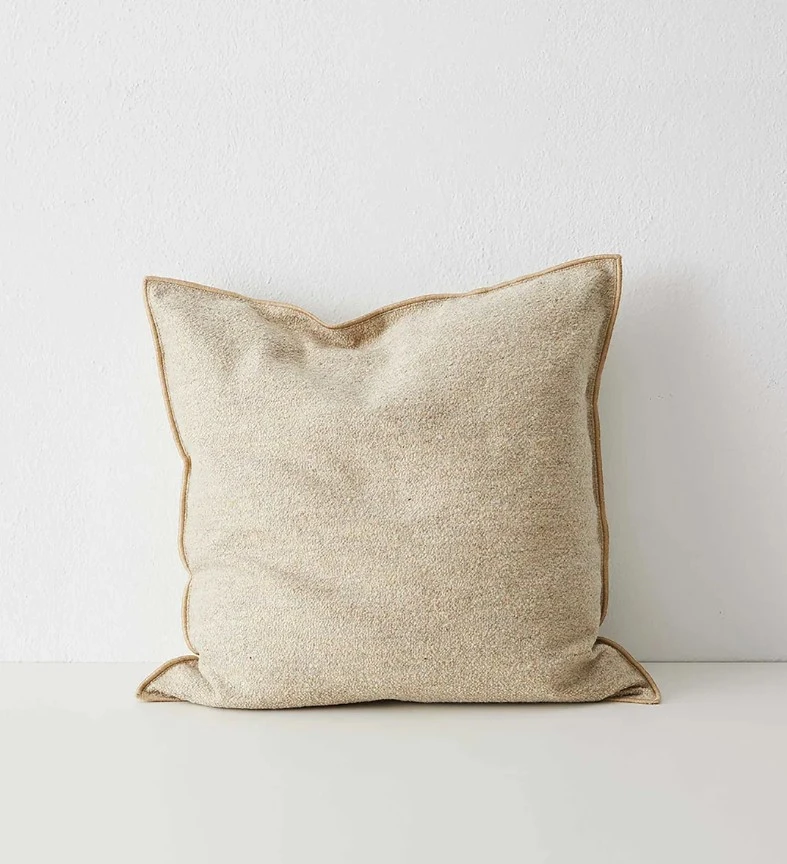


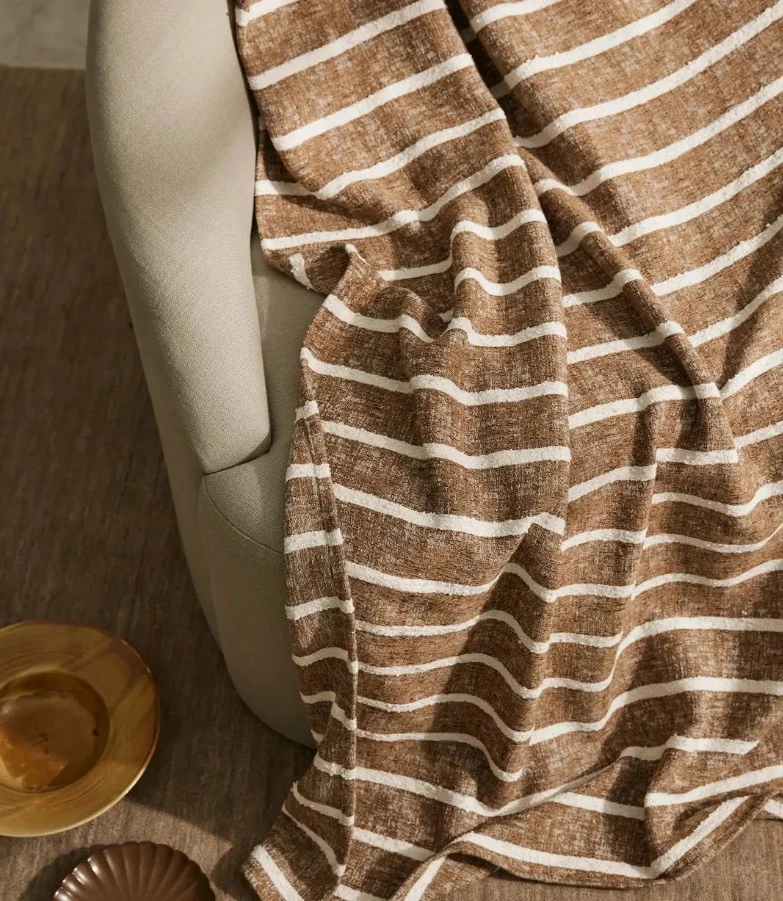
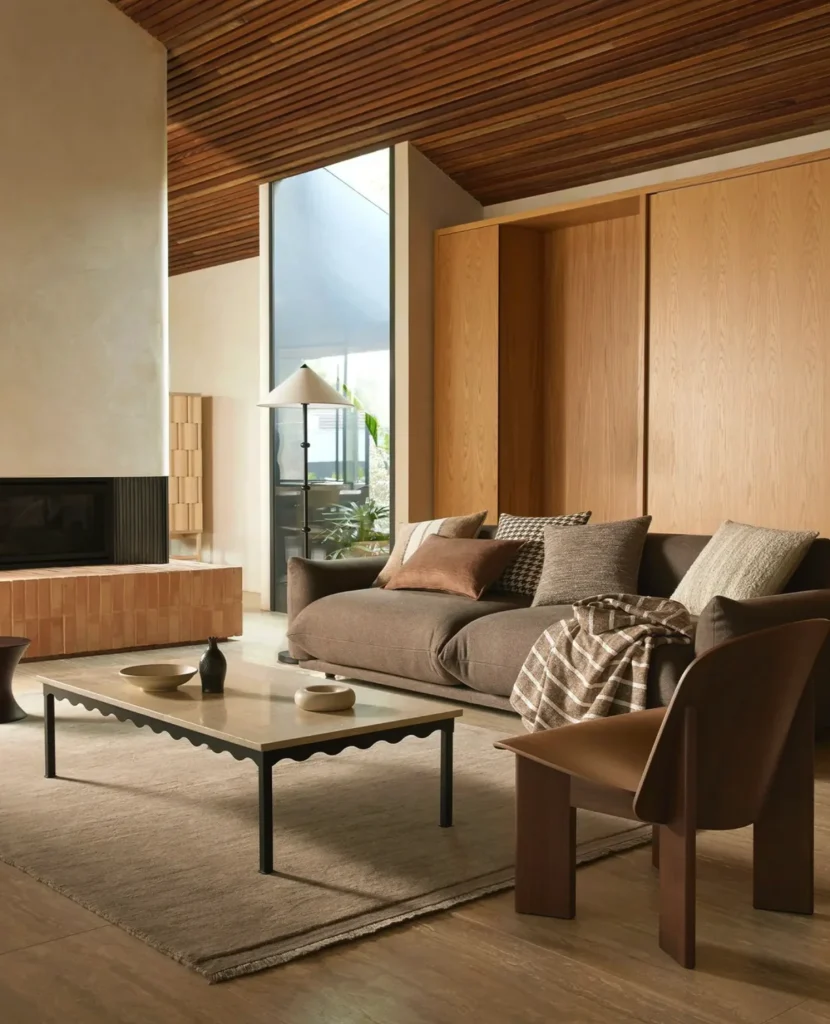
At Orli Interiors, we create timeless, luxurious homes across Sydney—from Manly and the Northern Beaches to the North Shore and Eastern Suburbs.
If you’d like help styling your home for winter—or want guidance on which furnishings will work best with your space and lifestyle—we’d love to assist. Whether you’re updating a single room or furnishing a whole home, our interior decoration service makes the process seamless, inspiring, and tailored to you.
Book a design consultation here
Or get in touch at design@orli-interiors.com.au
Beautiful homes. Better living. That’s what we’re about at Orli Interiors. Reach out anytime.

07 Jun
Luxury Wardrobe Design with Häfele: Hardware & Layout Tips for a High-End Dressing Room
Designing a luxury wardrobe is about more than storage — it’s about creating a personal sanctuary where refined aesthetics and intelligent function intertwine. Inspired by celebrity dressing rooms and the latest design innovations, here’s how to bring the ultimate wardrobe experience into your home.

A thoughtful layout underpins the success of every luxury wardrobe, balancing elegance with everyday usability.
Hanging Heights: Allow 150cm for full-length garments like dresses and coats, 100cm for jackets and shirts, and 75cm for folded trousers.
Shelves & Drawers: Adjustable shelves offer flexibility as your wardrobe evolves. Include drawers 15–30cm deep for accessories, folded items, or jewellery trays.
Island or Seating: If space allows, include a central island or an upholstered bench. Ensure a 90cm clearance on all sides for fluid movement.
Luxury begins with materials that feel as good as they look:
Luxe Surfaces: Think marble-topped islands or velvet lined accessory drawers that immediately elevate the space.
Cedar-Lined Interiors: Naturally aromatic and moth-repelling, cedar infuses your wardrobe with timeless appeal and function.
Hardware is the often overlooked workhorse of wardrobe; it is a key factor in elevating the ordinary to the extraordinary and Häfele’s new CONERO range by Kesseböhmer is setting a new benchmark in luxury wardrobe functionality.
“At Häfele, one of the innovations we’re most excited about is the CONERO range by Kesseböhmer, a beautifully engineered collection designed to elevate the modern dressing room.”
“From its elegant glass-fronted drawers to its intelligent pull-out accessories, CONERO is designed with adaptability and aesthetic sophistication in mind.”


LED Strip Lighting: Häfele’s Loox5 LED strip lighting with COB technology ensures “soft, continuous lighting throughout shelving and compartments. Its adjustable colour temperature settings enhance both visibility and ambiance.”
Integrated Rail Lighting: The CONERO LED wardrobe rail “seamlessly combines structural support and lighting in one sleek unit, ideal for minimalist wardrobes that value both form and function.”
Sensor Lighting: Incorporating LED strips and undershelf lighting connected to a door sensor switch means lights are only activated when needed. Trying to organise clothes in a dark cabinet can feel like looking into a void.
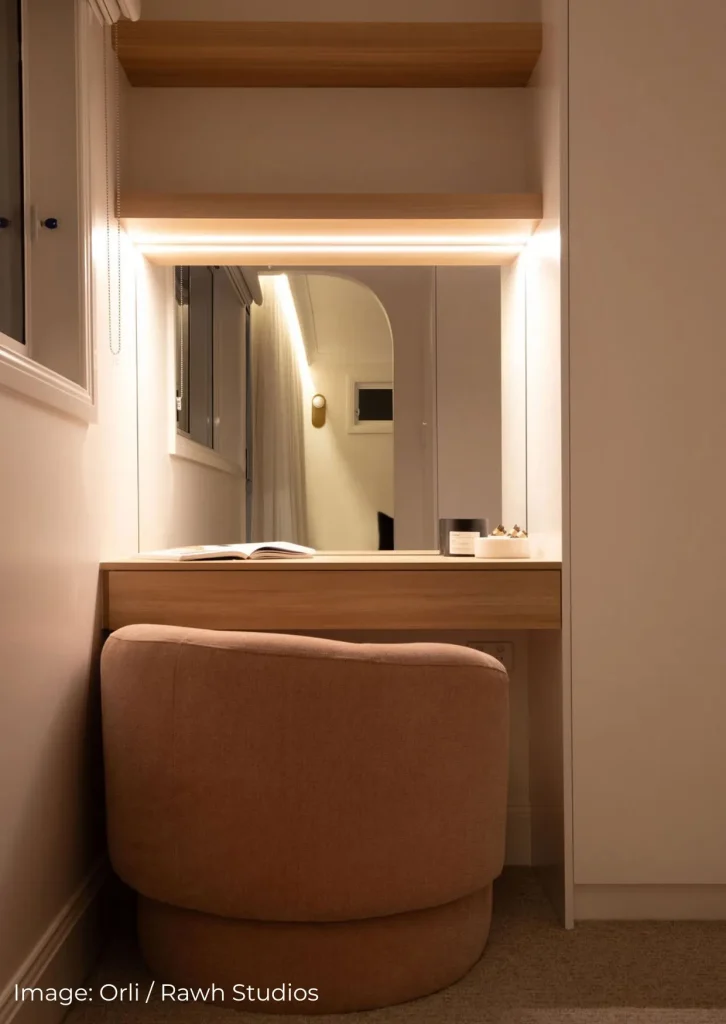
Open Wardrobes: Great for curated displays and easy access. These suit homeowners who love showcasing their wardrobe as part of the design.
Closed Wardrobes: Best for visual calm and protecting garments. Custom timber and upholstery finishes add a refined edge.
Every luxury wardrobe deserves a dedicated dressing zone — it’s where function meets self-care.
Dressing Table: Include comfortable seating, concealed storage for cosmetics and grooming items, and materials that echo the joinery.
Mirrors: Ensure both a well-lit vanity and a full-length mirror positioned to catch natural or LED light — essential for that final head-to-toe check.
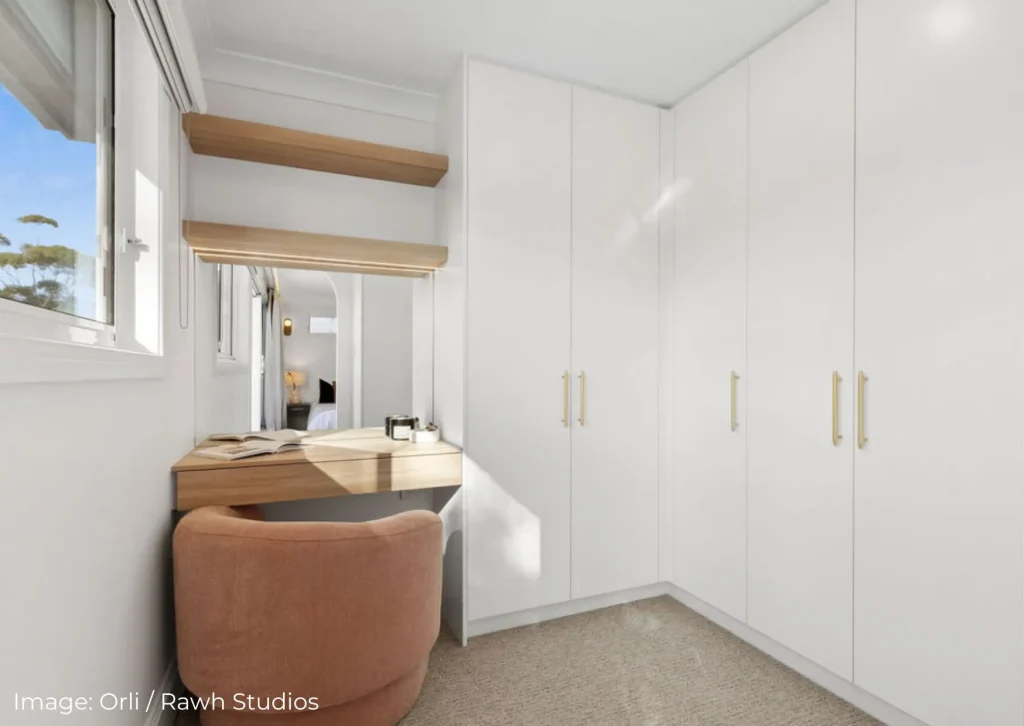
Some additions aren’t just about storage — they’re about experience. Here’s how to take things even further:
Warming Drawers: Originally found in kitchens, these gently warm towels and garments for a spa-like touch.
Garment Steaming Zone: Allocate space for steaming clothing or include a dry-cleaning cabinet to refresh items with ease.
Mini Beverage Station: Whether it’s a morning espresso or herbal tea before an evening out, a concealed refreshment nook adds serious indulgence.
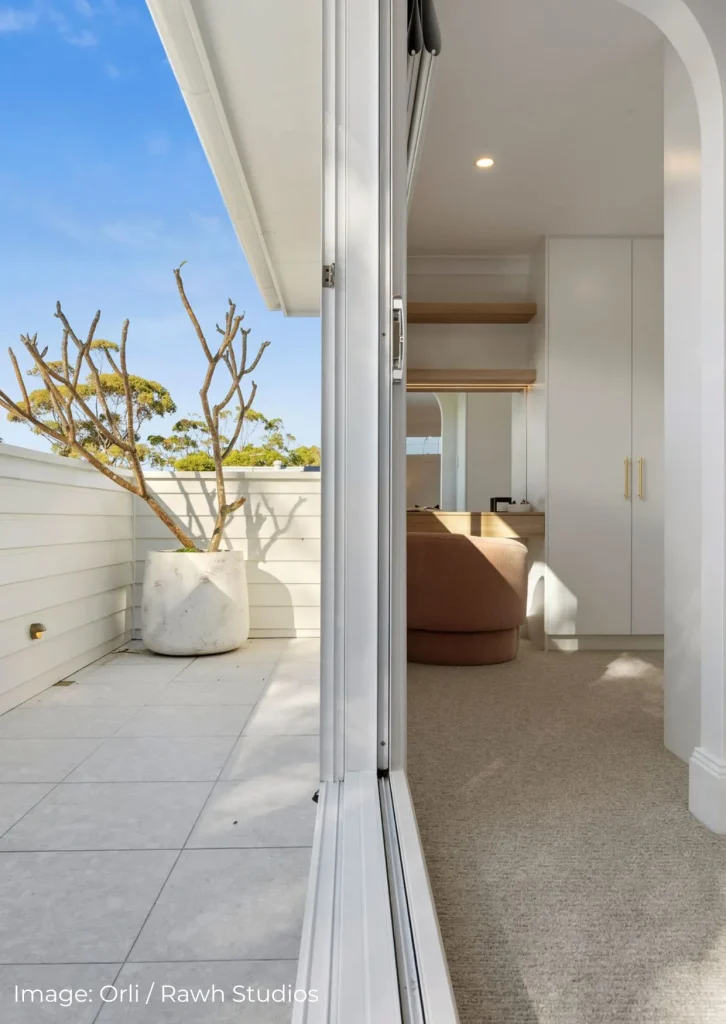
We asked Häfele what mistakes they often see in high-end wardrobe planning — and how to avoid them:
“Common mistakes in luxury wardrobe planning include failing to prioritise functionality over aesthetics, not considering storage needs thoroughly, and overlooking adequate lighting.”
Their tips?
“We recently collaborated with a designer whose client was a pilot. A section of their wardrobe was designated for work only, with a pulldown rail, a travel bag shelf, pull-outs for folded items, and a belt/tie rack with tray for accessories.”

“We like to think of hardware as jewellery for joinery,” says Häfele — and your finish choice matters just as much as your materials.
Brass & Warm Metals: “Highly sought after for their richness and ability to create a sense of warmth and luxury.”
Brushed Nickel: “Timeless and versatile.”
Matte Black: “Minimalistic, modern, and dramatic.”
Mixing Finishes: “High-end clients are increasingly drawn to curated combinations. The key is whether you want your hardware to make a statement or blend in.”
At Orli Interiors, we believe luxury isn’t just about what you see — it’s how a space makes you feel. A beautifully designed wardrobe turns dressing into a daily ritual of calm and confidence.
Planning a high-end renovation or walk-in wardrobe? Explore Hafele’s range and then let’s curate something extraordinary together – get in touch here.
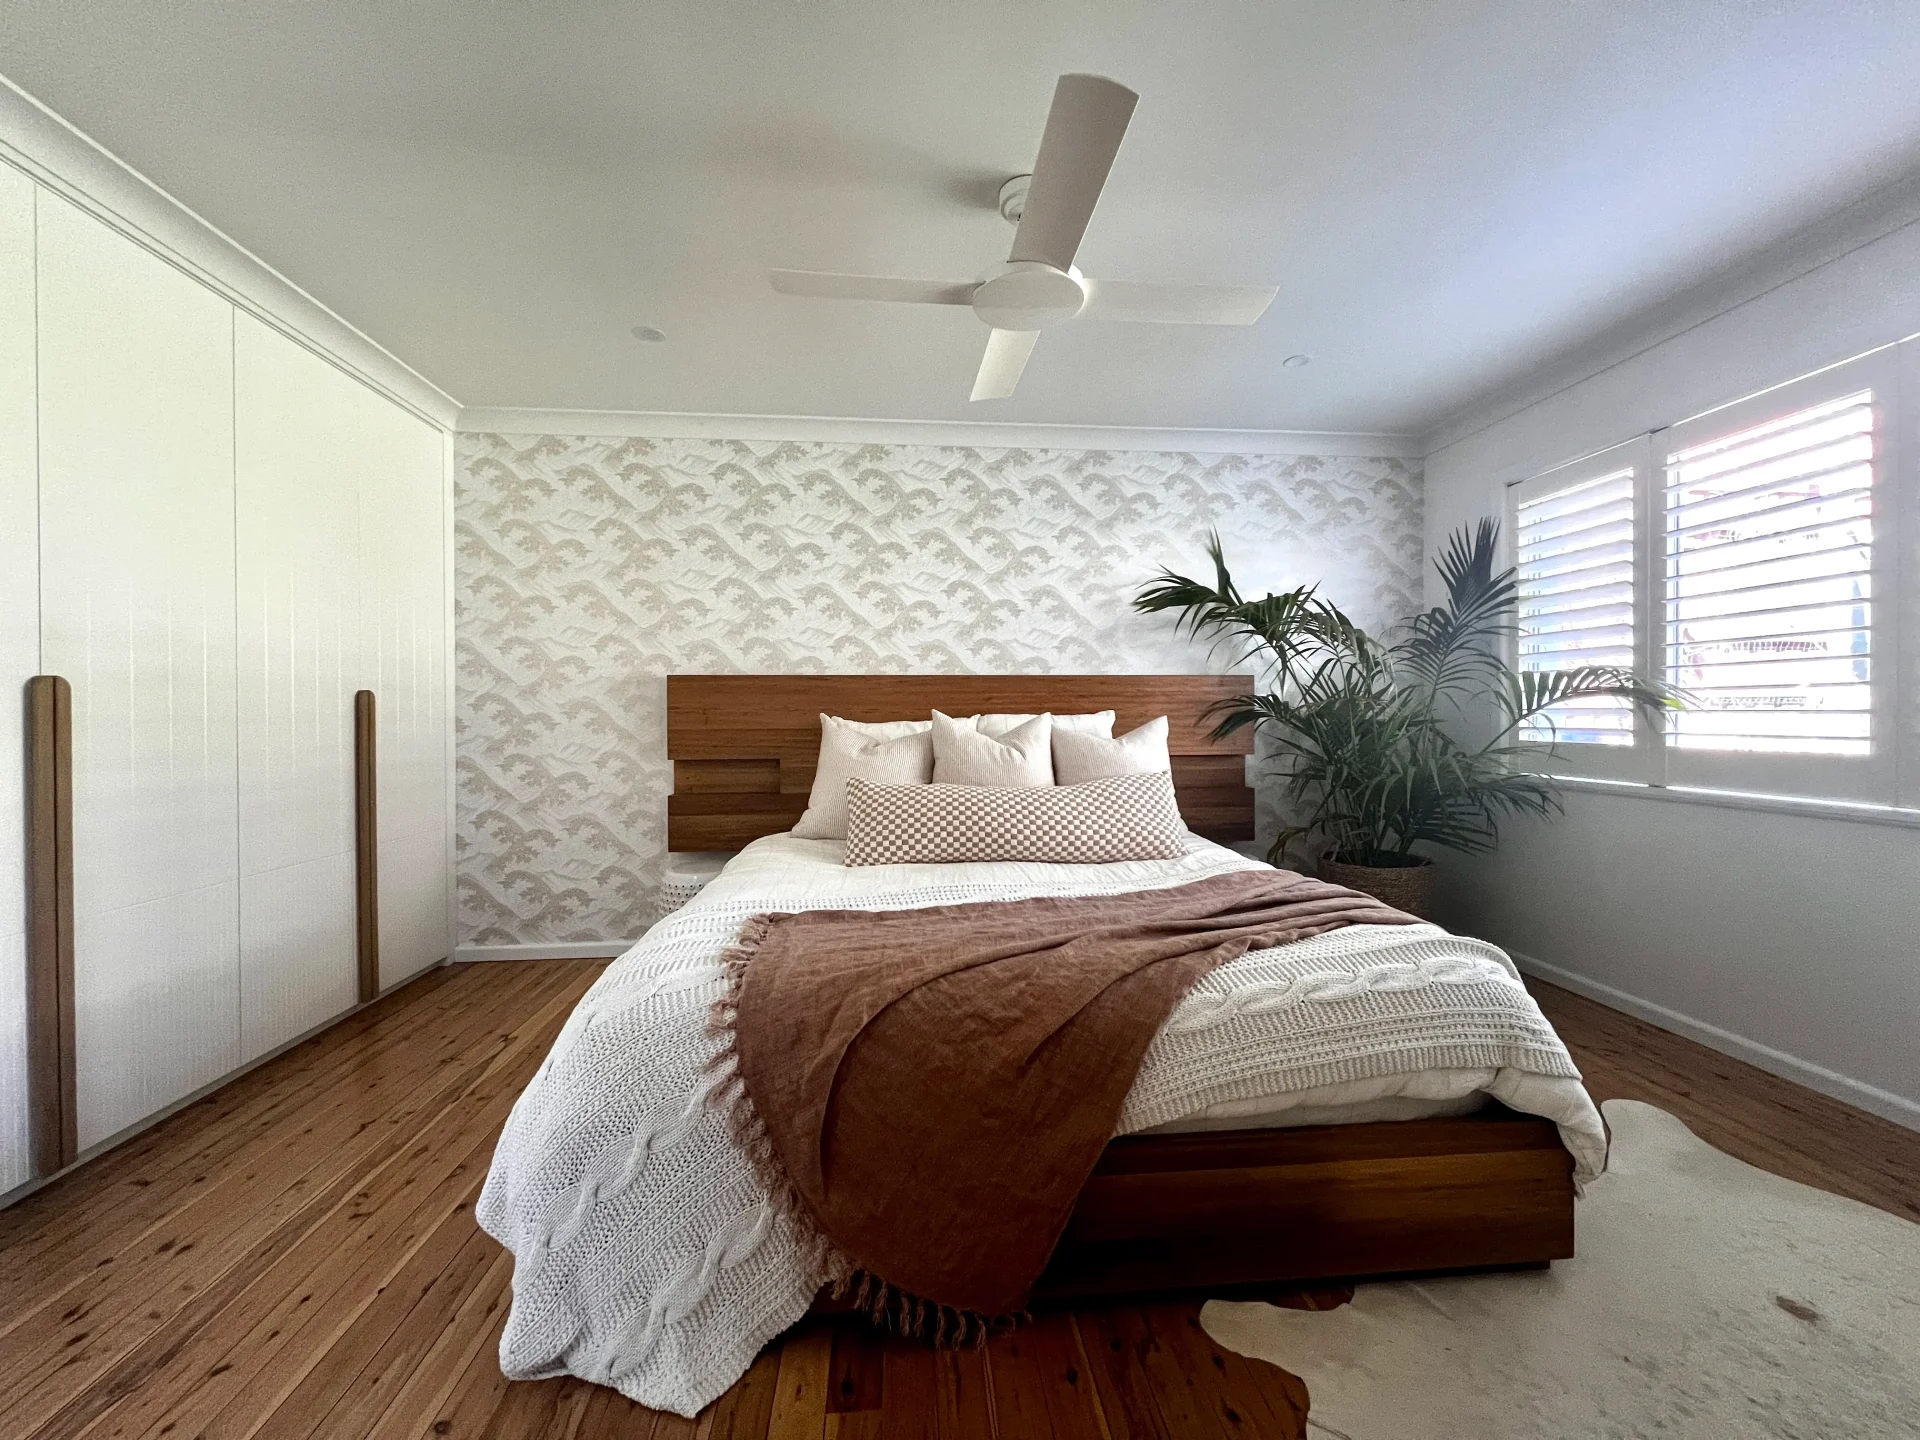
24 May
Choosing Curtains, Blinds, or Shutters? How to pick the Perfect Window Coverings for Your Home
At Orli Interiors, we know a beautiful space isn’t just about looks—it’s about how it feels and functions. And when it comes to creating homes that feel calm, connected, and utterly you, the right window furnishings play a bigger role than most people realise.
From thermal insulation and light control to adding a dash of style, window treatments can elevate a room from fine to fabulous. But with so many options out there, where do you start?
To shed some light (pun intended), we spoke with Northern Beaches window furnishing expert Rachael Whatson from Creative Canvas in Warriewood, about choosing curtains, blinds and shutters. Rachael shares practical advice, common pitfalls, and the latest trends. Here’s your complete guide to picking the perfect fit for your Northern Beaches home.

Curtains remain a timeless choice for clients looking to add softness, elegance, and acoustic comfort to a space. Ideal for living areas or bedrooms where you want that plush, luxurious feel, curtains can also help manage temperature when properly lined and installed.
What to consider:
Orli Tip: Our clients love pairing linen sheers with a thicker blockout for a dreamy, coastal-luxe vibe that’s perfect for the Northern Beaches climate.
Blinds are a solid go-to when space is at a premium or you’re going for clean, contemporary lines. Think roller blinds for a sleek profile, Venetians for adjustable light, or verticals in large windowed spaces.
From Rachael’s expert view:
Watch out: Many people overlook how much fit impacts performance. As Rachael cautions, “Poor fit leads to gaps, reducing both insulation and privacy.”


For clients seeking long-term value and serious style, plantation shutters are hard to beat. They suit everything from Federation homes to Hamptons-inspired renovations.
Why we recommend them:
Common mistake: Don’t forget furniture clearance! Shutters need room to open inward. Rachael warns against placing tall furniture too close to operable windows—it can block both access and function.

We’re increasingly helping clients incorporate automation into their interiors—and window treatments are no exception. Whether you’re away on holidays or just want to control everything from the couch, smart systems add incredible value. Rachael’s insights:
Why it matters: Automation isn’t just about ease. Rachael notes that it can cut cooling loads by up to 25%—a smart way to save energy and money in Sydney’s fluctuating climate.
Many homeowners fall into similar traps. Here’s what Rachael says to avoid:
At Orli Interiors, we help clients avoid these pitfalls by combining our design expertise with practical know-how. We also work closely with trusted local suppliers and fitters like Creative Canvas to ensure every choice is as functional as it is beautiful.
Rachael identifies the biggest window furnishing trends we’re embracing right now, and we agree:
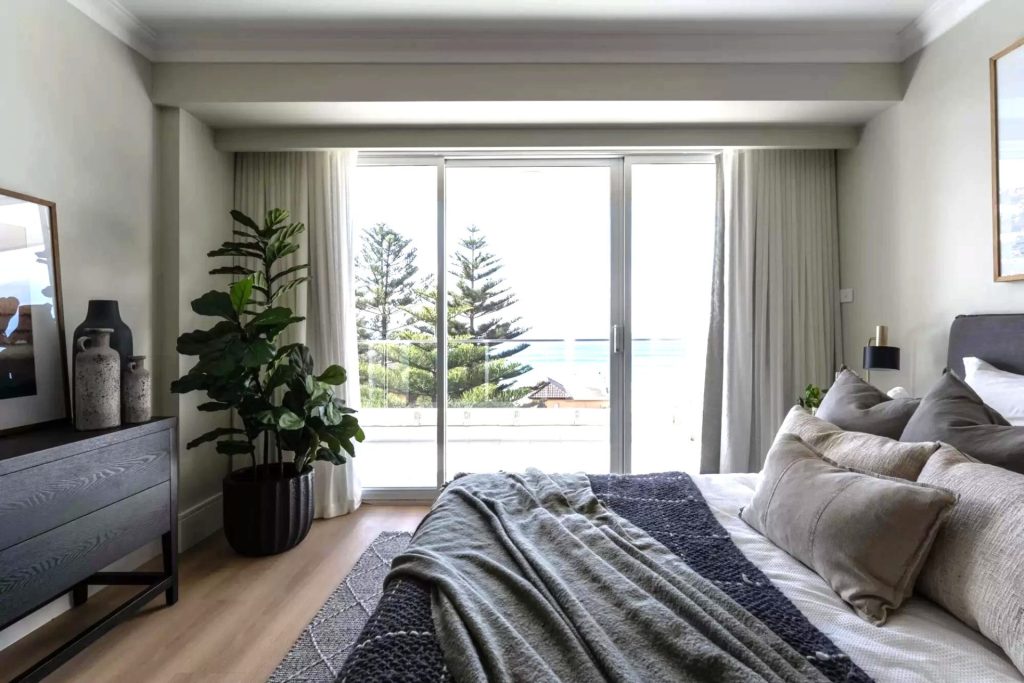
Your window furnishings should reflect more than just style—they should reflect how you live. At Orli Interiors, we balance aesthetics with everyday functionality to help you create a space that feels just right.
Whether you’re drawn to the softness of curtains, the clean lines of blinds, or the permanence of shutters, we’ll guide you through the process with empathy, expertise, and a touch of Northern Beaches flair.
Need help deciding? We’d love to help, drop us a line here. Let’s transform your windows—and your whole home—into something you’ll love to live in.
Reach out to Rachael and the team at Creative Canvas in Warriewood here

10 May
How to Style a Nursery: A Practical & Beautiful Approach
Bringing a baby into your home is one of the most exciting times in life, but setting up their nursery can feel overwhelming. As a mum myself, I know the balance between creating a beautiful space and making sure it’s practical, safe, and adaptable as your baby grows. Let’s walk through how to style a baby’s bedroom with longevity, safety, and your own personal style in mind.

Before you start buying furniture and decor, take some time to plan your nursery. Here’s how:

A gorgeous nursery means nothing if it’s not safe. Here are the must-dos:


Your baby’s nursery should evolve with them. Choosing versatile furniture and decor saves time and money in the long run:

Colour plays a huge role in setting the tone of a nursery, and using colour theory can help create a harmonious space. A well-balanced room follows the 60/30/10 rule:
By choosing a palette that resonates with you and incorporating these colour principles, you’ll create a space that feels both stylish and restful—for you and your baby!

Decor is where you can add personality while keeping things functional:
Babies come with a surprising amount of stuff, so storage is key:
Multi-use furniture: Consider a storage bench or ottoman that doubles as seating.

Styling a nursery should be an enjoyable and thoughtful process. By combining safety, comfort, and personal style, you can create a space that not only looks beautiful but truly works for you and your baby.At Orli Interiors, we love helping families create stylish, functional spaces they’ll love for years to come. If you’d like a hand designing your perfect nursery, let’s chat! You can get in touch here.
26 Apr
What You Need to Know Before Building a New Home on the Northern Beaches
Building a new home is one of the most rewarding projects you can take on—but it’s also a major commitment of time, energy, and resources. If you’re fortunate enough to be building on Sydney’s Northern Beaches, you already know you’re creating something special. But behind the coastal charm lies a set of unique challenges and opportunities that deserve thoughtful planning and a deep understanding of the lifestyle this region offers.
Here’s what you need to know—beyond the basics—before putting pen to paper or shovel to soil.

It’s easy to start with Pinterest boards and “dream home” checklists, but true success comes from designing a home that’s site-responsive. On the Beaches, your block might be steep, bush-adjacent, or exposed to salt-laden winds—factors that aren’t glamorous but fundamentally shape how your home functions and feels.
Rather than fighting the natural topography, use it to your advantage. For example, a split-level home can provide zones of privacy, create layered views, and reduce excavation costs. Think about how your house sits in the landscape—not just on it.
Tip: Embrace the slope. Split-level homes or tiered outdoor areas can turn a tricky block into a design feature.
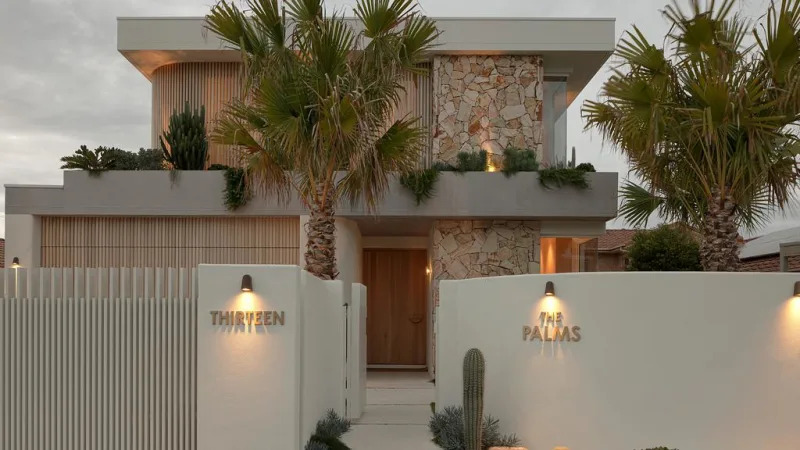
Each suburb on the Beaches—whether it’s Avalon, Curl Curl, or Dee Why—comes with its own set of planning controls and regulations. The Northern Beaches Council has specific guidelines around things like building height, setbacks, landscaping, and heritage conservation. These can affect your overall design and timeline.
The Council is also concerned with the fabric of our neighbourhoods. This means balancing your desire for impact with the area’s broader planning ethos of environmental protection, streetscape consistency, and community cohesion.
Look beyond your block—how will your new home impact your neighbours’ views, privacy, or access to light? These are key reasons builds are delayed or rejected. A proactive, collaborative approach in the early design phase can avoid costly back-and-forth later.
Think of your home as a long-term investment in your street and suburb. Good design lifts not only your personal quality of life but also neighbourhood appeal and resale value.
Tip: Engage professionals (a good architect and interior designer early) who are familiar with local regulations—it’ll save time, money, and stress down the track.
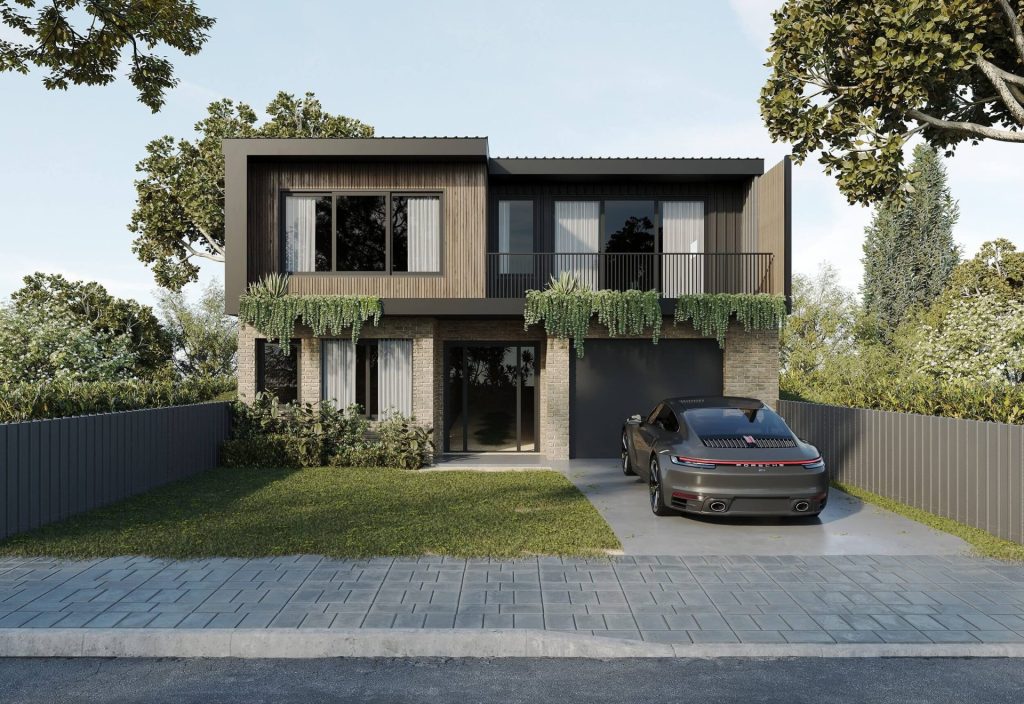
Coastal homes face the harshest conditions—UV exposure, moisture, corrosion. Aesthetics are vital, but your materials need to withstand time and nature.
Choose materials for their tactile and emotional qualities as well as their resilience. For example, stone benchtops patina beautifully over time, timber cabinetry adds soul, and aged brass tapware will wear-in, not wear-out.
Sustainability isn’t just about solar panels. It’s about enduring style, low-maintenance finishes, and smart insulation that lowers long-term costs and environmental impact.
For exteriors: Go for materials like fibre cement or colorbond wall cladding, aluminium window frames, and marine-grade hardware.
For interiors: Choose materials that are not only durable, but bring texture, warmth, and personality to your space — like natural timbers, honed stone, and finishes that develop character over time. Longevity isn’t about playing it safe — it’s about selecting quality that evolves beautifully with the life you live.
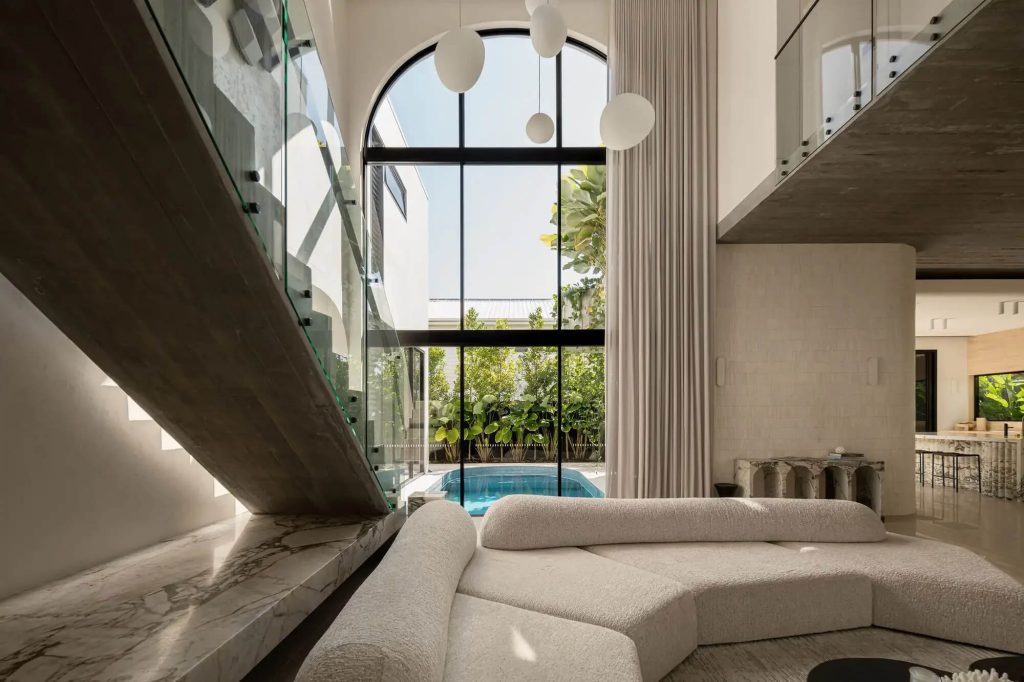
Northern Beaches living is synonymous with balance—between nature and design, between family and solitude, between functionality and beauty. Your home should support these rhythms.
Don’t just list rooms—map experiences. Where will you drop sandy towels after the beach? How will the kitchen support hosting spontaneous Friday night drinks? Is there a quiet nook for remote work or school projects?
Design to create emotion. What makes a home feel calm, safe, energising? Is it the filtered morning light through sheers? The texture of timber under bare feet? These are the invisible elements of good design that shape your daily experience far more than the width of your living room.
Think open-plan living with a seamless indoor-outdoor flow. Alfresco dining, large sliding doors, and easy access to the kitchen from the outdoor zones are all essentials.
Also consider things like storage (for boards, bikes, and beach towels), mudrooms, and multi-use spaces that can adapt as your family grows or changes.
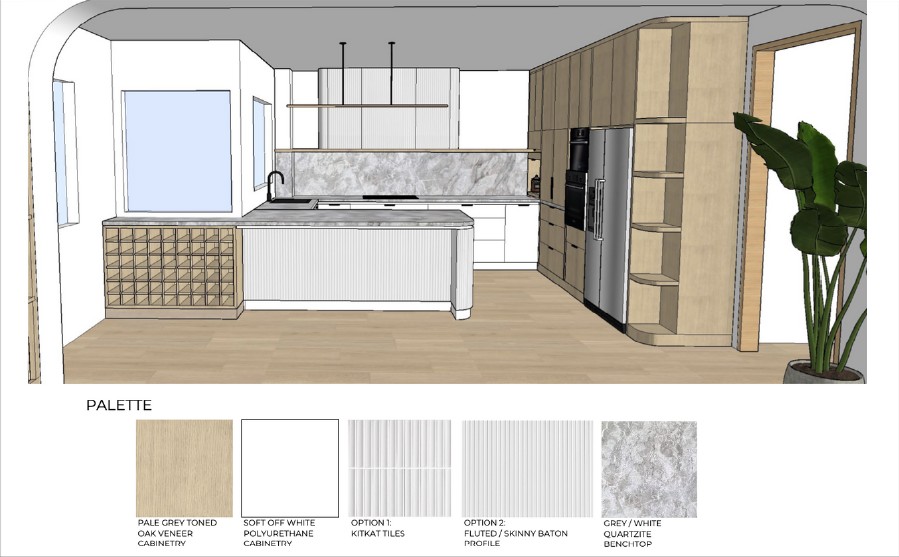
You’re not just building a house—you’re creating your future home. Surround yourself with a team who gets your vision and can bring it to life with equal parts creativity and common sense.
Often considered late in the process, interior design should be a strategic input from the outset. It’s not about choosing cushions—it’s about ensuring flow, cohesion, and that your home feels as good as it looks.
Design psychology matters. The colours, textures, and layouts we live within can reduce stress, improve sleep, and increase connection. Done right, design becomes an invisible support system for your best life.
Moreover, when you’re investing significant money into a build or renovation, it’s essential to maximise that investment through considered design. Upfront design expertise not only improves how your home functions and feels — it will significantly increase the long-term value and market appeal of your property.
At Orli Interiors, we work alongside your architect and builder to ensure every design decision—big or small—reflects your personality, lifestyle and practical needs. From your kitchen layout and bathroom selections to joinery design and furniture styling, we’re here to guide you through the journey with confidence and clarity.
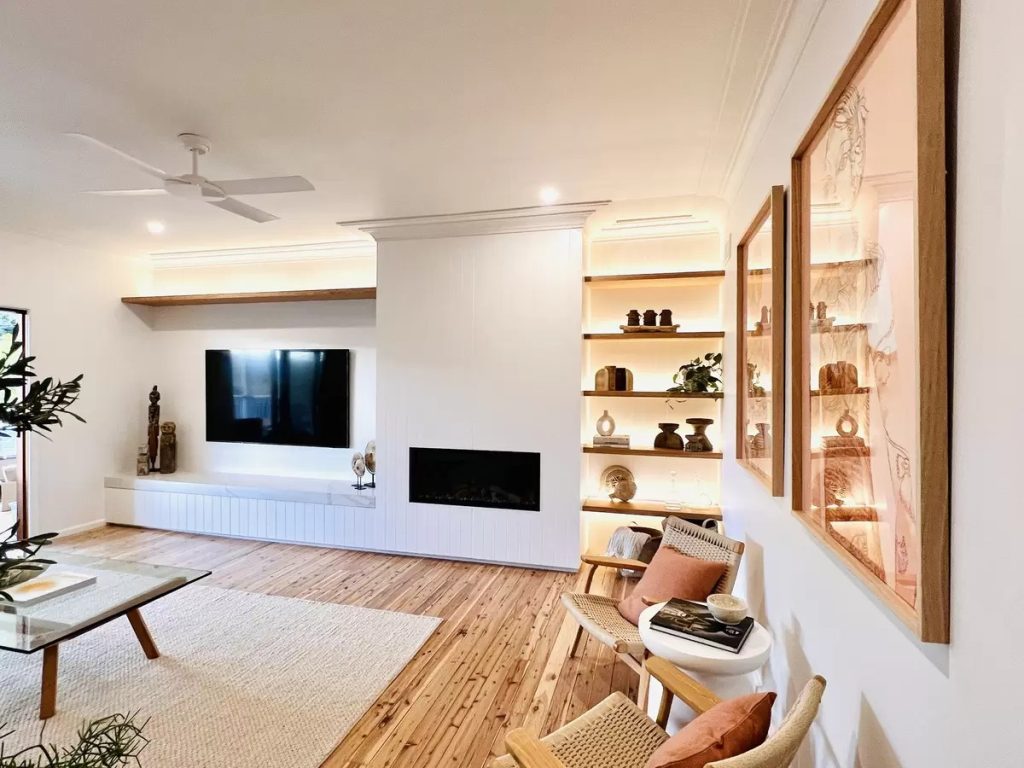
Most new home budgets are tight before construction even finishes—because people underestimate the “soft finishes” that make a house liveable. Curtains, custom joinery, furniture, outdoor spaces… these aren’t extras—they’re essentials.
A beautiful build with no budget for furniture or landscaping feels unfinished. Allocate 10–15% of your total budget for post-construction styling.
Think about how each dollar adds value, not just output. A well-designed custom media unit might seem pricey—but it anchors the living space, hides the mess, and replaces the need for a costly future reno.
Building a home on the Northern Beaches is about more than bricks and mortar—it’s about creating a space where your lifestyle can shine. A place to gather with friends after a swim, to relax with a morning coffee in the sun, and to enjoy the easy rhythms of coastal living.
If you’re ready to turn your plans into something truly special, Orli Interiors is here to help. We take the stress out of decisions and bring a down-to-earth, personalised approach to every build—no cookie cutter solutions here, just a home that is as relaxed, beautiful and authentic as the Beaches themselves. Get in touch here.
Photo credits: 1. Orli Interiors; 2. Justin Alexander (ArchitectureAU); 3. realestate.com; 4. LPC Projects; 5. Halo by Arlo Stone; 6&7 Orli Interios

12 Apr
The Best Kitchen & Bathroom Materials for a Timeless Look

Here on Sydney’s Northern Beaches, where life revolves around sun, sand, and easy indoor-outdoor living we crave an aesthetic that is both relaxed and timeless. When you’re planning a full renovation it’s important to choose materials that not only look beautiful but also stand up to the way we live. Kitchens and bathrooms are the true workhorses of the home, and a timeless design ensures they’ll feel fresh and functional for years to come. It’s all about making smart, stylish selections that blend coastal charm with lasting quality.
But let me clear before we go any further – timeless doesn’t just mean neutral! Believe me, almost every dated home I renovate has plenty of neutral colours – in fact all too often there are just too many samey neutral colours! While it’s important to have cohesive neutral undertones – these should serve as a backdrop to bring in your own personality. A timeless interior gives you the perfect canvas to play with colour and pattern as your style evolves.
At Orli Interiors, we believe in creating kitchens and bathrooms that balance beauty with practicality, while reflecting your personality and the way you truly live. So let’s dive into our favourite materials that promise enduring style—and why they work so well.
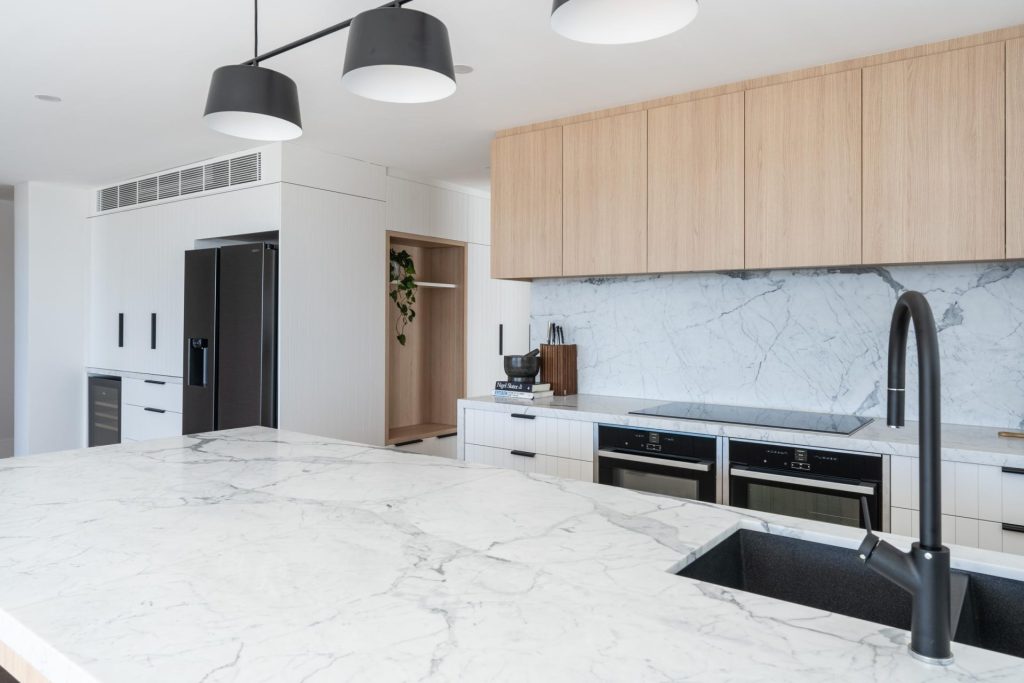

Few materials evoke luxury and longevity quite like natural stone. Whether it’s marble, granite, quartzite or travertine, stone brings a natural depth and texture that manufactured materials struggle to replicate.
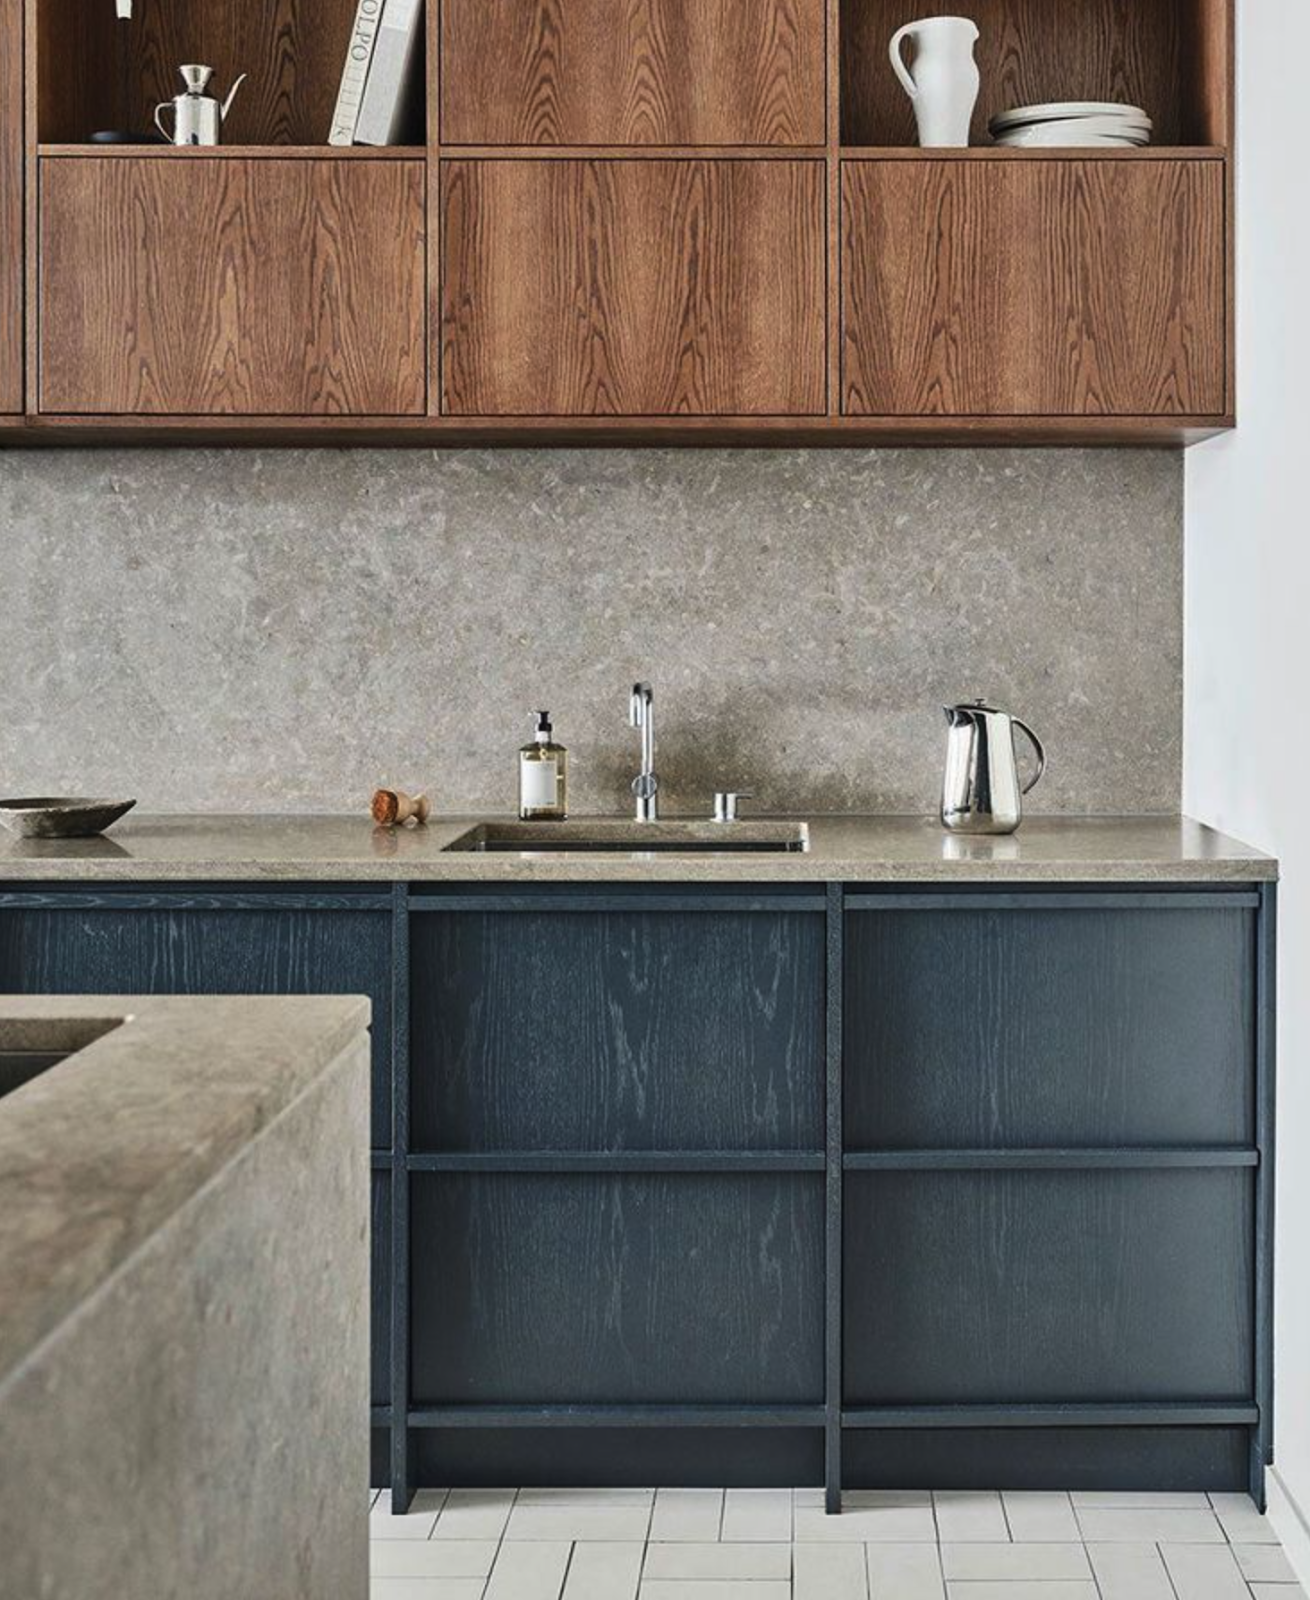
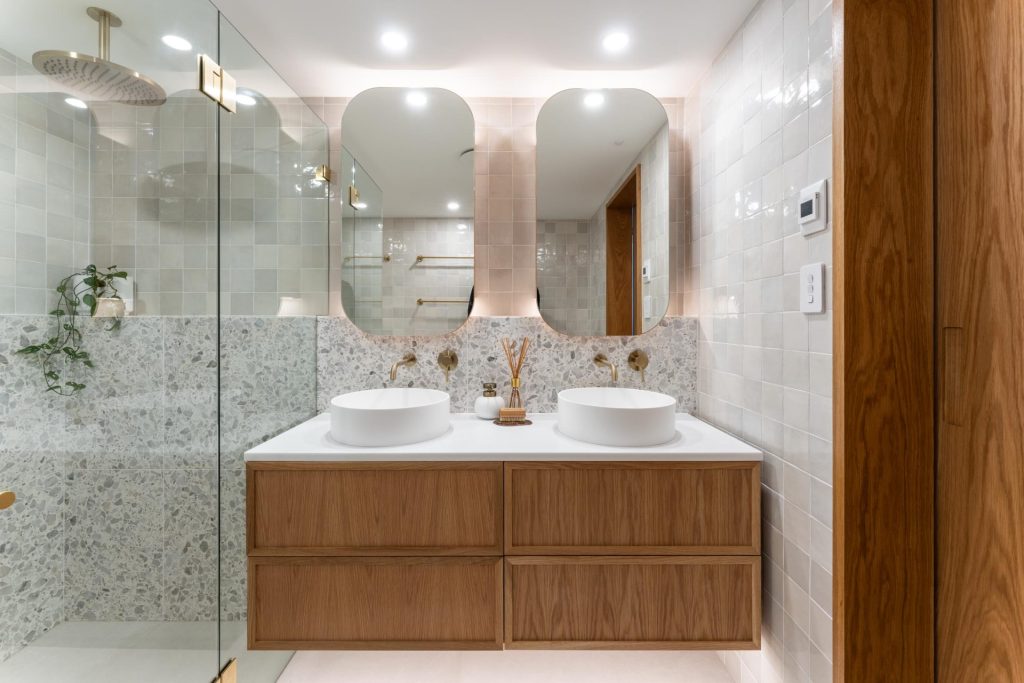
Nothing softens a space and adds soul like timber. Whether it’s solid wood cabinetry or a good quality woodgrain laminate, this material has a unique way of making a space feel warm and grounded.
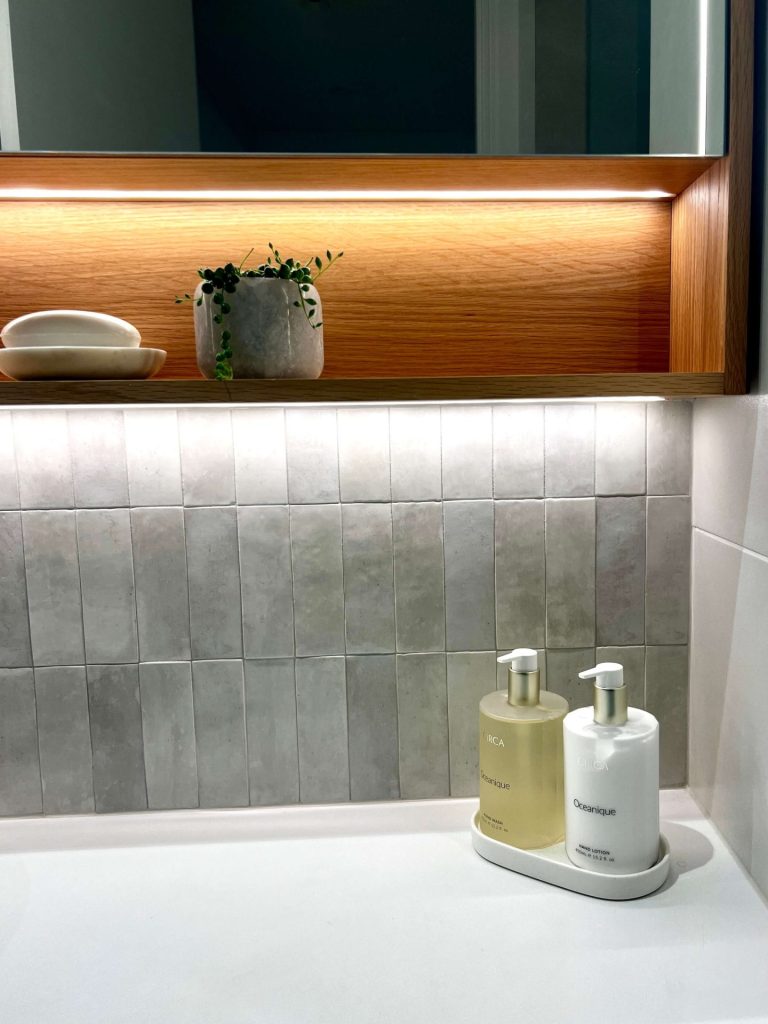

Choosing tiles can feel totally overwhelming. Tiles are where function meets flair. With an endless variety of finishes and formats but ceramic and porcelain tiles are your go-to for achieving both beauty and durability to a timeless interior.
What to avoid: Busy patterned tiles that dominate the space—opt instead for something with texture or soft variation for a more timeless appeal. Equally important is to avoid plain white and plain grey tiles – this may feel like a safe option but will look instantly rather boring and will date very quickly. Opt for movement, texture and variable shading for interest and depth.

Tapware may seem like a small detail, but it can totally transform your kitchen or bathroom. For a look that transcends trends, brushed nickel, brushed brass, and matte black are excellent choices.
Design bonus: These finishes are more forgiving with water marks than traditional chrome—hello less cleaning stress!
If you want to dive a bit deeper into other tapware finishes check out our blog here
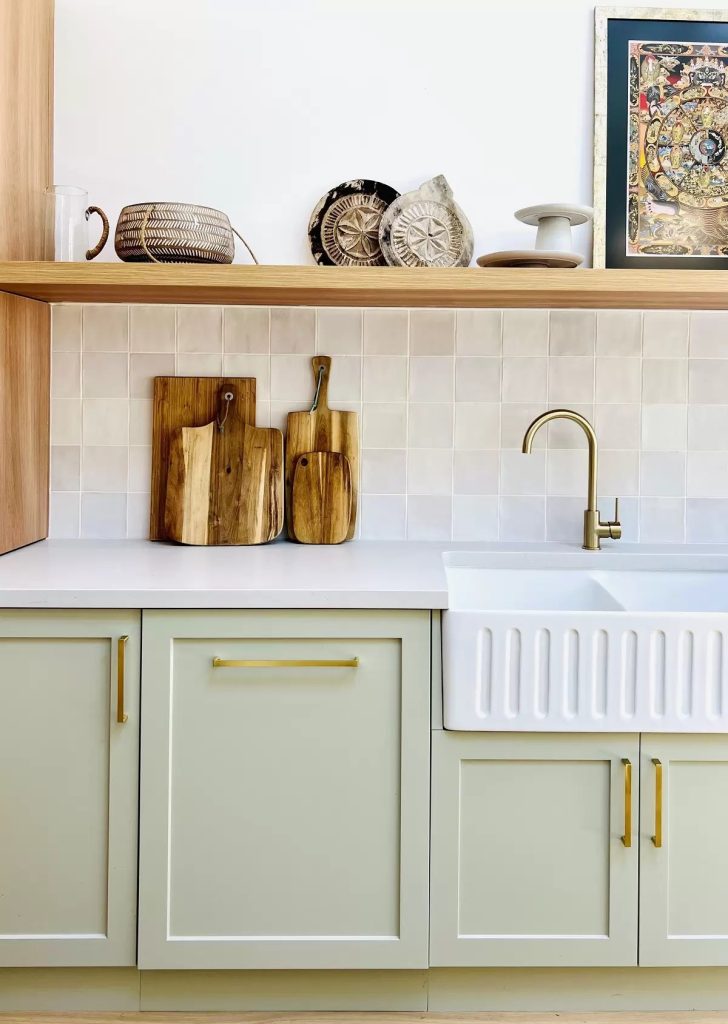
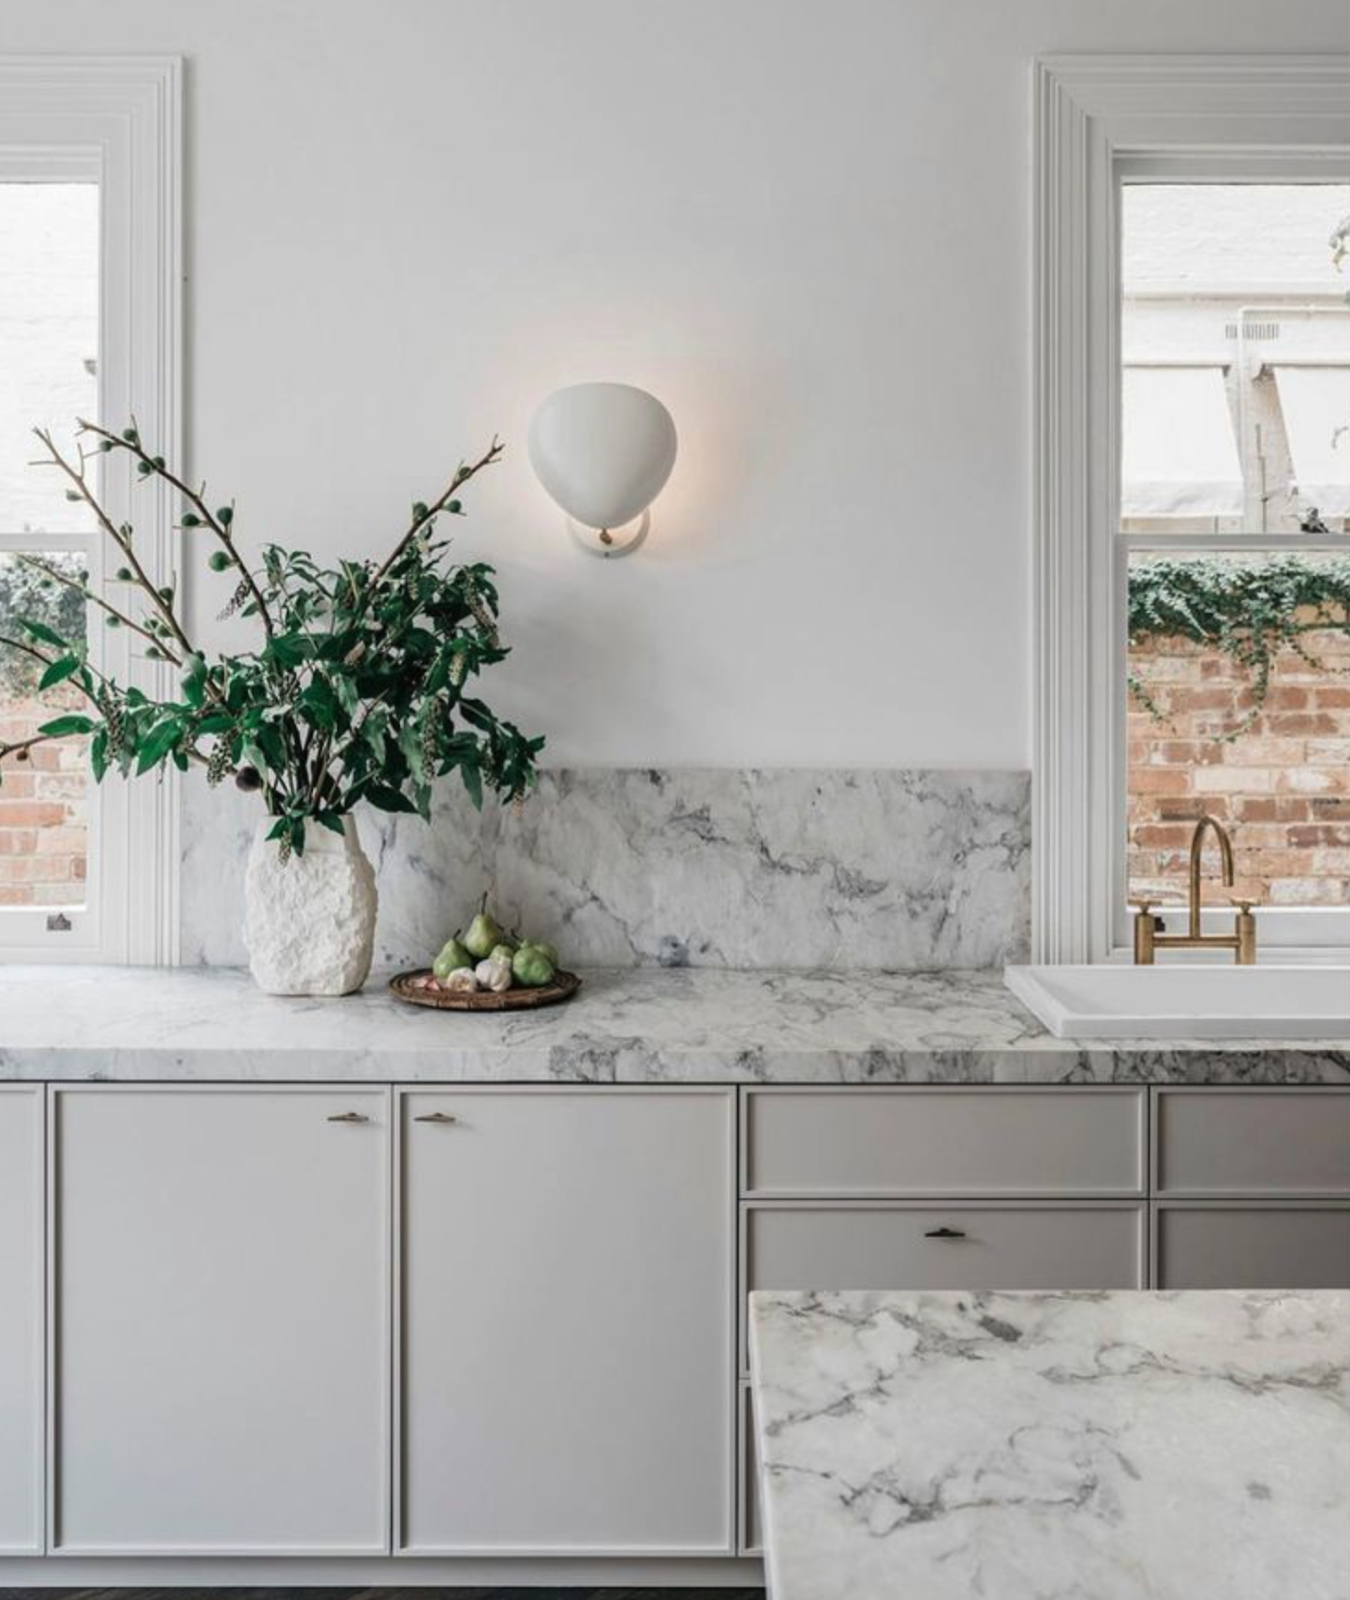
Joinery is a major visual element in kitchens and bathrooms, and opting for a classic style means your cabinetry won’t date in a flash.
Top tip: Combine classic profiles with contemporary colours like sage, navy, or warm whites for a fresh take on tradition.
For a more sleek and contemporary aesthetic look no further than the skinny shaker – a timeless cabinetry profile option that works with a whole host of design styles.

When we talk about timeless design, it’s not just about what you see—it’s also about how your space functions day in and day out. Hardware might seem like a small detail, but it’s one of the most heavily used elements in any kitchen or bathroom. Choosing high-quality, functional hardware is essential to keeping your renovation practical, polished, and feeling brand new for years to come.
Think about soft-close drawer runners, full-extension slides, and hinges that won’t squeak or sag after a few years of use. Reputable brands like Blum or Häfele offer precision-engineered fittings that stand up to daily wear, and make a world of difference to the user experience. These aren’t just luxuries—they’re small details that protect your investment over time.
One smart splurge that’s worth considering is pocket door hardware. While the upfront cost can feel significant, the payoff is huge—especially in compact spaces where every centimetre counts. Pocket doors glide smoothly out of sight when not in use, keeping your layout clean and uncluttered. Investing in a quality system ensures they’ll operate flawlessly for years, without sticking, rattling, or needing regular adjustment.
Handles and knobs also deserve thoughtful attention. Choose pieces that feel good in the hand—solid, weighty materials like brushed brass, matte black, or classic stainless steel that not only last but age beautifully. These are the daily touchpoints in your home, and they should signal quality every time you reach for them.
In short, don’t skimp on the hardware. These often-invisible choices are what make a space feel elevated, intuitive, and easy to live in for the long haul.
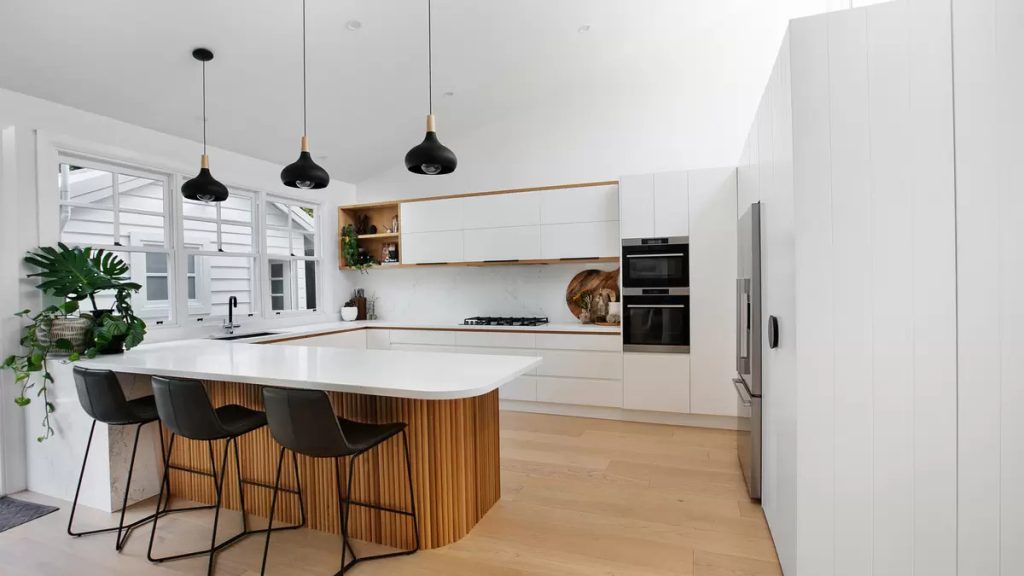
The right flooring sets the tone for your entire space. And while it needs to be durable enough to handle the chaos of family life, it also needs to look good doing it.
Engineered Timber offers the look of solid hardwood with better stability and sustainability. Oak tones are perennial favourites – in pale or golden hues, or even a medium brown, they will never go out of style, and just like a favourite pair of jeans they go with everything! Personally I would avoid any grey or taupe tones.
Avoid overly glossy finishes—they show every footprint and smudge. Go matte or satin for a more forgiving, elegant look.
Timeless design doesn’t mean boring or bland—it means thoughtful, considered choices that reflect your lifestyle and will age gracefully. At Orli Interiors, we specialise in blending practical functionality with down-to-earth elegance to create homes that feel truly “you”.
Whether you’re redesigning your kitchen, transforming your bathroom, or starting a whole-home renovation, our approach ensures every material and every detail is tailored to your life today—and tomorrow.
Looking to create a timeless kitchen or bathroom in your Northern Beaches home?
Let’s chat! Get in touch here
Because great design should always feel like home.

29 Mar
Timber vs Aluminium vs PVC Windows: Which is Best for Your Home?
Choosing the right window material is a crucial decision in any home renovation or new build. Windows significantly impact your home’s aesthetics, energy efficiency, and long-term maintenance. For homeowners who appreciate timeless elegance, modern sophistication, or practical durability, timber, aluminium, and PVC windows all offer unique advantages—and drawbacks.
To help you make the best choice for your home, we’ve weighed the pros and cons of timber vs aluminium vs PVC windows, covering key considerations such as aesthetics, durability, maintenance, cost, and energy efficiency.

Before diving into the details, it’s important to understand the core differences between these materials.
Each material has its strengths, but the right choice depends on your lifestyle, aesthetic preferences, and long-term needs.

Durability and maintenance play a major role in window selection. Some materials require more upkeep, while others are built to withstand the elements with minimal effort.
Timber is a high-maintenance choice but rewards homeowners with natural beauty and timeless appeal. With proper care, timber windows can last decades. However, they are susceptible to moisture, warping, and pests, meaning regular sealing, painting, or staining is required to maintain their integrity.
Pros: Warm, organic look; highly durable when well-maintained.
Cons: Prone to weather damage; requires regular upkeep.
Aluminium is naturally strong, corrosion-resistant, and requires very little maintenance. Powder-coated aluminium can last for decades without fading, chipping, or requiring repainting. However, cheaper aluminium windows may conduct heat, affecting insulation if not thermally broken.
Pros: Extremely durable, corrosion-resistant, minimal maintenance.
Cons: Poor insulation without thermal breaks; industrial look may not suit all homes.
PVC is naturally resistant to moisture, rot, and corrosion. It doesn’t require painting or sealing, making it an excellent low-maintenance option. However, lower-quality PVC may discolour over time, especially in harsh Australian climates.
Pros: Low maintenance, resistant to rot and corrosion, energy-efficient.
Cons: May discolour in extreme heat; can look less premium than timber or aluminium.
Your choice of window material should complement your home’s architecture and design style.
For luxury homes, classic renovations, and Hamptons-style properties, nothing beats the warmth and authenticity of timber windows. They can be painted or stained to match your interior palette and offer an inviting, handcrafted appeal.
Best for: Heritage homes, coastal or country-style properties, high-end contemporary residences.
Aluminium windows have a minimalist and industrial aesthetic, making them a favourite for modern and architecturally designed homes. Their slim frames allow for large panes of glass, perfect for capturing panoramic views and maximising natural light.
Best for: Modern, industrial, or minimalist designs; large glass panels and open-plan living.
While practical, PVC windows often lack the high-end appeal of timber or aluminium. They come in various colours and finishes but are generally better suited to contemporary suburban homes rather than premium or architecturally significant properties.
Best for: Energy-conscious homeowners looking for a cost-effective solution.

Energy efficiency is a key consideration, particularly in Australia’s climate, where insulation and heat control are essential.
Best for insulation: PVC and timber outperform aluminium unless the latter is thermally broken.
The cost of windows isn’t just about the initial purchase price. You should also consider long-term expenses such as maintenance, energy efficiency, and potential replacement costs.
| Window Material | Initial Cost | Maintenance Cost | Lifespan |
| Timber | High | High (regular sealing/painting) | 30+ years (if well maintained) |
| Aluminium | Mid-High | Low (minimal upkeep) | 40+ years |
| PVC | Low-Mid | Very Low (no sealing/painting) | 25-30 years |
Best value overall: PVC for affordability, aluminium for longevity, timber for premium aesthetics.
Choosing between timber, aluminium, and PVC windows depends on your priorities.
For Orli Interiors’ clients—whether renovating a luxurious coastal retreat or updating a family home—balancing style, durability, and long-term investment is key. If you’re still unsure, consider consulting a professional designer to help you choose windows that perfectly complement your home’s architecture and lifestyle needs.
Need help selecting the perfect windows for your home renovation? Orli Interiors can guide you through the decision-making process to ensure your windows enhance both the beauty and functionality of your space. Get in touch here.
Photo Credits: 1, 2, 5 Midcoast Windows; 3 & 4 – Cedarwest; 6 – Orli Interiors

15 Mar
Why Most Open-Plan Homes Feel Cold—And What I Do Instead
Open-plan living has become a go-to design choice for modern homes, offering light-filled, spacious interiors that encourage connection and flexibility. But many homeowners find that while open layouts look great in magazines, in reality, they can feel cold, echoey, and lacking in comfort.
So, how do you get the best of both worlds—the airiness of open-plan living with the warmth and cosiness of a well-designed home? Let’s break it down, tackling some of the most common open-plan concerns along the way.

One of the biggest challenges with open-plan layouts is that they can feel too open—like one giant room with no clear function.
✔ Use furniture to create “rooms within rooms”—A sectional sofa frames the lounge area, a large dining table anchors the eating space, and open shelving or a console subtly divides areas without blocking light.
✔ Try soft zoning with rugs—Placing a rug under your seating area instantly defines it as a separate, cozy space.
✔ Install partial dividers—Glass partitions, timber slats, or even statement pendant lights can help differentiate zones while maintaining openness.
Tip: Avoid pushing all furniture against the walls! Floating furniture naturally divides an open space while maintaining flow.

Expansive spaces can sometimes feel stark, especially if they lack texture, layers, and visual interest.
✔ Introduce layered lighting—Mix overhead lighting with wall sconces, table lamps, and pendant lights to create warmth and depth.
✔ Incorporate soft textures—Linen curtains, chunky knit throws, and upholstered furniture help soften a large space.
✔ Add natural materials—Wood, stone, and woven elements bring warmth and character to a space that might otherwise feel too sleek or minimalist.
Tip: If your open-plan space feels cold, check your lighting. A dimmable warm-white glow makes all the difference!

Without walls to absorb sound, open spaces can quickly become noisy, especially with kids, pets, and multiple activities happening at once.
✔ Use rugs, curtains, and soft furnishings—These absorb sound and reduce echoes.
✔ Opt for upholstered furniture—Leather and timber surfaces reflect noise, while fabric helps dampen it.
✔ Strategically place bookshelves—A well-filled bookshelf or cabinetry can act as a sound buffer between zones.
Tip: If you’re designing an open-plan home from scratch, consider adding acoustic ceiling panels or textured wall treatments to help with sound control.
Large open spaces can be tricky to heat in winter and keep cool in summer, leading to higher energy bills.
✔ Invest in good insulation—This is key to regulating temperature in any home, especially an open one.
✔ Use ceiling fans for airflow—They help circulate air and reduce reliance on heating and cooling systems.
✔ Layer window treatments—Sheer curtains let light in during the day, while heavier drapes provide insulation at night.
Tip: Zoning your heating and cooling system can save energy by allowing you to adjust temperatures for specific areas instead of the entire space.

One downside of an open kitchen is that smells and grease can easily travel into the living and dining areas.
✔ Invest in a high-quality range hood—The stronger the ventilation, the less likely smells will linger.
✔ Create a semi-open kitchen—Sliding glass doors or a pass-through window can provide flexibility between open and closed.
✔ Use air-purifying plants—Certain plants, like peace lilies and bamboo palms, help absorb odours and improve air quality.
Tip: If your kitchen opens directly into the living area, opt for non-porous, easy-to-clean surfaces to prevent grease build-up.

With fewer walls, storage can become an issue, and an untidy space is always on display.
✔ Opt for built-in storage—Custom cabinetry, window seats with hidden storage, and multi-functional furniture help keep clutter at bay.
✔ Stick to a cohesive colour palette—Too many competing colours can make an open-plan space feel chaotic.
✔ Edit your décor—Less is more. A few well-placed statement pieces create impact without overwhelming the space.
Tip: Floating shelves or cabinetry with closed doors let you store everyday items while keeping visual clutter to a minimum.
Open-plan homes don’t have to feel cold or overwhelming. With the right mix of zoning, lighting, textures, storage solutions, and sound control, you can create a home that feels both spacious and inviting.
Would you like help designing an open-plan space that feels warm and functional? Let’s chat—I’d love to bring your vision to life.

01 Mar
Nature-Inspired Interiors: How I Bring the Outdoors In
I am often asked how do I bring nature into my home? Bringing nature into your home isn’t just about adding a few potted plants (though they’re always a great start). It’s about creating a space that feels calm, grounded, and connected to the outdoors – something we Northern Beaches locals value deeply. I truly believe that a home inspired by nature can enhance your well-being, making every day feel like a breath of fresh air. So, if you’re wondering how to infuse your interiors with the beauty of the natural world, here are some practical ways to do it.
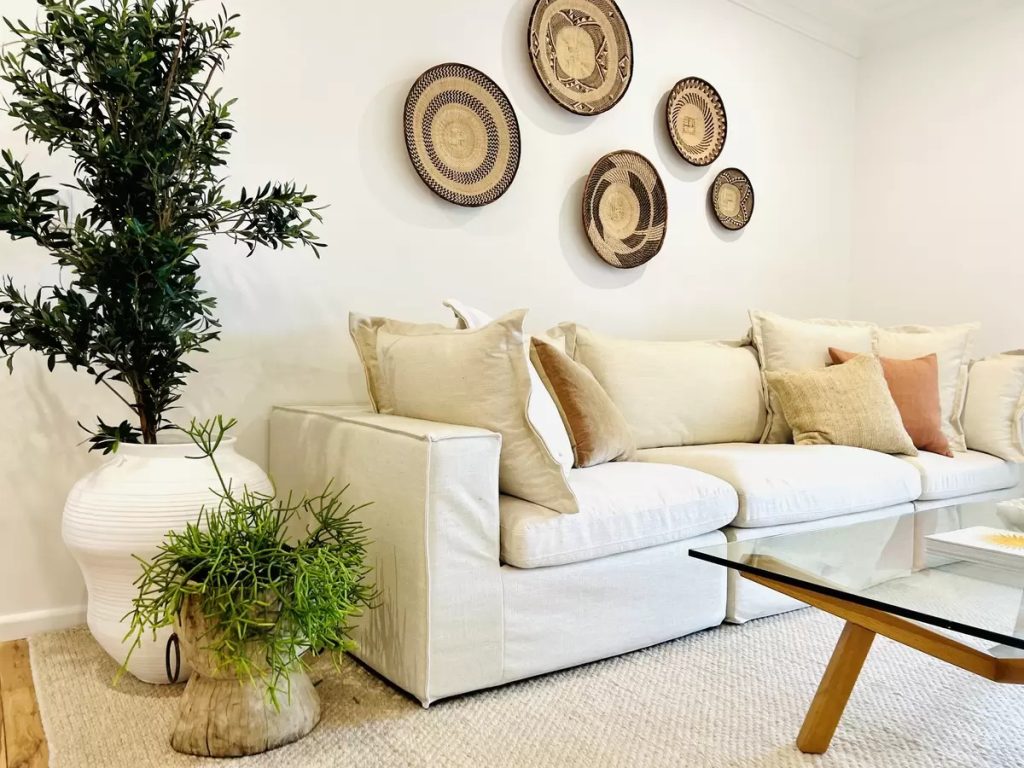

One of the simplest ways to bring nature indoors is by using natural materials in your design. Think timber, stone, linen, rattan, and even cork. These materials not only add texture and warmth but also create a timeless aesthetic that’s both inviting and durable.
Stone and Marble: Natural stone benchtops in your kitchen or a marble feature in your bathroom adds depth and character, and with a plethora of colours and infinite number of unique slabs to choose from this is a great choice for adding a touch of grounded luxury.
Wooden Elements: From hardwood floors to exposed beams and custom joinery, timber instantly brings a sense of the outdoors inside. Opt for lighter woods like oak or ash for a breezy, coastal vibe, or darker timbers for a more grounded, earthy feel. Soft walnut tones are making a big comeback in design right now!
Textiles: Swap out synthetic fabrics for layered linen or cotton in your cushions, throws, and curtains. Not only do they feel better, but they also age beautifully, much like nature itself.
Wallpaper: Textural grasscloth wallpaper brings a wonderfully earthy element to a space, alongside botanical prints and murals.
Natural light is a design element in itself. Maximise the natural light in your home by opting for sheer curtains, larger windows, and skylights where possible.
Oversized windows and glass doors are in themselves the perfect means of bringing a sense of the outside in, with views to the garden and surrounding landscaping creating meaningful connections with nature.

Reflective Surfaces: Use mirrors strategically to reflect light and make your space feel brighter and more open.
Soft Colour Palettes: Lighter, neutral tones like soft whites, beiges, and greys can enhance the effect of natural light, giving your home an airy, spacious feel.


Plants are the most obvious way to introduce nature into your home, but it’s all about how you use them.
Indoor Plants: Go beyond a single fiddle leaf fig. Mix and match different types of plants – from large statement pieces like monstera and rubber plants to smaller succulents and hanging vines.
Herb Gardens: If you love cooking, consider a small indoor herb garden in your kitchen. Fresh basil, mint, and rosemary not only smell divine but are handy too!
Dried Botanicals: Not blessed with a green thumb? Dried flowers and grasses, like pampas grass or eucalyptus, add a rustic charm and require zero maintenance.

The colours you choose for your walls, furniture, and accessories can greatly influence how natural your home feels.
Earth Tones: Shades like terracotta, olive green, sandy beige, and soft blues are all inspired by nature and bring a sense of calm to any room.
Accent Walls: If you’re not ready to commit to a full colour change, try an accent wall in a deep green or warm ochre to bring a bit of the outdoors in.
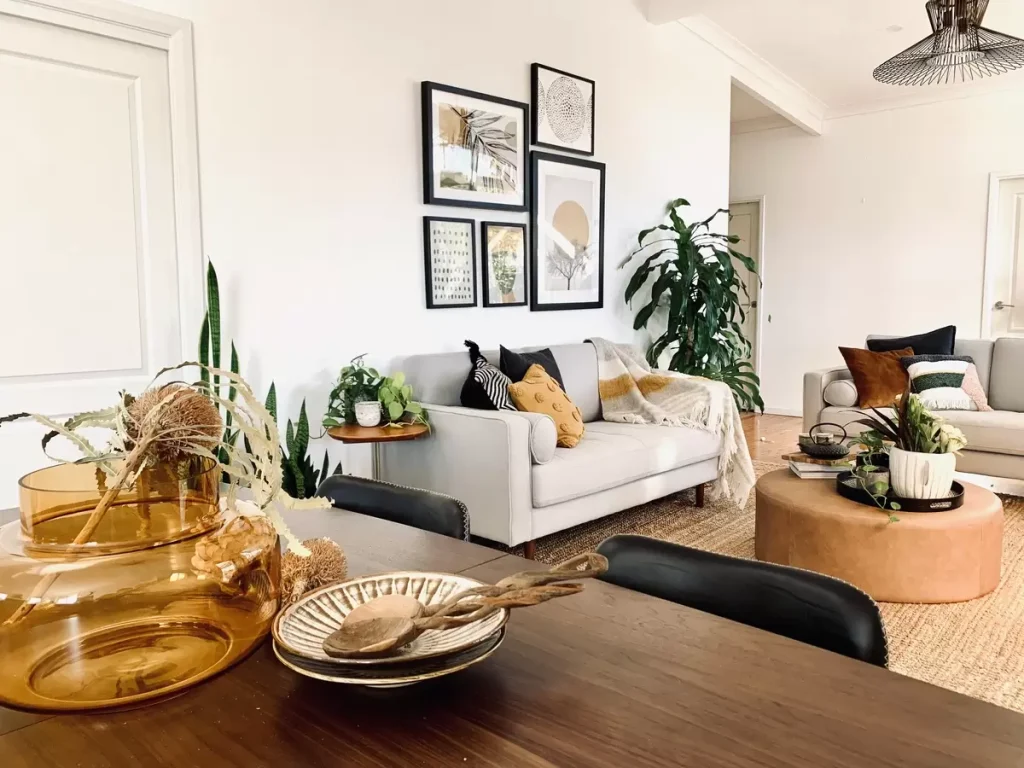
Nature is rarely rigid or geometric, so incorporating organic shapes into your interiors can create a more natural flow.
Curved Furniture: Opt for round tables, curved sofas, or arched mirrors to soften the lines in your home.
Irregular Patterns: From rugs with abstract designs to hand-thrown ceramics, items that embrace imperfections feel more connected to nature.

Scent is often overlooked in interior design, but it’s a powerful way to evoke nature.
Essential Oils and Diffusers: Scents like eucalyptus, lavender, and citrus can make your home feel fresh and invigorating.
Natural Candles: Choose soy or beeswax candles with natural fragrances for a subtle, cosy ambiance.
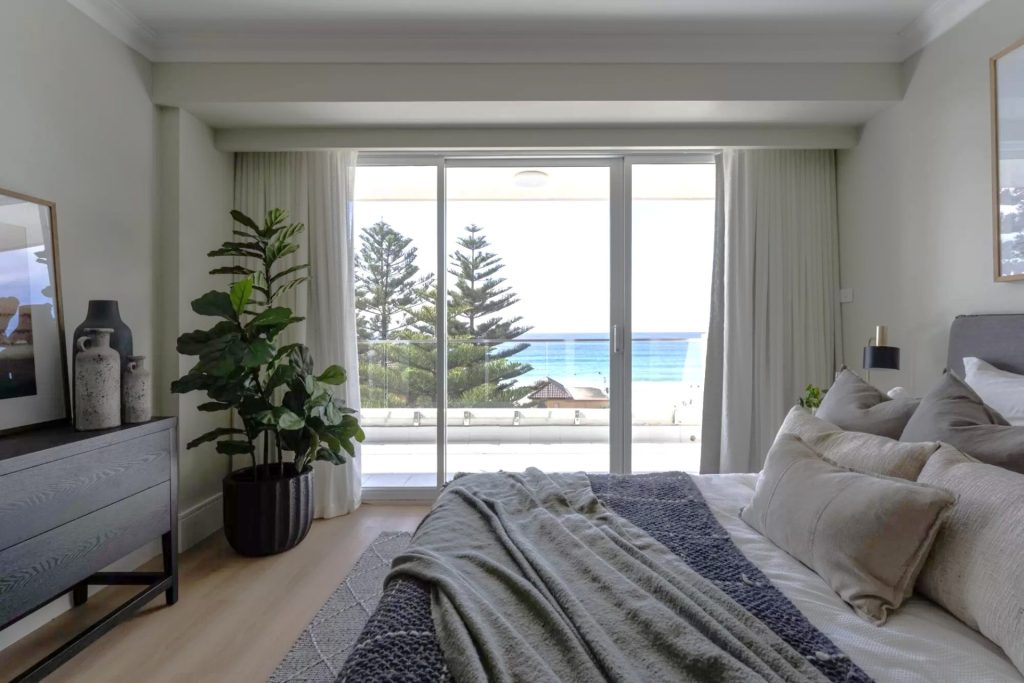
If you’re lucky enough to have beautiful views of one of our stunning beaches, make the most of them!
Large Windows and Sliding Doors: Open up your space to the outdoors with floor-to-ceiling windows or sliding glass doors.
Outdoor-Indoor Living: Create a seamless transition between your indoor and outdoor spaces with cohesive flooring, large openings, and complementary design elements.
For busy professionals, or those raising a family or enjoying an empty nest, styling with houseplants is generally the go-to way to bring the outdoors in, so here’s a few tips to consider before heading to the garden centre:
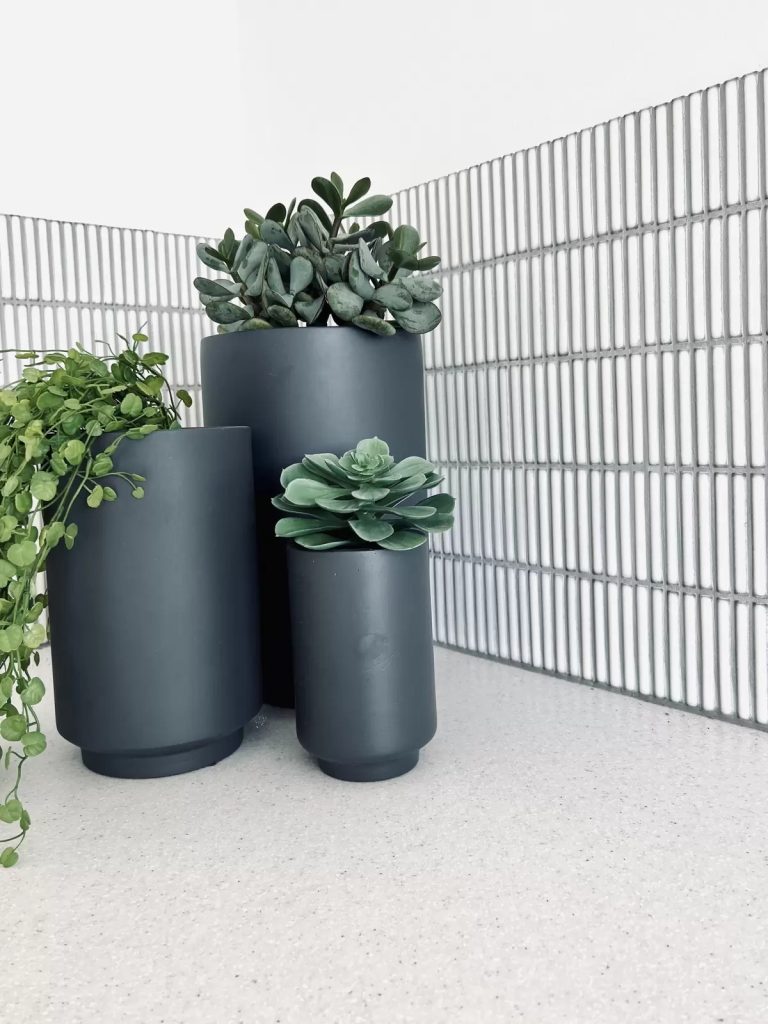
Elegant, Low-Maintenance Greenery – Opt for timeless, resilient plants like fiddle-leaf figs, peace lilies, or snake plants that require little attention but make a statement.
Strategic Placement for Visual Impact – Frame a grand entryway with large planters, style shelving with cascading Pothos, or add a touch of life to a sophisticated kitchen island.
Air-Purifying & Wellness Benefits – Prioritize plants that enhance air quality and promote relaxation, perfect for home offices, ensuites, and retreat-style living spaces.
Bespoke Planters & Finishes – Elevate your design with artisanal ceramic, stone, or woven baskets that complement your home’s aesthetic.
Child & Pet-Friendly Options – For family homes, choose non-toxic varieties like Calatheas and Parlor Palms to ensure a safe, stylish space.
Effortless Care Solutions – Self-watering planters, moisture meters, or a dedicated plant service can help maintain your greenery with minimal effort.
Seasonal Styling & Fresh Energy – Rotate in seasonal greenery or sculptural branches for a dynamic, ever-evolving interior.
Blending Indoor & Outdoor Living – Integrate statement pots in alfresco areas to create seamless transitions between your home’s interior and exterior spaces.
By curating plants intentionally, you can achieve a refined, nature-infused home that feels both sophisticated and welcoming—without adding to your every expanding to-do list!
Why Bringing Nature Indoors Matters
Incorporating natural elements into your home isn’t just about aesthetics – it’s about creating a space that feels harmonious, calming, and rejuvenating. As Northern Beaches locals, we’re fortunate to be surrounded by beautiful landscapes, and bringing that beauty into our homes can enhance our daily lives.
At Orli Interiors, we’re passionate about creating homes that balance aesthetics with practical functionality, while reflecting your unique personality. Whether you’re planning a full renovation or just looking to refresh your space, we’re here to help you bring nature into your home in a way that feels effortless and authentic – get in touch here.

15 Feb
Clever Storage Solutions for Busy Families: Designing a Home That Works Harder for You
Managing a household while balancing a demanding career and raising young kids can often feel like a juggling act—especially when your home isn’t pulling its weight. For busy professionals with energetic kids, having a beautifully designed space is just as important as having one that’s practical, organised, and easy to maintain.
When it comes to creating a calm, clutter-free environment amidst the chaos of daily family life, clever storage isn’t just a ‘nice-to-have’—it’s essential. But we’re not talking about the usual storage hacks you’ll find in a quick Pinterest scroll. We’re talking about smart, design-led solutions that seamlessly integrate with your home, making life easier without compromising on style.
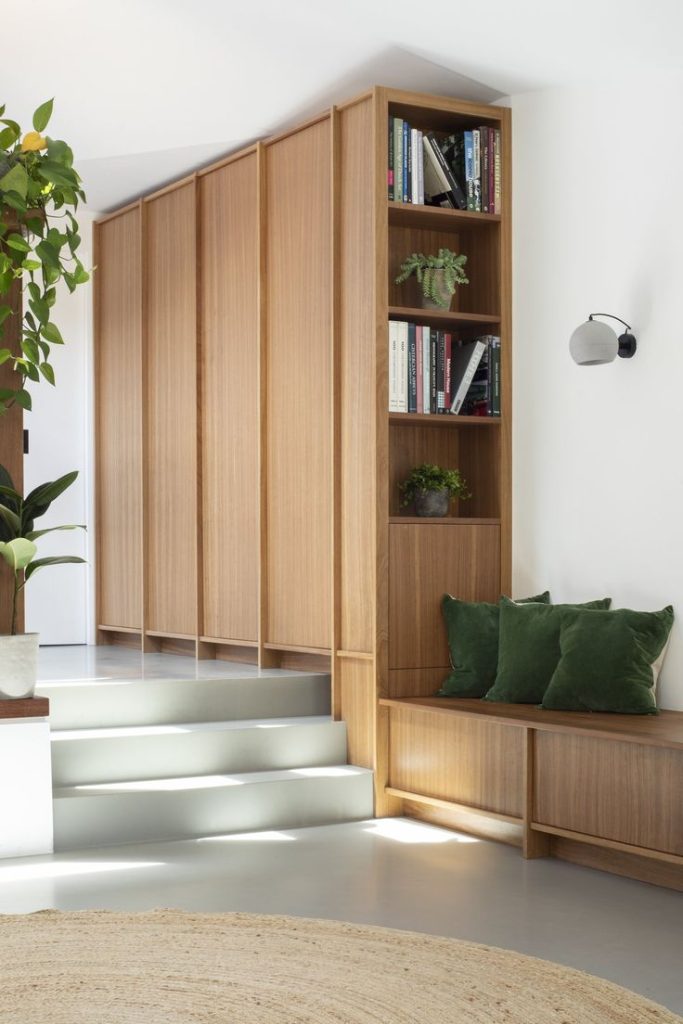
One of the best ways to maintain a clean, organised look is to make storage disappear—literally. Invisible storage refers to built-in cabinetry and hidden compartments that blend seamlessly with your interiors. Think floor-to-ceiling joinery with handleless doors in your living room that look like sleek panelled walls but open up to reveal shelves, drawers, and even concealed workspaces.
Why it’s brilliant for busy families:
Pro Tip: Opt for push-to-open mechanisms to avoid little fingers getting caught, and consider using soft, neutral colours to maintain an airy, open feel—even when the storage is packed full.

When space (and sanity) is at a premium, every piece of furniture should do double duty. Gone are the days when a coffee table was just a coffee table. Today, you’ll find ottomans with hidden storage, benches with lift-up lids, and beds with built-in drawers underneath.
Clever Ideas to Consider:
Pro Tip: Choose upholstered pieces in durable, easy-clean fabrics—bonus points if they’re stain-resistant for those inevitable juice spills and sticky fingers.
When floor space is limited (or just precious), think vertically. Walls aren’t just for art—they’re untapped real estate for smart storage solutions.
How to Maximise Vertical Space:
Pro Tip: In open-plan areas, opt for floating shelves or sleek built-ins that match your walls’ colour to create a cohesive, uncluttered look without feeling boxy.
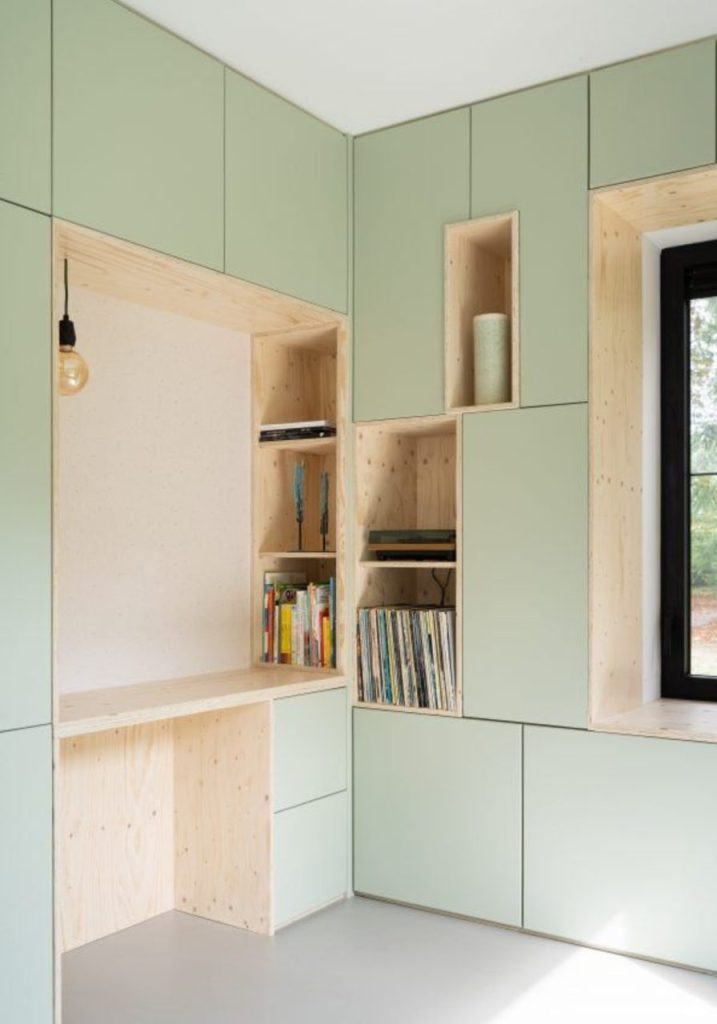

For busy families, the kitchen isn’t just for cooking—it’s command central. Smart storage here can save you time, reduce stress, and cut down on food waste by making everything super accessible and easy to see.
Next-Level Kitchen Storage Ideas:
Pro Tip: Include a “family hub” drawer with compartments for charging devices, storing mail, and organising school notes—a lifesaver for busy mornings.

Sometimes, the best storage solutions are hiding in plain sight. These unexpected spaces can be game-changers:
Pro Tip: In kids’ rooms, use the space under loft beds creatively—not just for desks but for built-in wardrobes, play areas, or secret storage cubbies and book shelves.

While clever cabinetry is essential, true organisation comes down to having the right systems in place. It’s not just about where things go, but how they’re stored to make daily routines smoother.
Systems That Save Time (and Sanity):
Pro Tip: Involve the whole family in maintaining these systems. Even young kids can learn to pop their shoes in a cubby or put their toys back in labelled bins.
For busy families like yours, the goal isn’t just a clutter-free home—it’s creating a space that supports your lifestyle. Smart storage solutions aren’t about cramming more into less space; they’re about designing a home that feels calm, organised, and effortlessly functional.
At Orli Interiors, we understand that your time is precious. That’s why we design homes with not just beauty in mind, but real-life functionality—so you can spend less time tidying and more time enjoying the moments that matter.
Ready to create a space that works harder for your family? Get in touch with us today—let’s design a home that makes life easier, one clever storage solution at a time.
Photo credits

01 Feb
The Ultimate Guide to Tapware Finishes: Pros, Cons, and Aesthetic Suitability
Choosing the right tapware finish can elevate the overall aesthetic of your kitchen, bathroom, or laundry while also impacting durability and maintenance. But what is the most durable finish for tapware? What colour tapware is timeless? From classic chrome to bold matte black, each finish has its own strengths and weaknesses. Here’s an in-depth guide to help you navigate the world of tapware finishes and select the best option for your space.
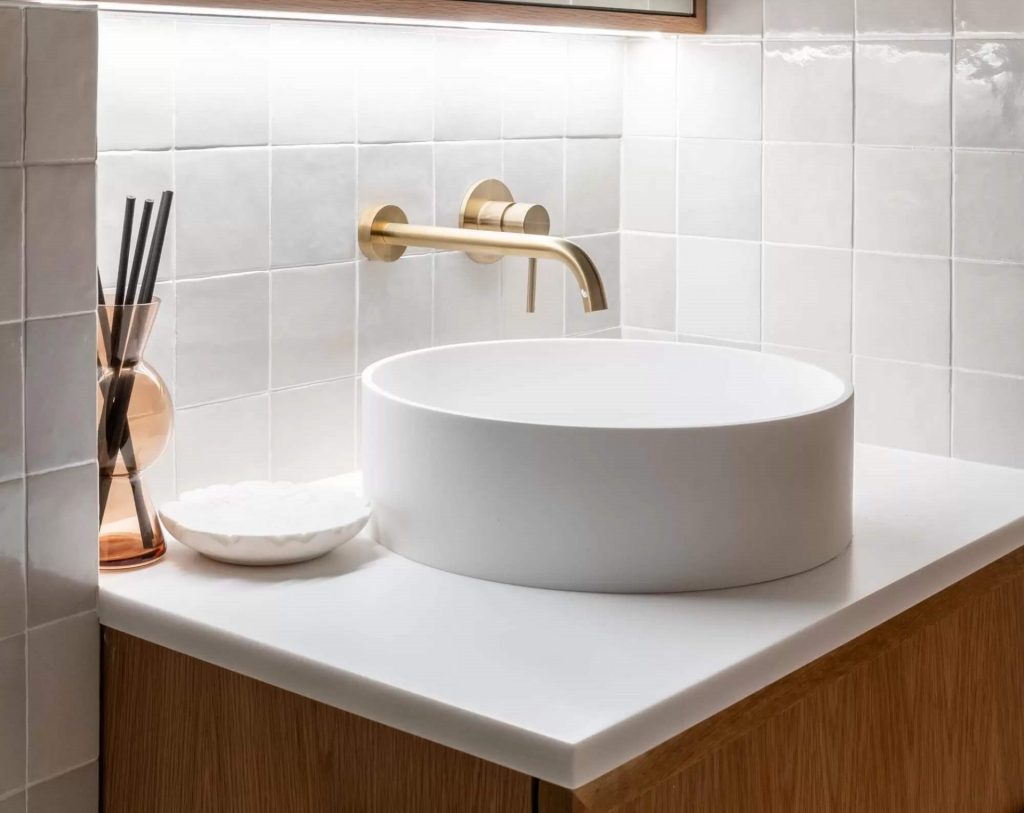
Aesthetic Appeal:
Chrome tapware is a timeless choice that suits a wide range of styles, from traditional to modern. Its highly reflective, mirror-like surface makes it a popular option for those seeking a sleek and polished look.
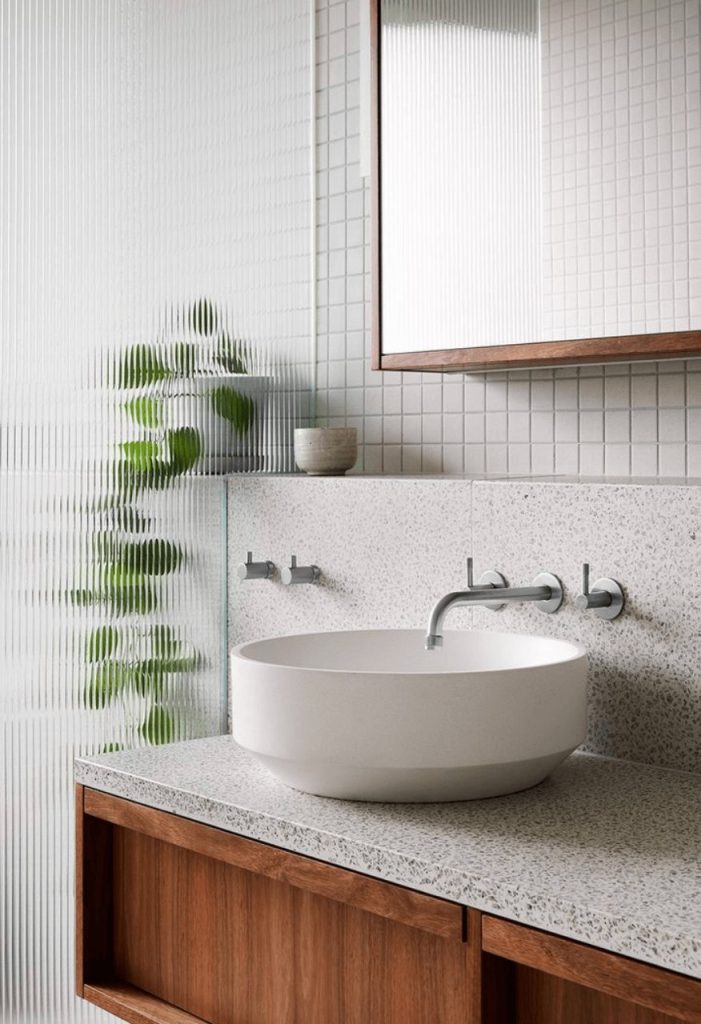
Pros:
✔ Affordable and widely available
✔ Easy to clean and maintain
✔ Highly durable with a corrosion-resistant surface
✔ Works well in contemporary and classic spaces
Cons:
✖ Shows fingerprints and water spots easily
✖ Can look too conventional if overused
✖ Scratches may be more visible over time
Best Suited For:
Maintenance Tips:
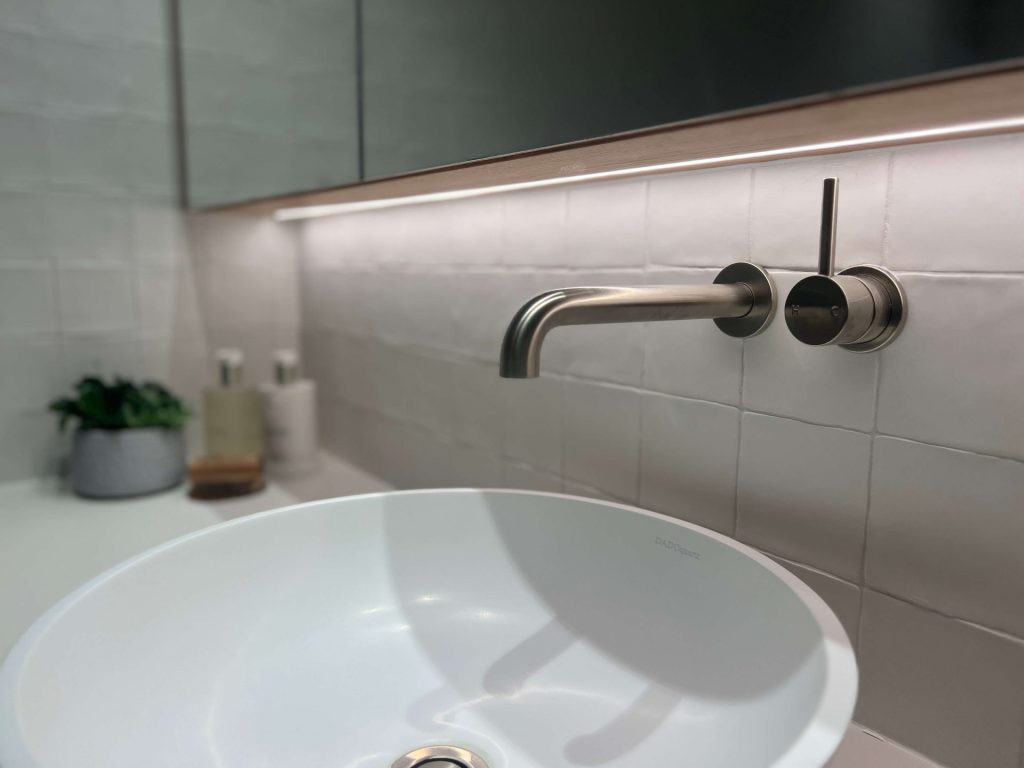
Aesthetic Appeal:
Brushed nickel and brushed stainless steel offer a soft, muted finish with a subtle texture that gives them a warm and sophisticated look. These finishes blend seamlessly into modern and industrial-style interiors.
Pros:
✔ More resistant to fingerprints and water spots than chrome
✔ Provides a warm, neutral tone that complements various colour palettes
✔ Highly durable and resistant to corrosion
✔ Matches well with stainless steel appliances
Cons:
✖ Slightly more expensive than chrome
✖ May require occasional polishing to maintain its brushed look
✖ Hard water stains can sometimes be difficult to remove
Best Suited For:
Maintenance Tips:
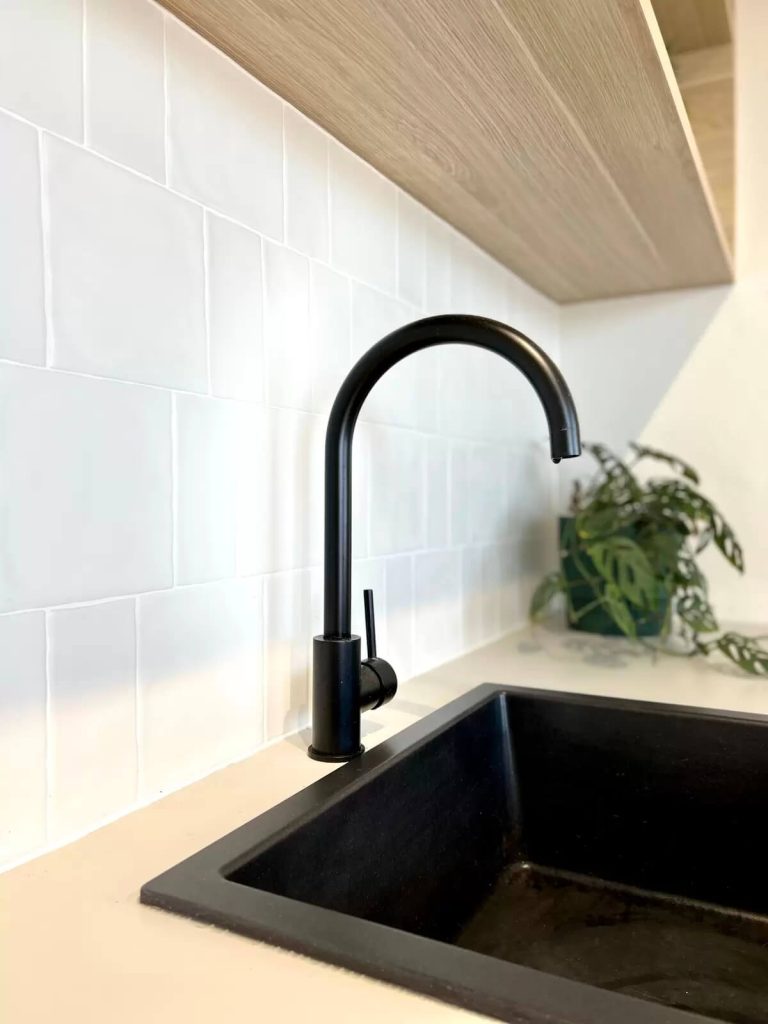
Aesthetic Appeal:
Matte black tapware has taken the design world by storm, offering a bold, modern, and slightly edgy aesthetic. It creates a striking contrast against lighter surfaces and brings minimalist style to any space.
Pros:
✔ Fingerprint-resistant and easy to maintain
✔ Adds a sophisticated and contemporary feel
✔ Pairs beautifully with white, marble, or timber finishes
✔ Works well in monochromatic or contrasting colour schemes
Cons:
✖ Can show soap scum and mineral deposits
✖ More prone to scratches compared to metallic finishes
✖ Can look overpowering in smaller spaces if overused
Best Suited For:
Maintenance Tips:
Aesthetic Appeal:
Brass and brushed gold tapware introduce warmth, richness, and a hint of vintage charm. Unlike the polished brass of the past, today’s brushed gold finishes have a more muted, elegant appearance.
Pros:
✔ Adds warmth and luxury to a space
✔ Less prone to showing fingerprints and water spots
✔ Works well with natural materials like timber, stone, and terrazzo
Cons:
✖ Higher cost compared to other finishes
✖ Requires occasional polishing to prevent tarnishing
Best Suited For:
Maintenance Tips:

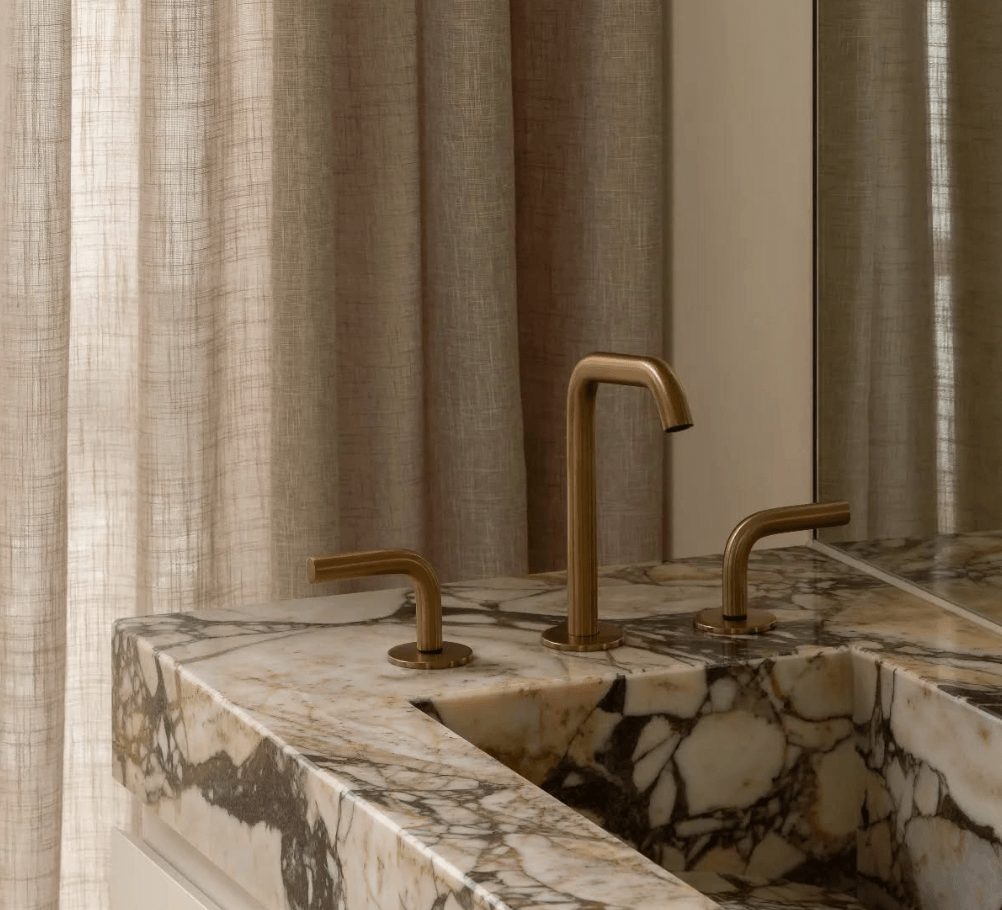
Aesthetic Appeal:
These warm-toned finishes bring a luxurious, elegant, and slightly vintage touch to a space. Bronze has a deeper, earthy feel, while copper and rose gold offer a more refined and striking appeal.
Pros:
✔ Adds warmth and richness to a space
✔ Works well in vintage, industrial, and contemporary designs
✔ Creates a standout feature in kitchens and bathrooms
Cons:
✖ More expensive than standard finishes like chrome✖ Rose Gold is currently somewhat dated whereas deeper bronze tones will stand the test of time
Best Suited For:
Aesthetic Appeal:
Gunmetal grey tapware offers a unique alternative to black or chrome. It has a deep, moody tone that adds an industrial yet refined touch to a space that isn’t as stark as matt black and is potentially less of a passing trend.
Pros:
✔ Provides a modern yet softer alternative to black
✔ Less prone to showing fingerprints and water spots
✔ Works well with concrete, stone, and timber elements
✔ Pairs well with both warm and cool colour palettes
Cons:
✖ Can be harder to source than chrome or black finishes
✖ More expensive than standard finishes
✖ May not suit very traditional interiors
Best Suited For:
Maintenance Tips:
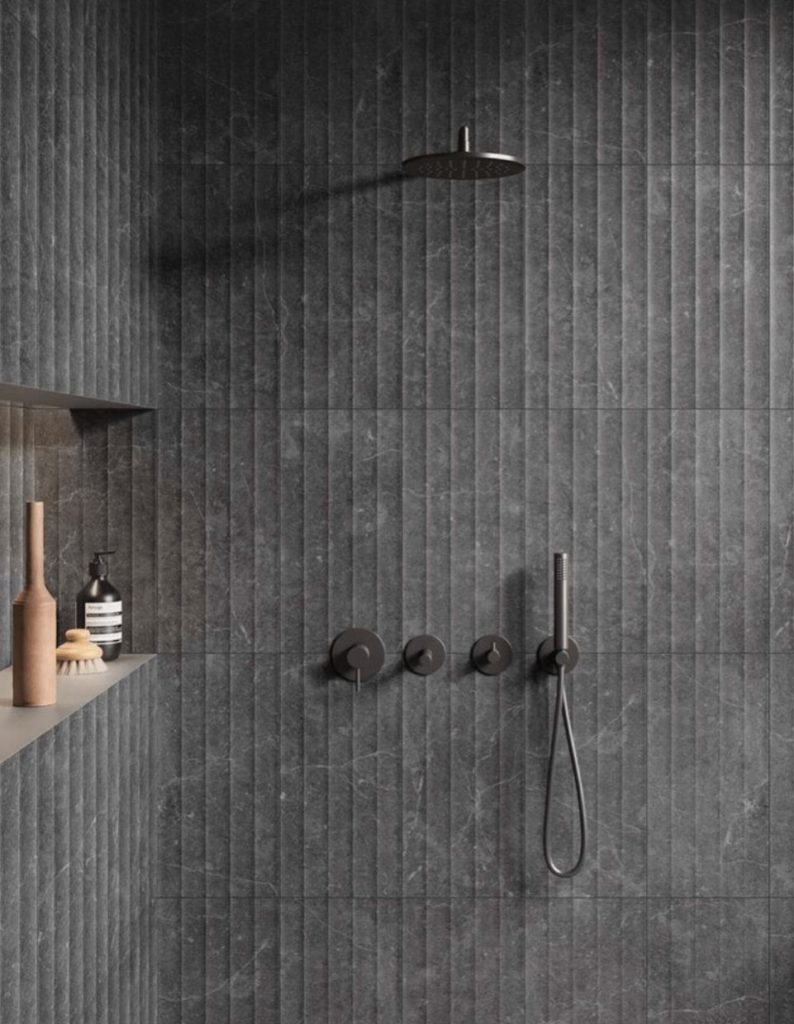
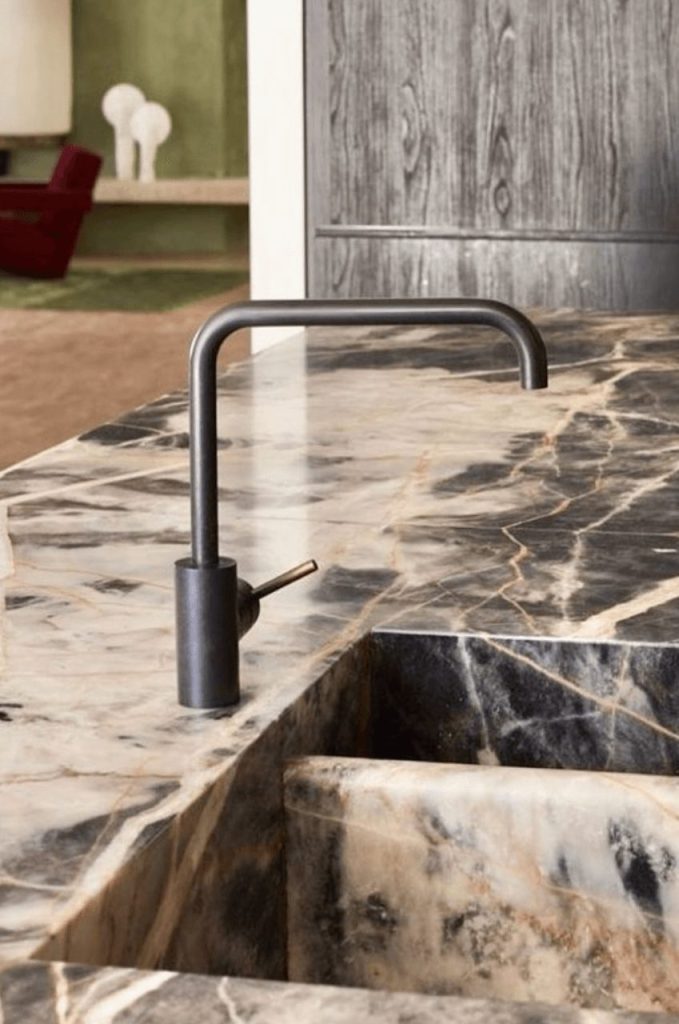

Aesthetic Appeal:
Living finish tapware is a bold and distinctive choice that brings warmth and an artisanal feel to a space. Over time, it will develop a beautiful patina, adding to its character and uniqueness.
Pros:
✔ Rich, warm tone that adds depth and luxury
✔ Develops a beautiful aged patina over time
✔ Naturally antimicrobial, reducing bacteria build up
✔ Works well with rustic, industrial, and vintage interiors
Cons:
✖ Will tarnish or change colour over time unless sealed
✖ Requires regular maintenance to prevent oxidation
✖ More expensive than common finishes like chrome
Best Suited For:
Maintenance Tips:
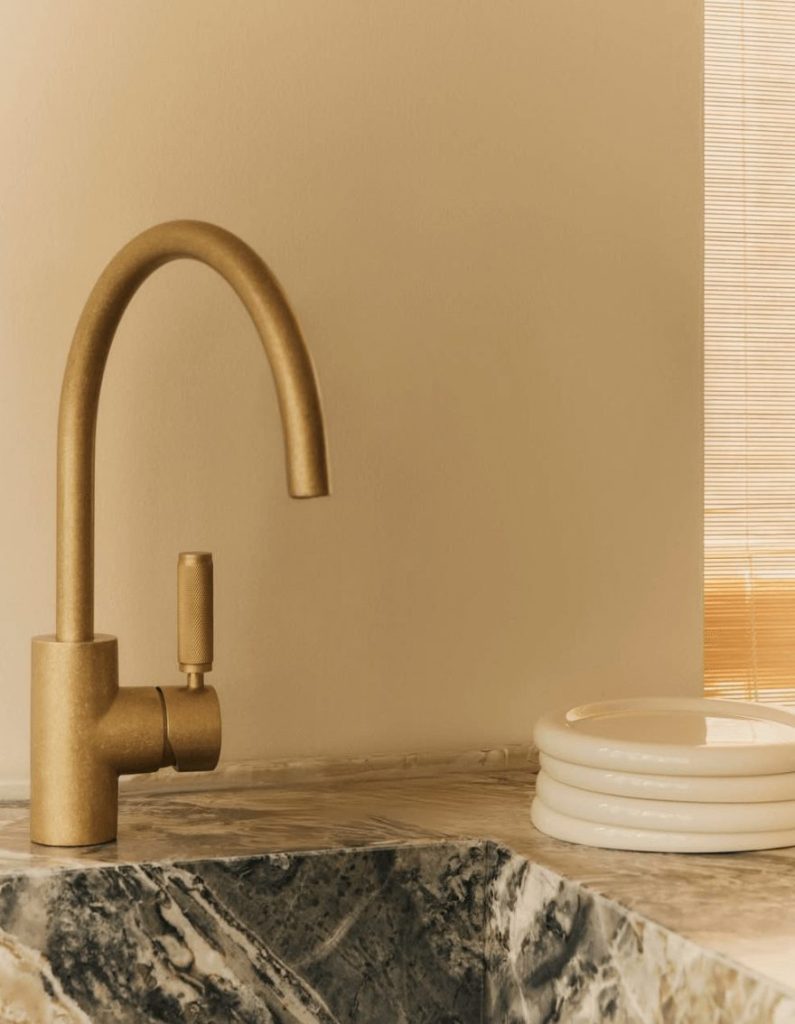
Aesthetic Appeal:
Tumbled tapware finishes offer a raw, aged, and weathered look, making them ideal for rustic, industrial, and vintage-inspired interiors. The tumbling process gives the metal a distressed appearance, highlighting natural imperfections and creating a unique patina over time.
Pros:
✔ Provides a beautifully aged, lived-in aesthetic
✔ Develops a unique patina that enhances character over time
✔ Less prone to showing fingerprints and water spots compared to polished finishes
✔ Works well with natural materials like timber, stone, and concrete
Cons:
✖ The finish can vary slightly from piece to piece due to the tumbling process
✖ May require sealing or periodic maintenance to prevent excessive ageing
✖ Not as commonly available as standard finishes like chrome or matte black
Best Suited For:
Maintenance Tips:
Aesthetic Appeal
White and coloured tapware provide a fresh, playful, and often unexpected design element. Whether it’s soft pastels, bold hues, or crisp white, these finishes add personality to a space.
Pros:
✔ Offers a unique and contemporary aesthetic
✔ Can create a striking contrast or blend seamlessly with colour schemes
✔ White finishes work well in coastal and Scandi-style homes
Cons:
✖ Can be prone to staining over time
✖ Less common and harder to find matching accessories
✖ Durability varies depending on the quality of the coating
Best Suited For:
Maintenance Tips:
Handle gently to prevent chipping or wear
Clean with warm soapy water to prevent stains
Avoid using coloured cleaning cloths that may transfer dye

Final Thoughts
The choice of tapware finish goes beyond aesthetics—it also impacts durability, maintenance, and how well the fixture integrates into your overall design. If you love a timeless, versatile look, brushed nickel may be your best bet. For a bold, modern statement, matte black or gunmetal grey are excellent options. Those leaning towards warmth and luxury should consider brushed gold or living brass, while lovers of contemporary or playful spaces might find coloured tapware the perfect fit.
General Tapware Maintenance Tips:
✔ Always dry tapware after use to prevent water stains and mineral build-up
✔ Avoid using abrasive cleaners or harsh chemicals that could damage the finish
✔ Regularly clean with a soft cloth and mild detergent to maintain its original appearance
✔ If unsure, check the manufacturer’s care guide for specific recommendations
Whichever finish you choose, ensure it complements your overall interior style and meets your practical needs. The right tapware finish can elevate even the simplest of spaces into something truly special.


18 Jan
Illuminating Design: How to light your joinery

Joinery is the unsung hero of interior design—the cabinets, nooks, and shelves that provide storage, style, and structure to your home. Joinery lighting, often overlooked, can turn this functional storage into a stunning design feature. Thoughtfully integrated lighting will showcase your own unique style, enhancing both aesthetics and functionality. Read on to find out how to light your joinery.

Joinery lighting is the winning combination of functionality and flair, as practical as it is beautiful. It highlights craftsmanship, improves usability, and adds layers of depth by:
1. Accentuating Your Collected Treasures
From heirlooms to travel trinkets and sculptural beauties, proper lighting draws attention to the details that tell your story. Consider a backlit bookcase glowing softly in the evening or spotlights that bring your collected treasures into sharp focus – highlighting a gallery of cherished photos or children’s art, unique pieces you have collected or sentimental objects. Highlighting the pieces you love and making your home uniquely yours.

2. Setting the Mood
Lighting isn’t just practical—it’s an atmosphere builder. Soft, ambient lighting in your living room shelves creates a cosy evening vibe, while bright task lighting in your study boosts productivity. A warm LED light placed under the kitchen benchtop to highlight the island facade is a great way of adding subtle mood lighting to the area. Adjustable lighting solutions let you tailor your home’s mood to every occasion.
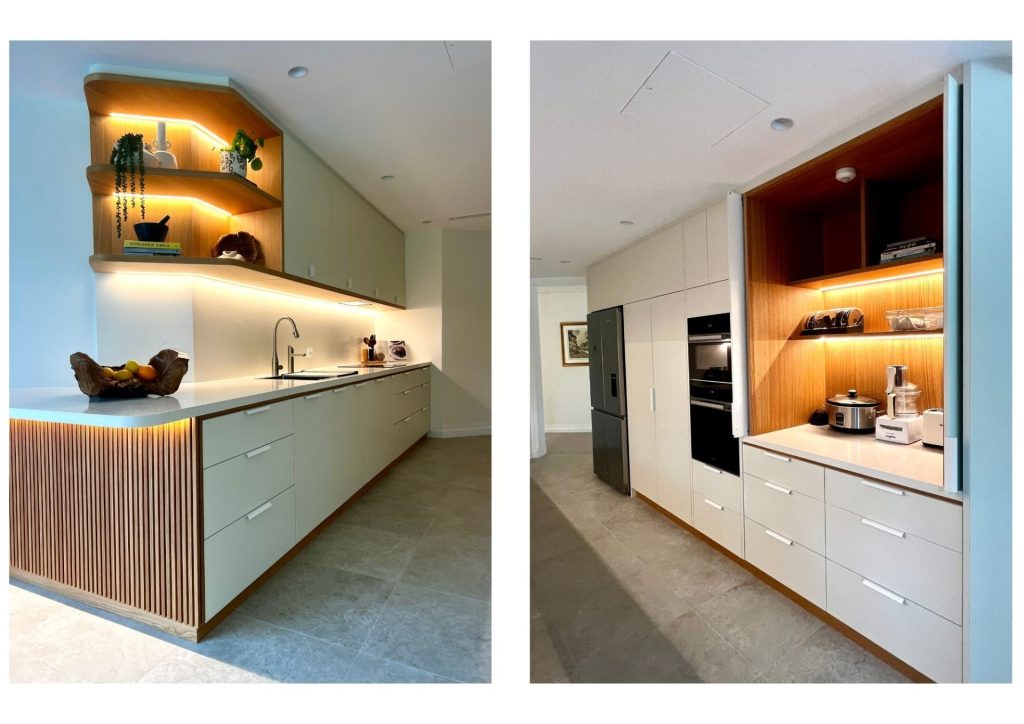
3. Enhancing Everyday Functionality
Thoughtfully placed joinery lighting streamlines everyday tasks allowing you to effortlessly find spices in your kitchen cabinet or pull together an outfit from a brilliantly illuminated wardrobe. Under-cabinet lighting in kitchens and LED strips in wardrobes are just a couple of ways joinery lighting makes daily life smoother and more enjoyable. A well lit space is something you don’t notice until it isn’t!
4. Being Stylish and Sustainable
Energy-efficient lighting, like LEDs, blends seamlessly with modern sustainability goals. Long-lasting and cost-effective, they reduce your energy consumption while adding a chic touch. Stylish and eco-conscious? Yes, please!


Selecting the right light fixtures for joinery lighting is critical to achieving a functional and aesthetically pleasing result.

If you would like some help to light up your life, one perfectly placed fixture at a time, then please reach out to us here – we’d love to show you how to light your joinery!

01 Jan
Styling Your Outdoor Space for Summer: How to Create an Alfresco Oasis
So Christmas is done but summer has just begun! Now is the perfect time to transform your outdoor space into a stunning sanctuary for relaxation, entertaining, and enjoying the balmy Australian evenings. Whether you’re working with a spacious backyard or a compact balcony, thoughtful design can elevate your outdoor area into a place of style and functionality.
Here’s a guide to help you style your outdoor space for summer, ensuring it becomes the perfect extension of your home.
1. Define the Purpose of Your Space
Before diving into the aesthetics, it’s essential to consider how you’ll use your outdoor space. Will it be a serene spot for family dinners, a lively area for entertaining friends, or a tranquil escape for solo relaxation? Defining the purpose will guide your decisions on layout, furniture, and accessories. If you have the luxury of space for creating different zones for different purposes, include this in your planning and landscaping to make the most of every square metre available.
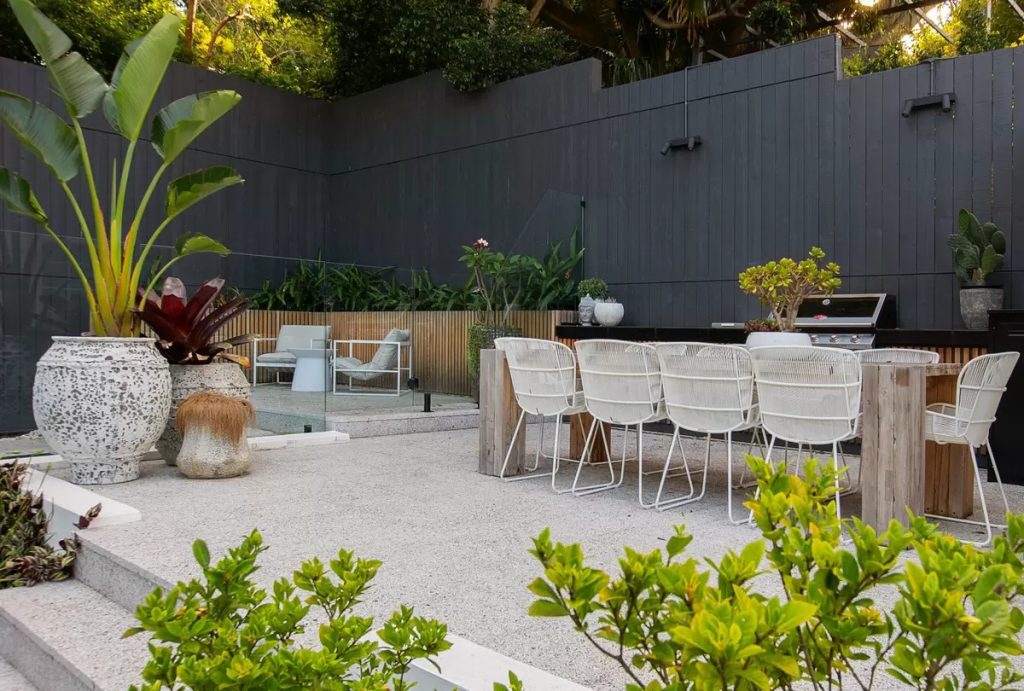
2. Invest in Durable and Stylish Furniture
Choosing the right furniture is crucial. Look for weather-resistant pieces that can withstand Australia’s harsh sun and occasional downpours. Materials like teak, aluminium, and synthetic wicker are excellent options.
Outdoor fabric technology has come a long way and there are some wonderfully textural options out there that feel just like indoor upholstery, so be sure to investigate custom options if budget permits. Tired outdoor furniture can also be given a new lease of life with freshly upholstered cushions.
Similarly there are some excellent outdoor rugs available – soft with wool-like texture, these are made from recycled bottles so they are kind to the planet too.
Dining Area: Opt for a robust dining table paired with comfortable, stylish chairs.
Lounge Area: A modular outdoor sofa with plump cushions in UV-resistant fabric can provide a cosy space for unwinding.
Compact Spaces: For smaller areas, consider foldable furniture or a bistro set to maximise functionality without compromising on style.
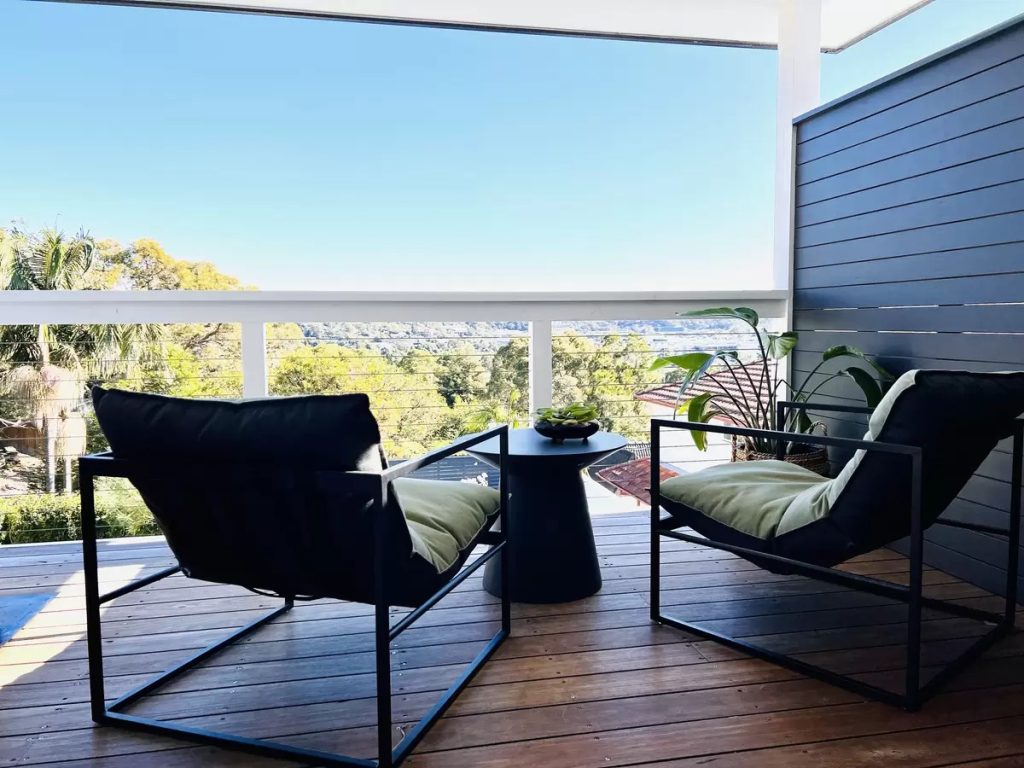
3. Create Zones for Functionality
Divide your outdoor space into functional zones to ensure versatility and flow, and if your outdoor space is uncovered, consider where the morning sun and afternoon shade can be found for the most comfortable location in relation to function. Eating breakfast in the winter sun can be wonderful, but having lunch in the baking heat less so!
Dining Zone: Place the dining set close to your indoor kitchen or outdoor grill for convenience.
Lounge Zone: Create a conversational area with sofas or armchairs centred around a coffee table or firepit.
Green Zone: Dedicate a corner for greenery with planters, herbs, or a vertical garden for a lush touch.
Layering rugs or using planters as dividers can help subtly demarcate these zones.

4. Focus on Lighting for Ambiance
The right lighting can completely transform your outdoor space after sunset.
Consider a mix of functional and decorative lighting:
Overhead Lighting: String lights or lanterns add a magical glow, ideal for evening gatherings. Alternatively a statement pendant or cluster of pendants can create a focal point to the area.
Task Lighting: Install LED strip lighting under countertops or bollard lights along pathways for practicality.
Accent Lighting: Lighting to some of the more striking planting in the garden will bring the whole outdoor space to life.

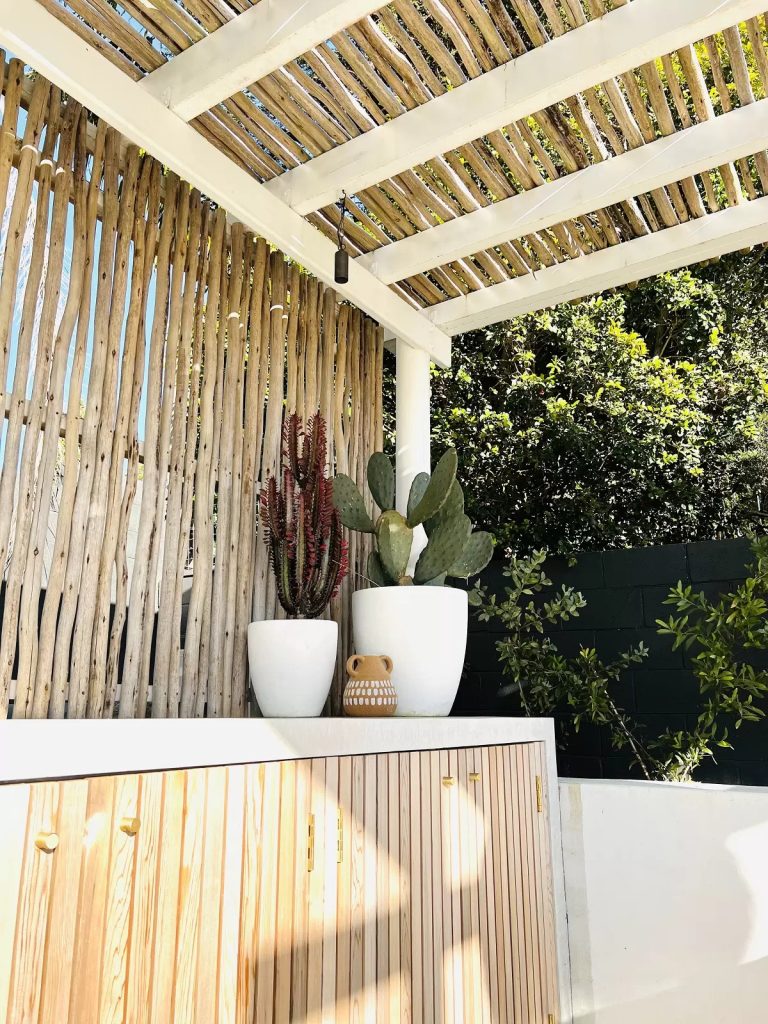
5. Incorporate Natural and Coastal Elements
As a business based in Sydney’s Northern Beaches, we embrace a coastal aesthetic that complements the region’s natural beauty. Bring in these elements through:
Natural Materials: Use timber or stone furniture and accessories for an organic feel.
Coastal Colours: Stick to a palette of whites and sandy neutrals to evoke the beach.
Textures: Add a mix of materials like rattan, jute rugs, or woven throws to create depth and warmth.
6. Add Greenery and Landscaping
Lush greenery is the key to transforming your outdoor space into a vibrant summer retreat. Opt for plants that thrive in the Australian summer to ensure lasting beauty:
Planting for Visual Impact: Create a stunning, cohesive look by mixing plants with contrasting sizes, leaf shapes, and heights. Consider grouping plants en masse for a structured, modern aesthetic, or go for a tropical vibe with a variety of vibrant, oversized foliage to evoke a sense of lush, exotic escape.
Vertical Gardens for Small Spaces: Maximise your space with vertical gardens, which are perfect for adding greenery to compact patios or balconies. These living walls not only save floor space but also bring a dramatic, eye-catching feature to your outdoor area.
Native Plants for Low Maintenance: Incorporate hardy, drought-tolerant Australian natives like kangaroo paw, grevillea, or succulents. These plants are ideal for withstanding summer heat while adding a touch of local charm and colour to your garden.
7. Embrace Multipurpose Features
Maximize your outdoor space by incorporating multifunctional elements that blend practicality with style.
Don’t forget to consider an outdoor kitchen as a game-changing feature for entertaining and convenience. From built-in BBQs and pizza ovens to mini-fridges and countertops, an outdoor kitchen allows you to prep and serve meals seamlessly without missing out on the fun. Pair it with a versatile dining table to effortlessly transition from casual family lunches to elegant dinner parties under the stars.
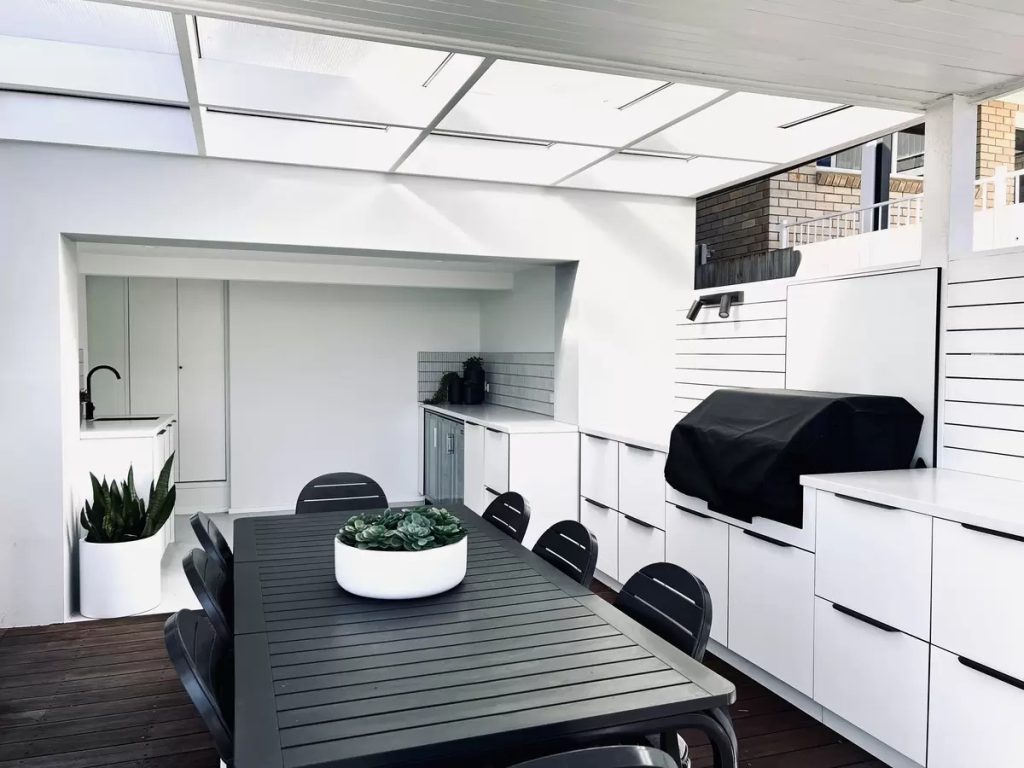
8. Accessorise Thoughtfully
Accessories are the finishing touch that brings personality to your outdoor space. Here’s how to elevate the look:
Cushions and Throws: Choose weather-resistant fabrics in subtle patterns or muted tones, and if your outdoor area is uncovered, consider where these will be stored when not in use.
Outdoor Rugs: Anchor seating areas with durable, fade-resistant rugs, but avoid the low cost plastic feeling rugs if budget permits. There are some fabulous wool-like outdoor options out there.
Decorative Pieces: Add a sculptural centrepiece on your dining or coffee table such as an Agave in a large vessel of water, or a structural succulent in a decorative planter.
Remember to strike a balance between aesthetics and functionality. Accessories should enhance comfort while tying the overall design together.
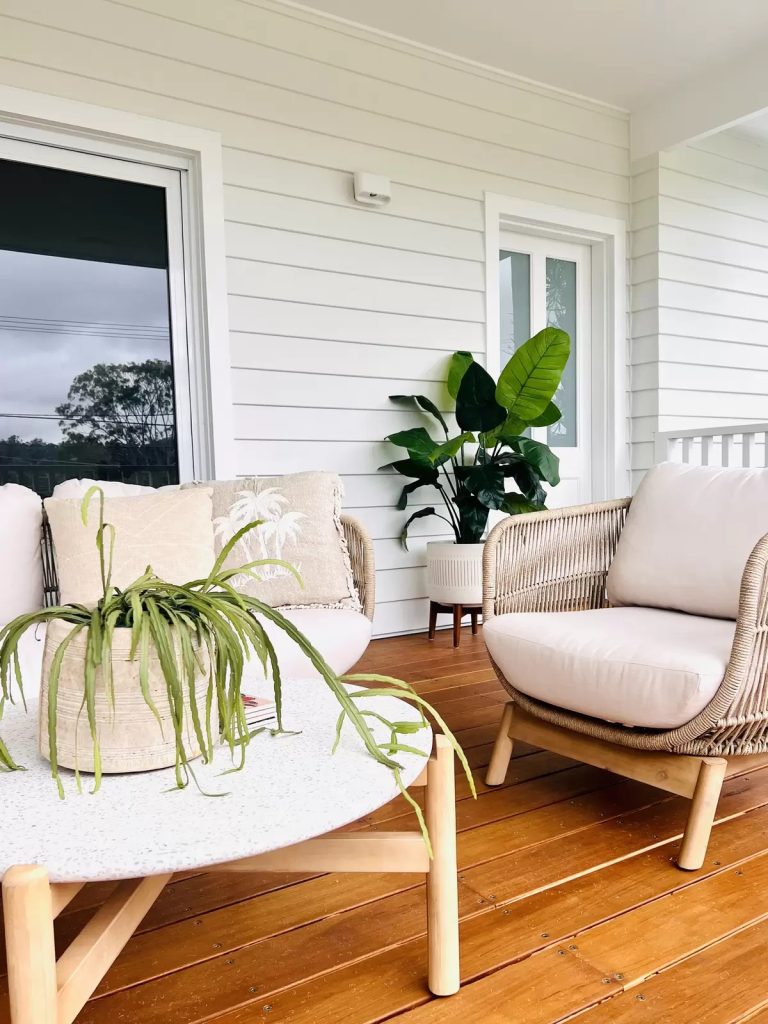
9. Think Sustainably
Sustainability is a rising priority in design. Consider these eco-friendly options for your outdoor space:
Solar Lighting: Harness the sun’s energy for eco-conscious illumination.
Recycled Materials: Look for furniture and décor made from repurposed or recyclable materials such as solid timber.
Rainwater Harvesting: If you’re adding landscaping, a rain barrel can provide a sustainable watering solution.
10. Stay Cool
For an extra level of comfort, integrate cooling features to beat the heat:
Misting Systems: Subtle and effective, they keep the area cool without soaking your guests.
Outdoor Fans: Ceiling or standing fans not only keep you cool but also help ward off insects.
11. Regular Maintenance is Key
To keep your outdoor space looking its best all summer, invest time in regular upkeep:
Clean and Protect Furniture: Use covers or store cushions indoors when not in use.
Tend to Plants: Water early in the morning or late in the afternoon to avoid scorching.
Inspect Lighting: Check for burnt-out bulbs or corroded fixtures periodically.
Creating a stylish outdoor space is about blending practicality with beauty. By investing in good quality, durable furniture, embracing the natural surroundings, and adding thoughtful touches, your outdoor area can become a cherished extension of your home. This summer your alfresco space can truly become the ultimate venue for connection, relaxation, and celebration.
Let us know if you need some help by emailing us here!
Final image credit – Beacon Lighting

18 Dec
Last-Minute Ideas to Make Your Christmas Table Look Fabulous
The holiday season is a whirlwind of activity, especially for busy families on Sydney’s Northern Beaches. Between school holidays, beach outings, and last-minute shopping, decorating your Christmas table might feel like an afterthought. But don’t worry – you can still create a show-stopping setting with minimal effort using items you likely have at home or can find easily, even in nature. Here’s how to ace decorating for Christmas with a touch of Northern Beaches charm.
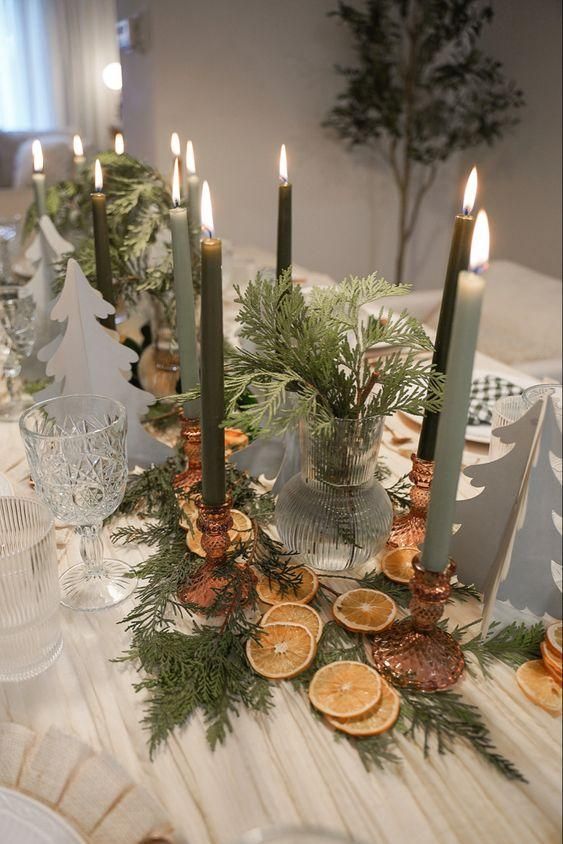
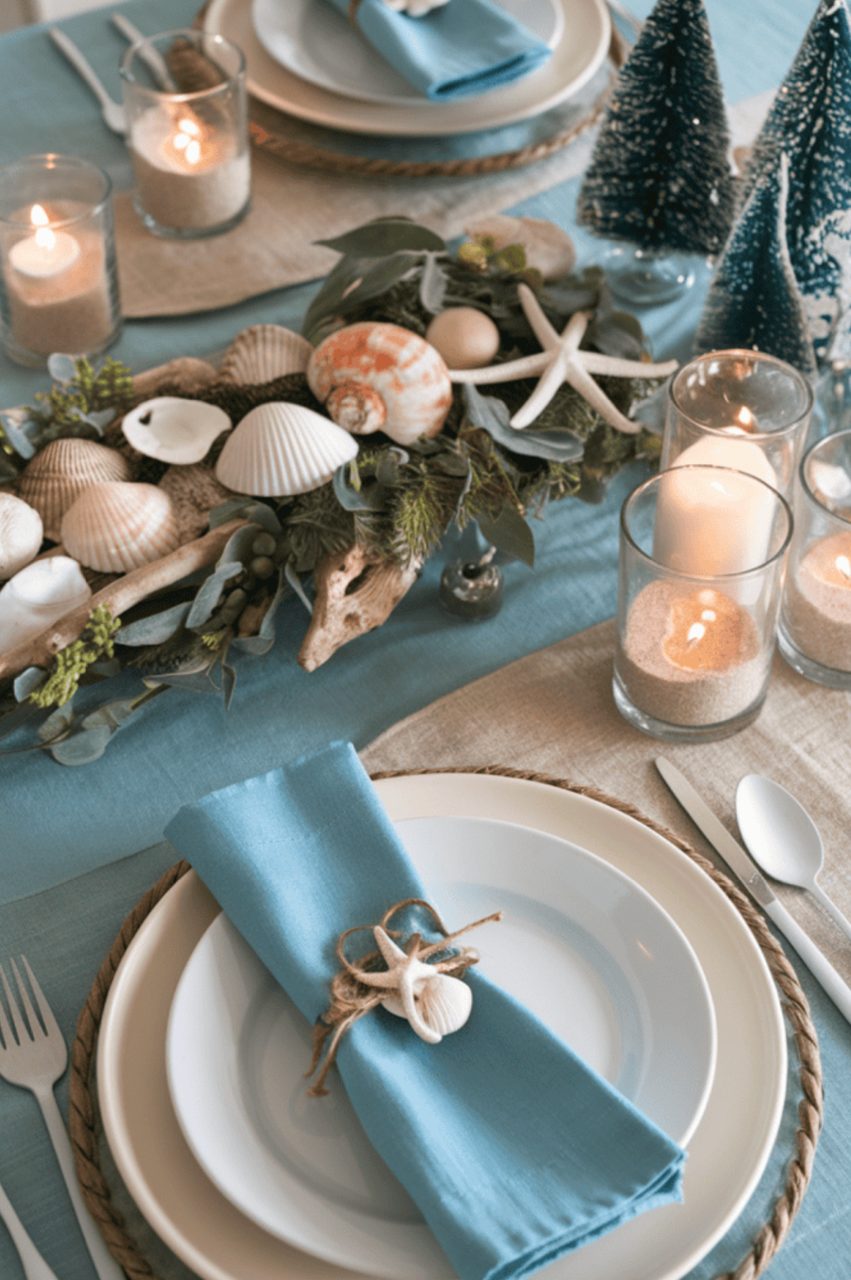
Living on Sydney’s Northern Beaches offers the perfect opportunity to incorporate natural elements into your Christmas table decor. For a beachy yet festive look:


Candles instantly elevate any setting. Create quick and unique candle holders using jars or glasses:
Fill the jars with sand or seashells – both are easy to gather from nearby beaches.
Nestle tea light candles on top for a coastal vibe. If you’re feeling fancy, tie some twine around the jar and add a small sprig of rosemary, some fruit slices or a star-shaped Christmas ornament.

Give your table a personal touch with custom place settings:
Cut name tags from recycled cardboard and tie them around rolled napkins with natural twine or use pinecones to hold them.
If you have kids, involve them by letting them draw festive motifs like stars or Christmas trees on the tags.
Use sprigs of herbs like thyme or lavender to tuck into napkin folds – it’s a simple touch that adds elegance and a subtle fragrance.
If you don’t have a table runner on hand, improvise with what you have at home:
A lightweight scarf in Christmas colours can double as a chic runner.
Alternatively, use butcher paper and let your kids or guests draw festive patterns on it. This doubles as a conversation starter and adds a playful element to your table.


Who says your tableware must match perfectly? Lean into the eclectic look:
Mix and match plates, bowls, and glasses from different sets.
For a cohesive touch, tie the look together with a consistent colour palette – for example, sticking to whites, greens, and reds.
Add small festive touches like tying a ribbon around cutlery or placing a candy cane on each plate.
Have leftover Christmas tree trimmings or extra greenery? Use them to make mini wreaths or garlands for the table:
Arrange these greens along the centre of the table with a few ornaments nestled in for sparkle.
Snip a few branches of magnolia, pine, or rosemary to create lush accents.

Fruits can serve as functional and festive decor:
Arrange bowls of vibrant citrus fruits like oranges and lemons with a few cloves studded into them for a rustic, fragrant touch.
Red apples and pomegranates add a Christmassy vibe and can also double as snacks!
I dried a heap of orange slices in the oven last weekend which I will be tying in clusters with festive ribbon and adding to my Christmas garland and using to decorate my Christmas table.
Add heartfelt elements that reflect your family:
Write a short note or Christmas wish for each guest and place it at their setting.
Display family photos from previous Christmases as part of your table decor. It’s a lovely way to reminisce while adding a personal element.
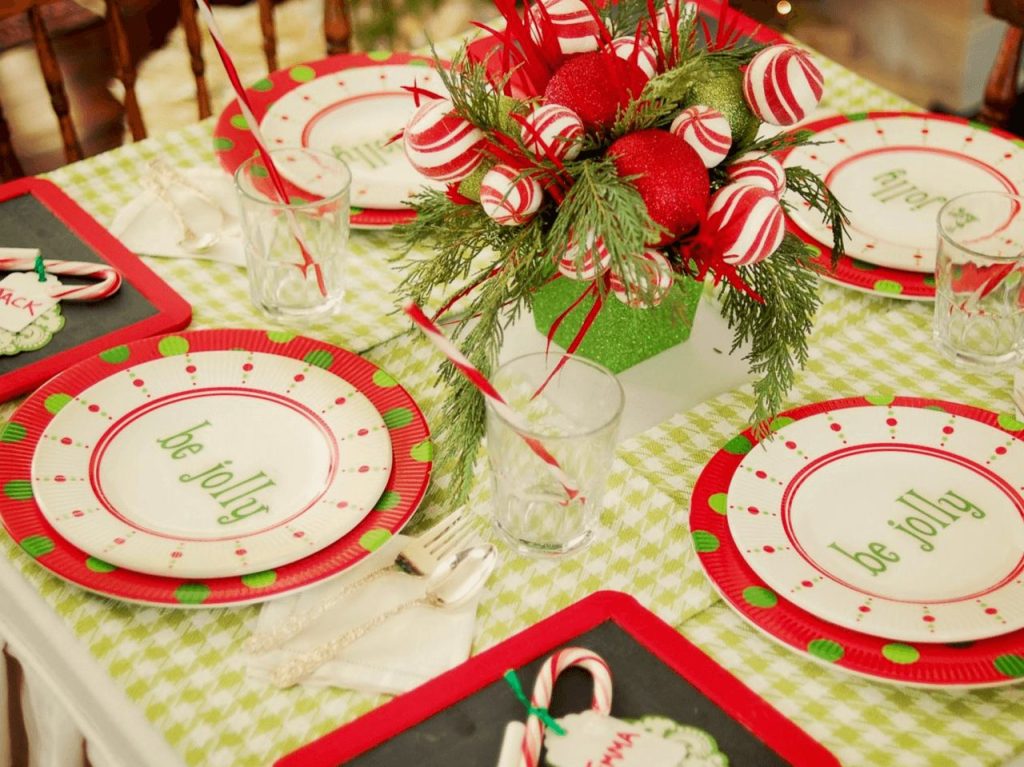
If you’re hosting children, make their table just as special:
Cover it with butcher paper and provide crayons so they can create their own Christmas artwork.
Add a small festive centrepiece – perhaps a bowl of baubles or a mini Christmas tree.

The magic of Christmas isn’t in perfection; it’s in connection. Embrace the beauty of imperfection, lean into what you have, and prioritise creating a warm, welcoming atmosphere.
With these last-minute Christmas ideas, your table can look fabulous without breaking the bank or causing extra stress. And best of all, you’ll have more time to enjoy what truly matters – making memories with your loved ones.
So, get creative, take a walk along the Northern Beaches for inspiration, and let your table reflect the joy of the season.
Merry Christmas from Orli Interiors!
Photo Credits:

07 Dec
Thinking of Hiring an Interior Designer? Here’s What to Expect from the Renovation Process …
Embarking on a home transformation is both exciting and daunting. Whether you’re considering a full renovation or a room makeover, partnering with an interior designer can turn your vision into reality. But what does this collaboration entail? Here’s a comprehensive guide to the interior design process, enriched with insights from Orli Interiors’ approach.

1. Initial Design Consultation: Laying the Foundation
The journey begins with an initial consultation, a pivotal meeting where we will discuss:
Your Lifestyle and Needs: How do you use your space daily? What challenges do you face, and what improvements are you seeking?
Aesthetic Preferences: Share your style inspirations, favourite colours, and design elements you admire.
Budget and Timeline: Establishing a clear budget and timeline ensures the project aligns with your expectations.
At Orli Interiors, this consultation is an opportunity to delve into your project and explore various aspects together. During this 90-minute meeting, Nikki visits your home to gain a firsthand understanding of your space, discussing elements such as project scope, lifestyle, functional requirements, budget considerations, and aesthetic preferences.
2. Defining the Scope of Work: Setting Clear Expectations
Post-consultation, the designer outlines the project’s scope within a detailed fee proposal:
Project Requirements: Specific areas to address, such as kitchen redesigns, bathroom renovations, or whole-home makeovers.
Services Provided: From conceptual design to project coordination, understanding the designer’s role is crucial. At Orli Interiors we offer an end-to-end service, leaving the client to focus on family, work and the myriad of life’s demands!
Budget and Timeline: A realistic plan with a detailed suggested budget that aligns with your financial and scheduling constraints.
This clarity ensures both parties have a mutual understanding, paving the way for a smooth collaboration.
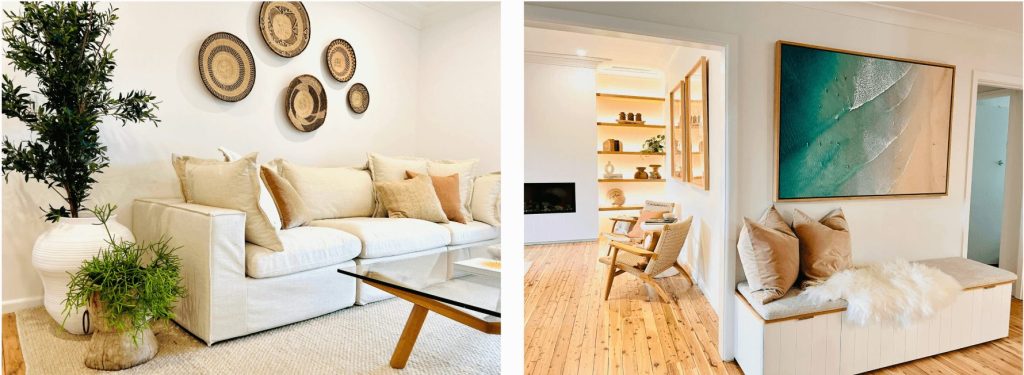
3. Concept Development: Bringing Ideas to Life
With a defined scope, the designer crafts a tailored concept, presenting:
Inspirational Imagery: Visuals that capture the desired ambiance and style.
Mood Boards: Visual compilations showcasing colour schemes, materials, and textures.
Space Planning: Preliminary layouts illustrating furniture and joinery arrangements and spatial flow.
Detailed Floor Plans and Elevations: During this phase of work and in collaboration with the client, more precise kitchen, bathroom and joinery drawings are compiled that guide construction. These drawings are suitable for a builder and trades to provide initial project estimates before moving into specification phase in order to help guide the selection process.
3D Rendering: A full 3D model of the proposed spaces or home with conceptual finishes in terms of flooring, tiles, stone and so forth – giving the client a clear visual representation of the final outcome.
4. Design Development: Detailing the Vision
Advancing from conceptual work, the designer delves into the specifics:
Material and Finish Selections: Choosing tiles, stone, cabinetry, flooring, upholstery and colours that align with the design vision. These are presented in formal schedules for each trade to work from.
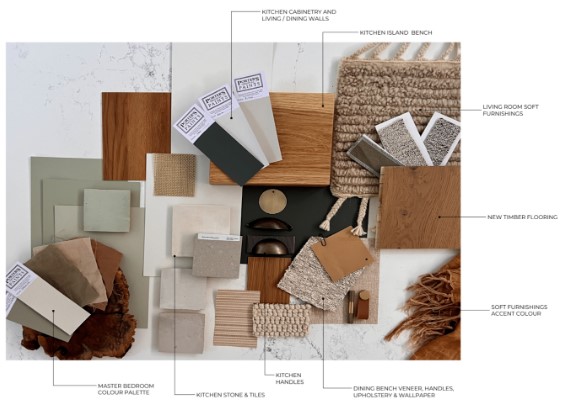
Fixtures, Fittings & Equipment: Selecting everything from taps to kitchen appliances and lighting fixtures to door hardware, your interior designer has all of these decisions in hand to create a cohesive design throughout the home.
Trade Quotes: Briefing trades to obtain accurate quotes based on suggested specifications.
Furniture Selection: Curating pieces that complement the overall aesthetic and functionality while leveraging industry connections to find quality items within your budget.
This phase transforms abstract ideas into actionable plans, ensuring every detail aligns with your vision.
At Orli Interiors, our focus is on creating beautiful homes for better living. Our designs aim to enhance lifestyles, turning homes into personal sanctuaries, while offering a service that saves the client time, money and stress through a smoother, more efficient renovation process without the headache of decision fatigue and project overwhelm.

5. Budgeting and Procurement: Managing Resources Wisely
Effective budgeting and procurement are vital. The designer assists by:
Sourcing Materials and Furnishings: Leveraging industry connections to find quality items within your budget.
Obtaining Quotes: Gathering estimates from suppliers and contractors to inform financial decisions.
Overseeing Orders: Managing the procurement process to ensure timely and accurate deliveries.
Orli Interiors specialises in delivering comprehensive end-to-end services for new builds and home renovations, assisting clients in overcoming challenges by offering expert guidance and support throughout the entire process.
6. Project Coordination: Managing the Transformation
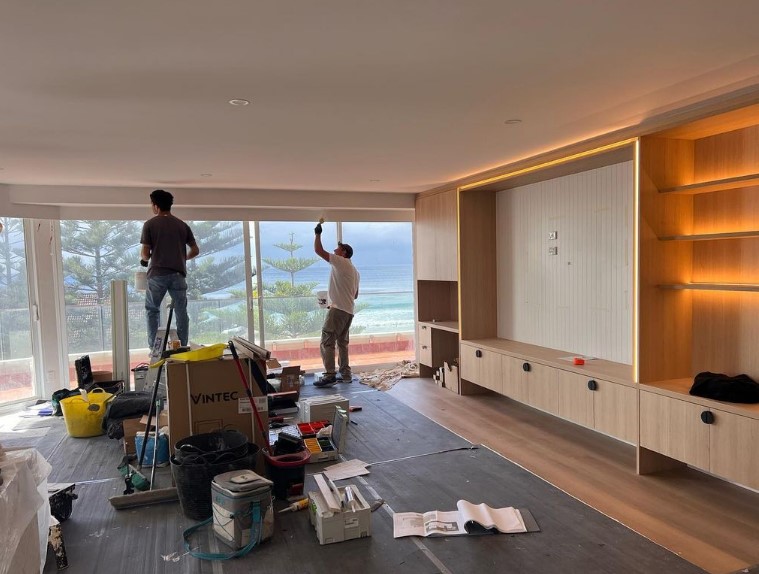
For projects involving construction or significant alterations, the designer often takes on a project coordination role, handling:
Liaison with Contractors and Tradespeople: Ensuring all parties work harmoniously towards the shared vision and ensuring the design intent is understood.
Timeline Management: Keeping the project on schedule to meet agreed-upon deadlines.
Quality Control: Monitoring workmanship to maintain high standards.
This ensures the project progresses smoothly, allowing you to focus on daily life without the stress of managing the multiple facets of the renovation process.
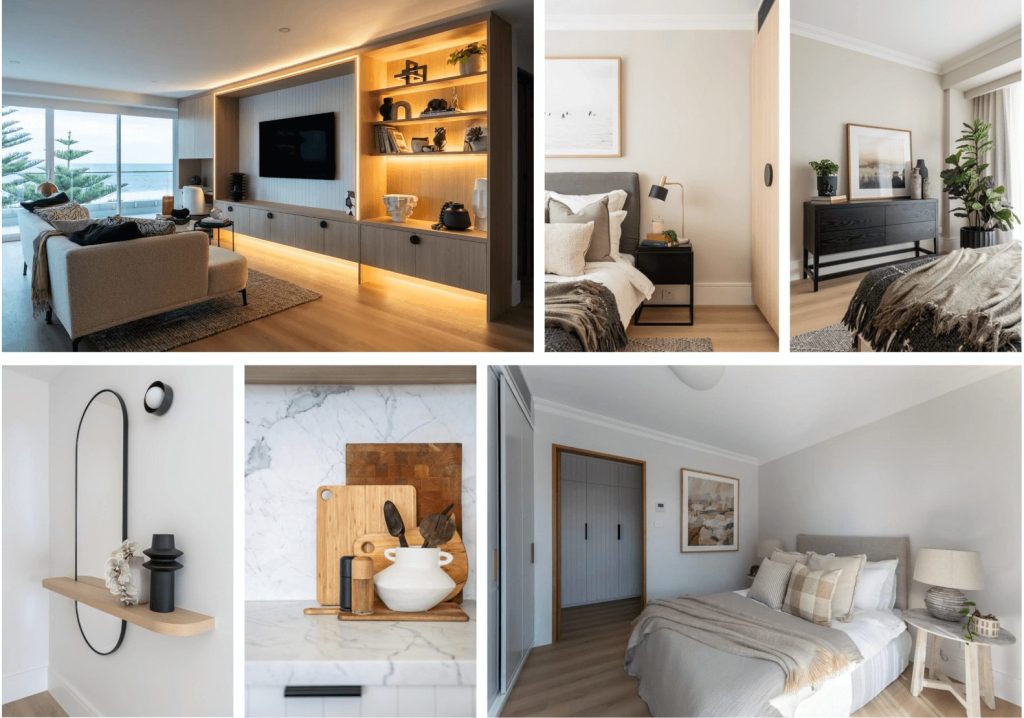
As the project nears completion:
Installation: Furniture and accessories are placed according to the agreed spatial plan.
Styling: Final touches, such as artwork and décor, are added to bring the space to life.
Walkthrough: The designer guides you through the transformed space, ensuring every detail meets your expectations.
At Orli Interiors, the goal is to create spaces that are not only aesthetically pleasing but also practical for daily living, transforming houses into comfortable family homes.
Why Choose Orli Interiors?
Nikki, the founder of Orli Interiors, brings a wealth of experience and a deep passion for interior design. Living with her family on the stunning Northern Beaches of Sydney, she focuses on crafting enduring spaces that people can truly call home—places to be enjoyed every day, uniquely reflecting their personalities.
One client shared, “After transforming our entrance hall and study, we engaged Nikki to turn her hand to our 3 bedrooms and second lounge. The result has been fantastic, converting these previously bland and empty rooms into warm, fun, relaxing spaces that we love spending time in.”

Final Thoughts
Working with an interior designer on your renovation project isn’t just about creating a beautiful space — it’s about making the entire process more efficient, enjoyable, and stress-free. An experienced designer understands how to tackle common pain points, from saving time and money by avoiding costly mistakes to reducing the stress and overwhelm that often come with renovation projects. They streamline decision-making, offering expert guidance to prevent decision fatigue, and manage the complexities of the process so you don’t have to. By partnering with a professional, you’re not just investing in your home; you’re investing in a smoother, more efficient journey toward creating a space that reflects your unique style and meets your family’s practical needs.
Ready to embark on your design journey? Contact Orli Interiors here and take the first step towards creating a home you’ll love for years to come.

23 Nov
How to Choose the Perfect Rug for Your Home: Size, Style, and Durability Tips
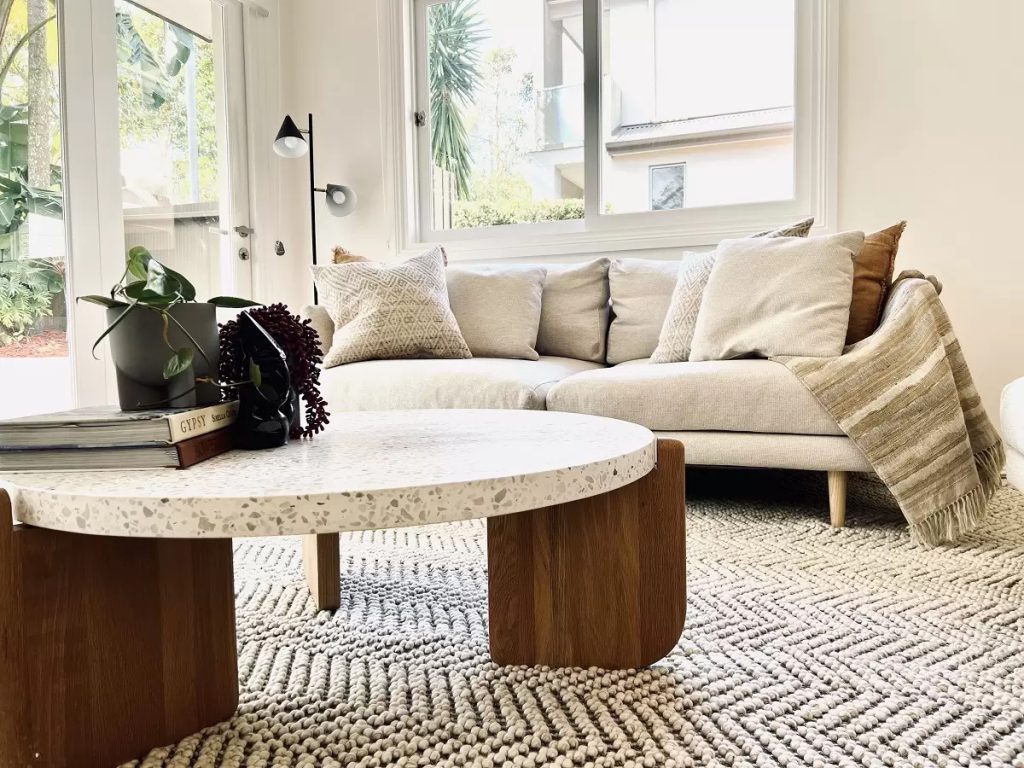
Creating a warm and inviting home is something that many of us dream of, especially when it comes to designing a space that will stand the test of time and become a “forever home.” One of the easiest ways to transform a room, add warmth, and bring together the design of any space is through rugs. But with so many choices, selecting the right rug can feel overwhelming.
As a Sydney interior designer, I believe that a rug should bring comfort and style without compromising on practicality, especially if you’re creating a home to grow with. Let’s walk through some tips to help you choose a rug that not only looks great but also fits your lifestyle—no matter how busy, bustling, or relaxed it might be.
1. Start with the Right Size
The size of a rug has a huge impact on the look and feel of a room. Get it right, and your room will feel grounded and harmonious; get it wrong, and it might feel awkward or cramped. Here are some general guidelines for rug sizing that I often use when helping clients:
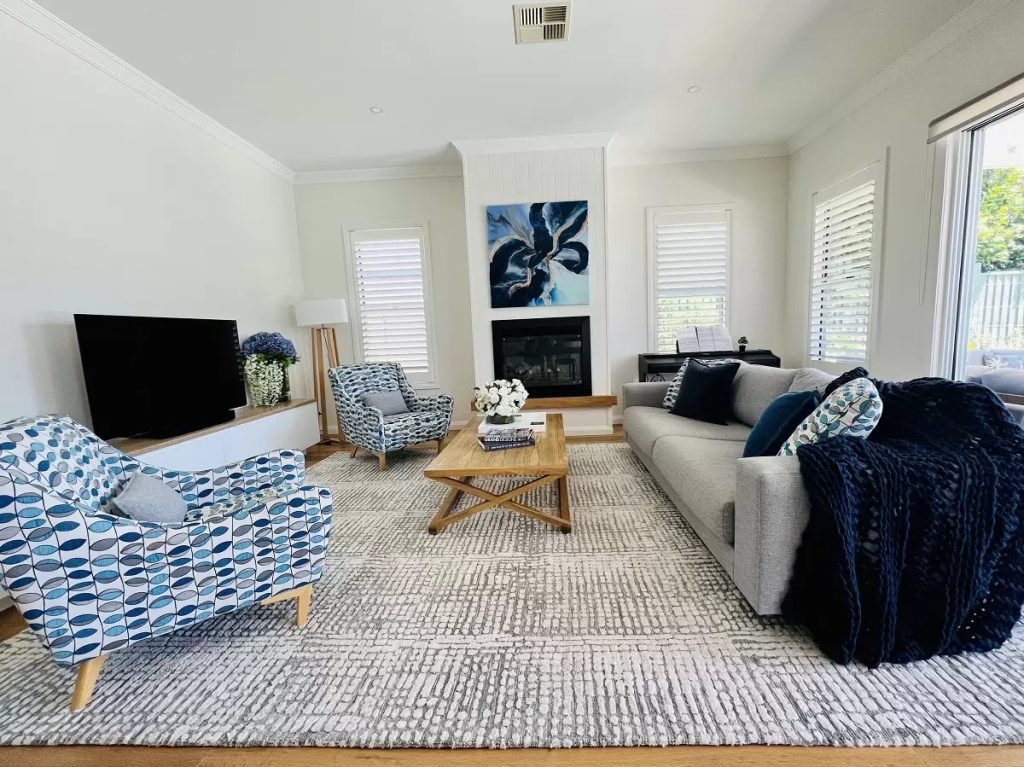
Living Rooms: In a typical living room, the rug should be large enough to fit at least the front legs of all seating pieces on it. This helps to create a cohesive seating area. If you have a large space, go for a bigger rug that can accommodate all four legs of your sofa and chairs. A common mistake is choosing a rug that’s too small, which can make the room feel disjointed and smaller than it actually is.
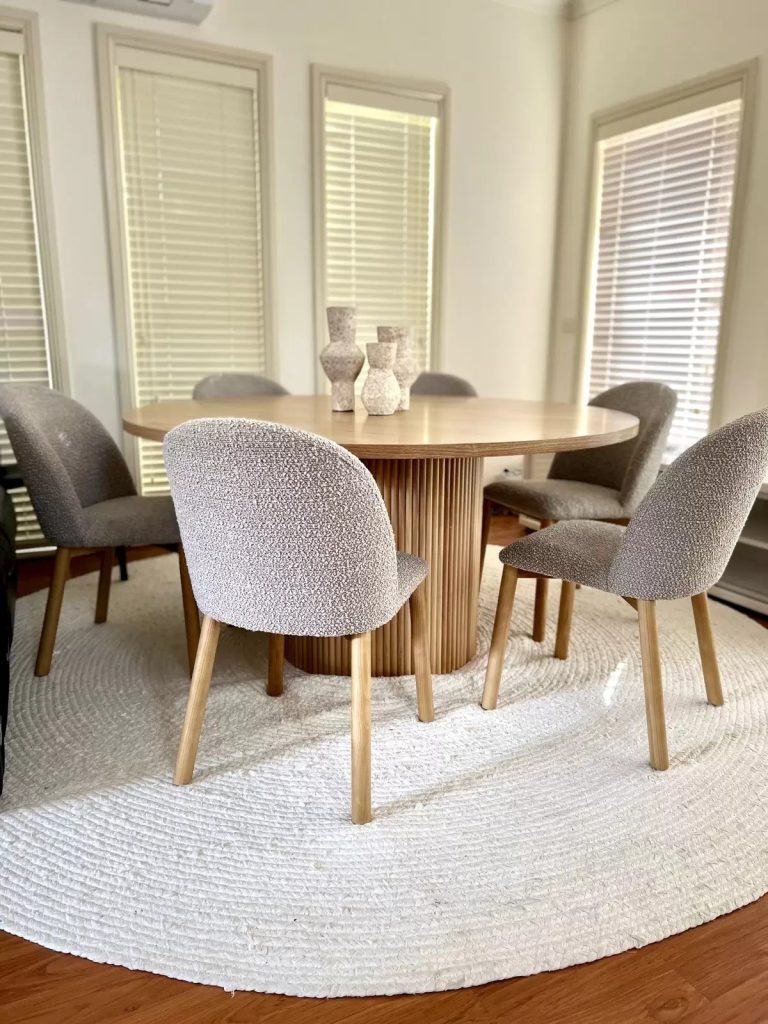
Dining Rooms: Here’s a tip that I swear by: make sure the rug is large enough so that when the dining chairs are pulled out, they remain on the rug. This means the rug should extend at least 60cm beyond the table on all sides. This trick not only prevents the rug edges from getting curled or torn but also keeps everything looking visually balanced. A rug at least 240×300 cm works well with a 180-cm rectangular table but make sure it won’t cause a trip hazard for anyone walking around it to get to another room.
Be sure to include an anti slip mat too to avoid the rug sliding around on the floor beneath it.
Inevitably there will be the odd spillage so go for durable, easy-to-clean options like wool, nylon, or polypropylene. Smooth fibers like cotton are easier to clean than rough ones like jute or sisal.
Bedrooms: For a king or queen-size bed, choose a rug large enough to extend out from the bed on each side. Typically, a 2 x 3 m or 3 x 4m rug works well for most queen or king bedrooms. Placing the rug so it’s about two-thirds of the way under the bed, allowing it to sit in front of the bedside tables and extend out at the foot and sides, creates a cosy feel.
2. Defining Spaces in Open-Plan Areas

Open-plan living is a hallmark of modern homes in Sydney, where large, open areas are divided into specific zones for lounging, dining, and even working. Rugs are a fantastic tool for defining these spaces without the need for walls or partitions, creating both flow and structure within a room. Here’s how to make it work:
Use Rugs as Room Dividers: In open-plan spaces, a rug can act as a visual boundary between areas. For example, a large rug under the dining table will define the dining zone, separating it visually from the lounge or living space nearby.

Size and Placement Matter: The size of the rug should suit the scale of each “zone” you’re creating. For a lounge area, place the rug so that it anchors the furniture in that specific space. The rug should be large enough to contain the seating arrangement or at least the front legs of sofas and chairs, giving each area its own defined feel.
Layering for Texture and Interest: Layering rugs is a great way to add texture and interest, especially in larger rooms. You might layer a plush rug on top of a natural fibre one to add both warmth and a touch of personality. This layered approach works particularly well in Sydney homes, where relaxed, stylish, and versatile looks are the favoured aesthetic.
Rugs are an ideal way to bring cohesion to your decorating style, allowing each area to feel purposeful and inviting. By carefully selecting and placing rugs, you can make even the largest open-plan space feel like a series of intimate, well-defined rooms.
3. Finding a Style That Speaks to You
Once you’ve nailed down the size, it’s time for the fun part: choosing a style that suits your home’s aesthetic! Think about how the rug will work with the other elements in the room, such as furniture, lighting, and decor. Some popular styles include:
Classic Patterns: Traditional or Persian-inspired rugs add timeless elegance and can bring in a sense of warmth and detail. They often feature intricate patterns and rich colours, which can help anchor a room and create a sense of history.

Modern and Minimalist: If you love clean lines and a minimalist aesthetic, look for solid-coloured or subtly textured rugs. These add a quiet sense of sophistication and won’t compete with other bold design elements. Think of these rugs as a gentle background to your room’s statement pieces
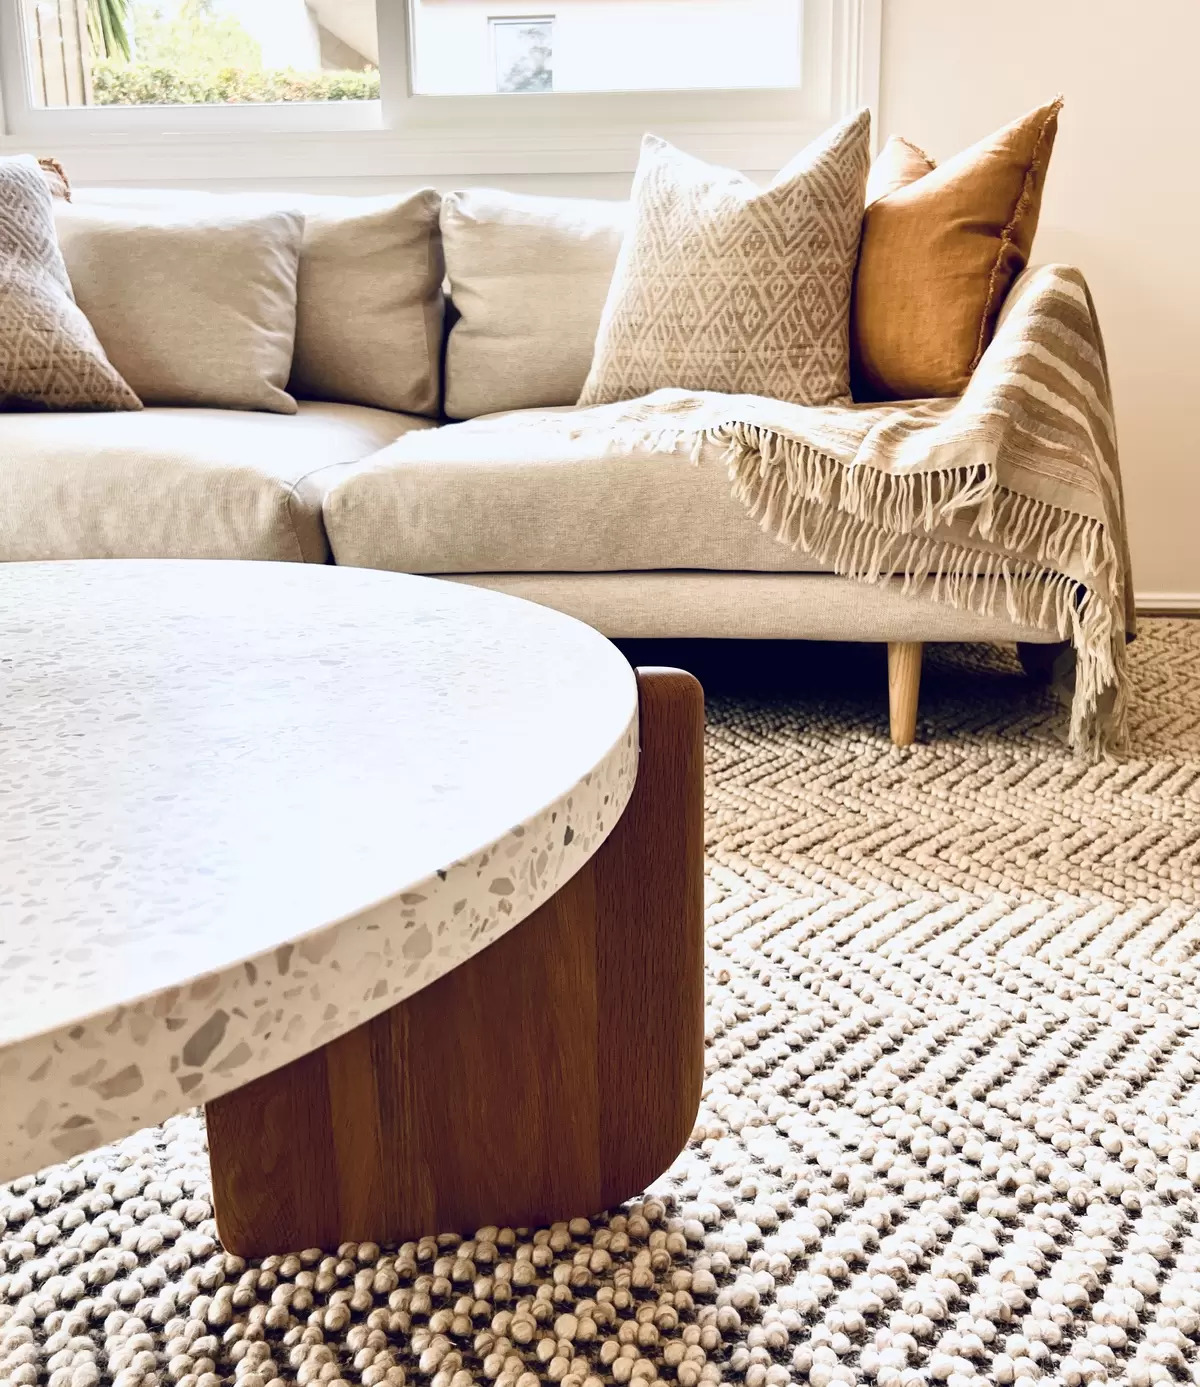
Natural and Textured: Jute, sisal, and wool rugs with natural textures are fantastic for a relaxed, earthy vibe. These work wonderfully in the coastal style of many Northern Beaches homes. They also suit farmhouse or rustic interiors and are ideal for creating a cosy, grounded feel. Keep in mind that natural-fibre rugs are often more durable but aren’t as soft and squishy underfoot.
Playful Patterns and Bold Colours: A vibrant, patterned rug can act as a focal point in an otherwise neutral room. This style is great for children’s rooms, play areas, or even living spaces where you want a touch of personality and fun. Be conscious of the size of the room however, as a heavy pattern can be overwhelming in a small space.
4. Considering Durability and Maintenance
Your choice of rug should reflect not only your style but also your lifestyle. If you have young children, pets, or a busy household, durability is key. Here’s what to consider:
Material Matters: Wool and jute rugs are durable and naturally stain-resistant, making them a good choice for high-traffic areas. Synthetic fibres like polypropylene are also tough, easy to clean, and often more affordable. These are fantastic for families with kids or pets since they handle wear and tear well and can usually be spot-cleaned.

Pile Height: Low-pile rugs are easier to clean and are more resilient in high-traffic areas like hallways and dining rooms. They’re also great for homes with kids, as they don’t trap dirt as easily and won’t get flattened by constant foot traffic. High-pile rugs are soft and cosy, making them ideal for bedrooms, but they’re trickier to clean.
Pattern for Practicality: Consider rugs with patterns or multi-toned fibres if you’re worried about spills or stains. Patterns can be forgiving and help mask small imperfections, so you won’t have to stress about every little mark.
Choosing a Rug for Your Forever Home
Choosing a rug is an exciting part of the design process. Whether you’re looking to add warmth, colour, or a bit of texture, the right rug can transform a room from plain to polished. By keeping in mind the size, style, durability, and practicality, you’re sure to find a rug that will bring joy and comfort to your home for years to come.
Rugs aren’t just accessories—they’re the foundation of your room’s design and the comfort under your family’s feet. Embrace the process, and let your personal style guide you to a choice that will make your space feel like a true forever home.
If you would like some help with your forthcoming renovation or interiors project please feel free to reach out to us here – we’d love to help you!
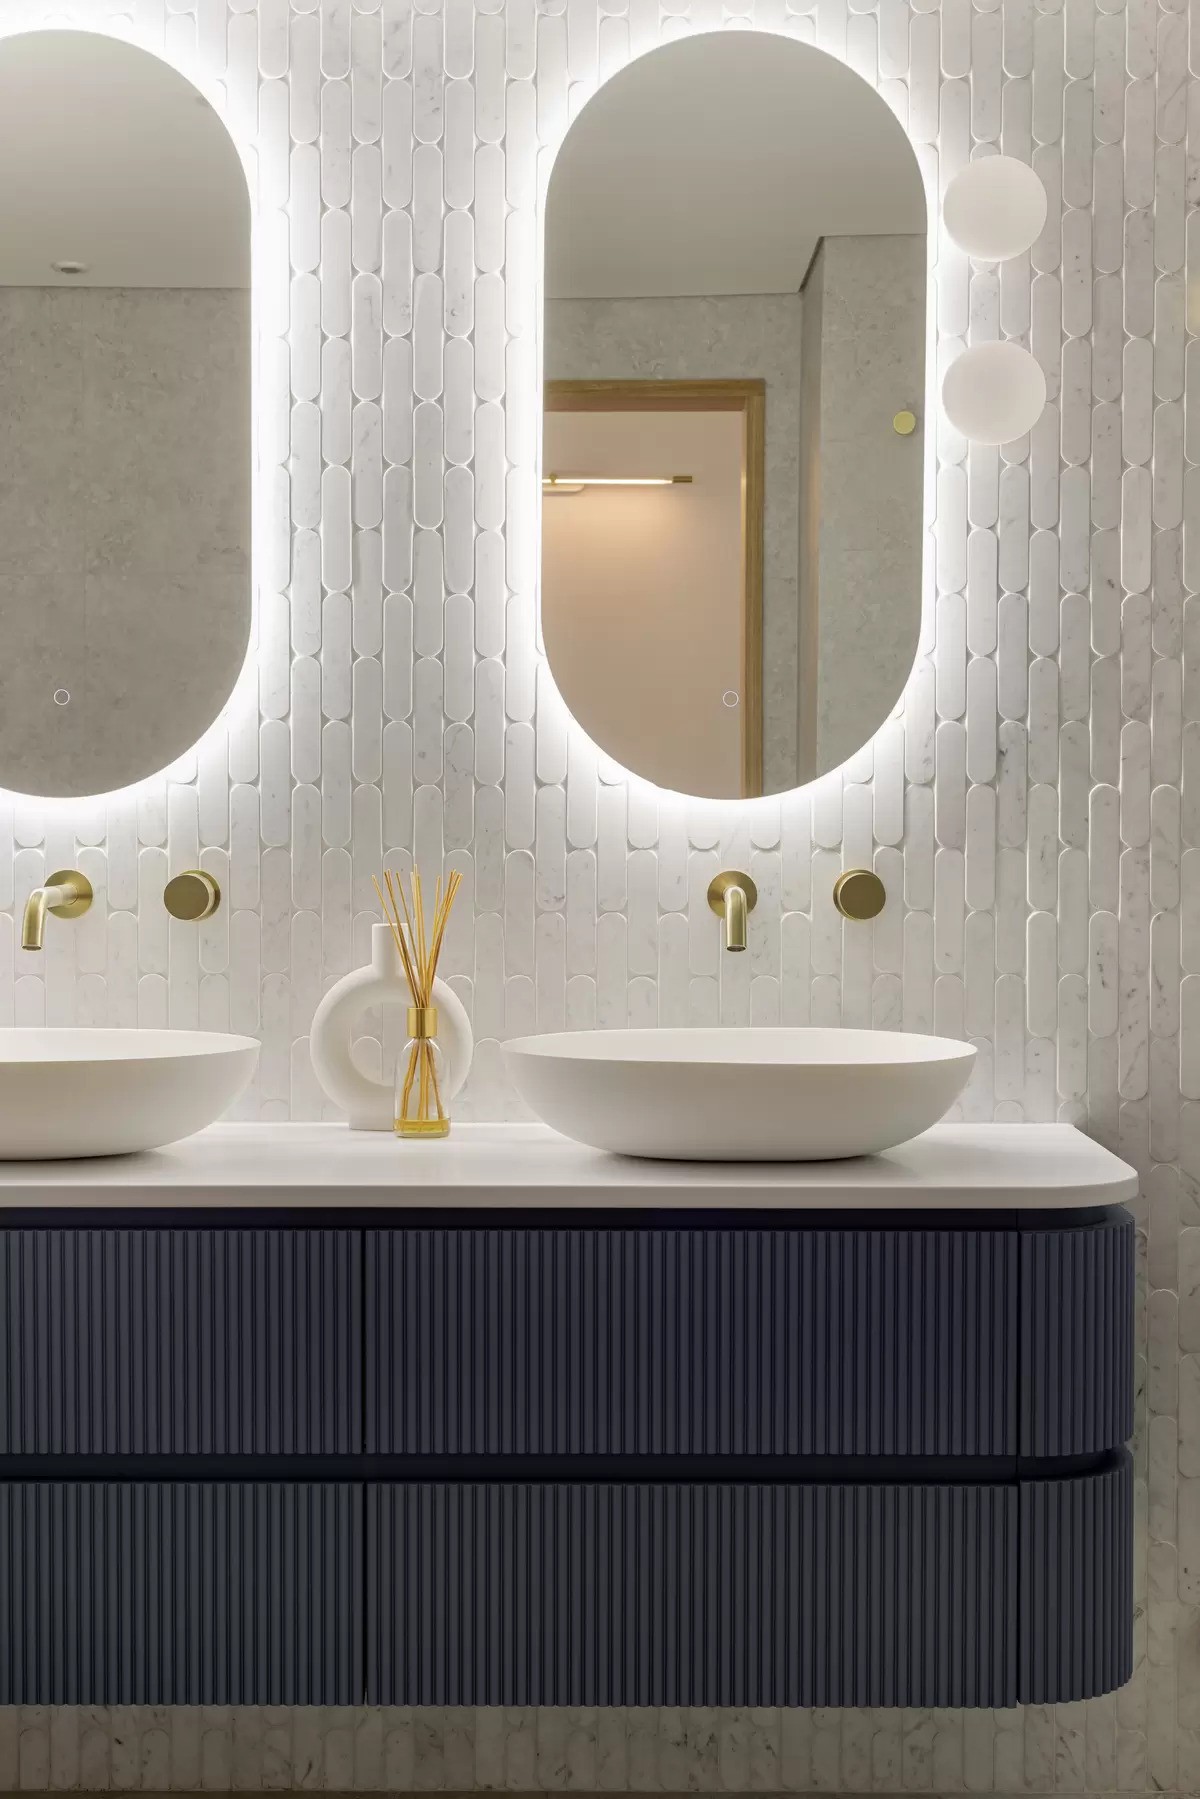
09 Nov
Choosing Tiles for Your Renovation: Tips from a Sydney Interior Designer
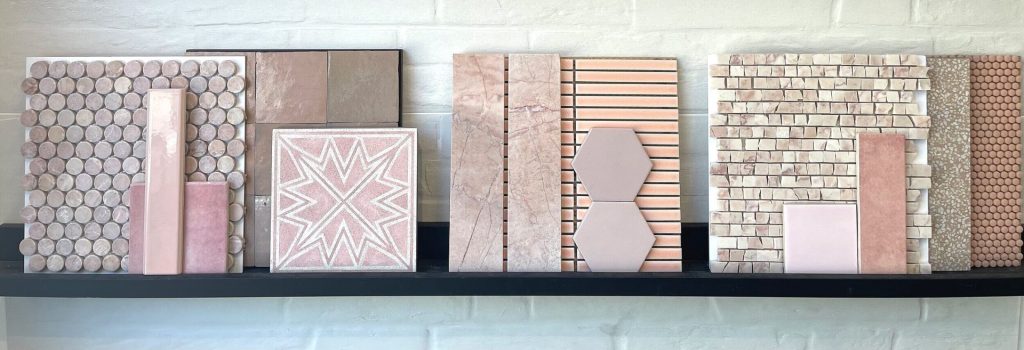
Planning a home renovation? If you’re in Sydney, you’re in the perfect place to explore some incredible tile options that blend style, durability, and functionality. As a Northern Beaches interior designer, I often see clients feeling overwhelmed by the sheer number of tile choices out there. But don’t worry—here, I’ll share practical advice to make the tile selection process enjoyable and, most importantly, stress-free.
Whether you’re updating a bathroom, kitchen, or outdoor area, choosing tiles can make a significant difference in the overall look and feel of your space. Keep reading for key considerations and tips that will help guide you through this essential aspect of your renovation.

1. Start with the Room’s Purpose
Tiles come in a range of materials, styles, and durability levels. Each room has specific requirements, so the first question to ask yourself is: Where am I placing these tiles? This may seem simple, but narrowing down the purpose helps eliminate choices that might not be suitable.
Bathrooms: Bathrooms require moisture-resistant tiles. Porcelain and ceramic are popular choices here, as they’re water-resistant, easy to clean, and can withstand daily use.
Kitchens: For kitchen floors, consider tiles that can handle heavy foot traffic and the occasional spill. For splashbacks, let your creativity shine—mosaic, variable shade, gloss or matt tiles will add personality and can be cleaned easily.
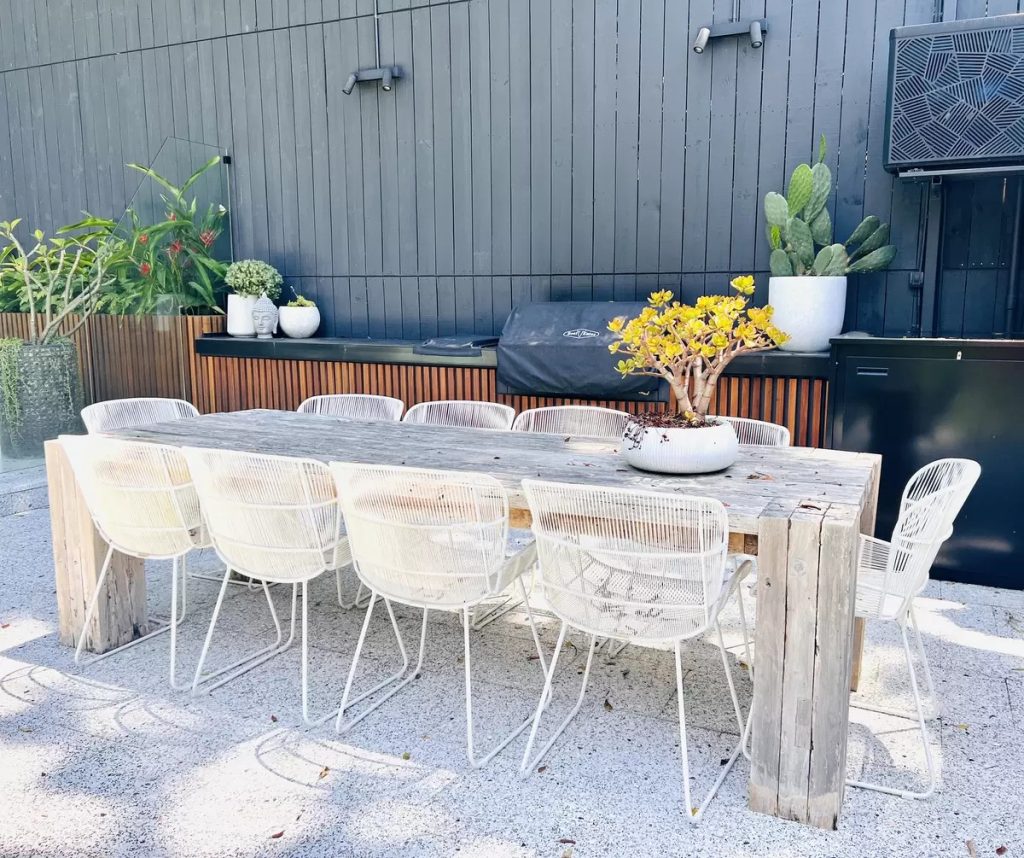
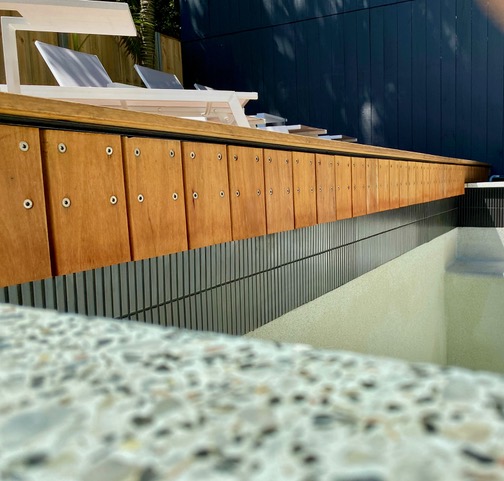

Outdoor Spaces: Choosing tiles for pool, patios or balconies? Make sure they’re weather-resistant and slip-proof. Stone and porcelain are excellent choices, offering both durability and style for Sydney’s mix of weather conditions.
2. Balance Aesthetic with Practicality
The style of tile you choose should reflect your personality and the mood you want to create, but functionality is key. A tile’s finish, texture, and importantly its slip rating (particularly in bathrooms and outdoor areas) can impact its practicality.
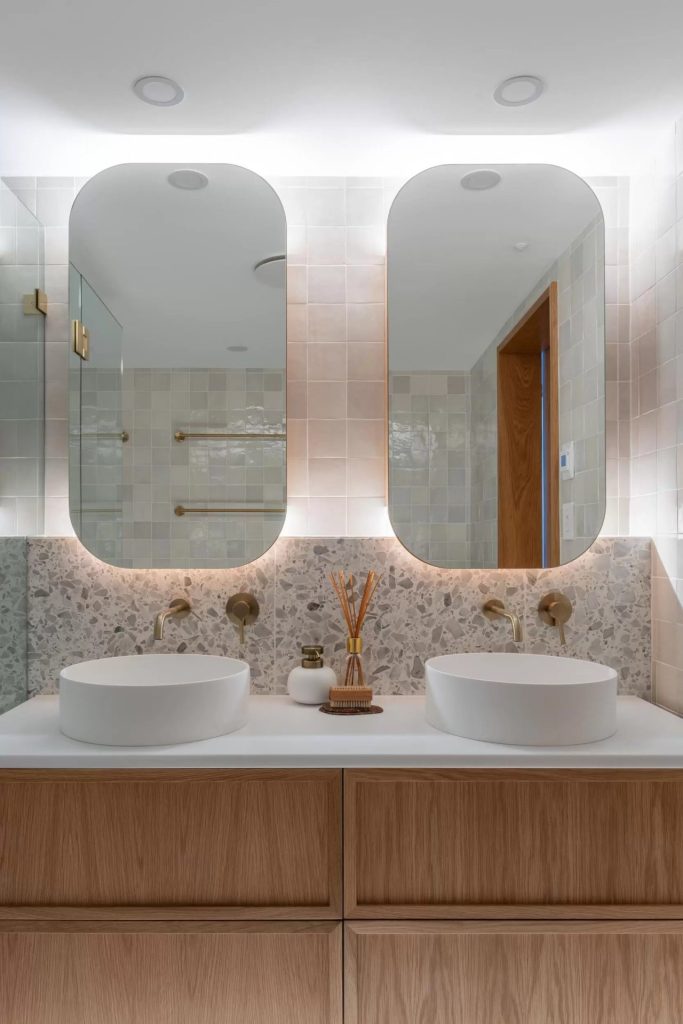
Glazed vs. Unglazed Tiles: Glazed tiles are highly resistant to moisture and stains, making them a good choice for splash-prone areas like kitchens and bathrooms. Unglazed tiles, such as natural stone, have a beautiful, rustic look but require sealing to stay stain-free.
Glossy vs. Matte Finish: Glossy tiles reflect light, which can make a small bathroom or kitchen feel larger. However, they show water marks and fingerprints more easily, so they require frequent cleaning. Matte tiles, on the other hand, hide smudges well and offer a softer, more contemporary look.
3. Consider the Size and Layout of Your Space
Tile size and layout can dramatically alter the feel of a room. Larger tiles make a small space feel bigger by reducing the number of grout lines, while smaller tiles are perfect for areas where intricate designs or patterns can add interest, like bathroom feature walls.
Large Format Tiles: These are popular for open-plan living spaces and bathrooms, as they give a seamless, modern look. They also mean less grout, which can be easier to clean.
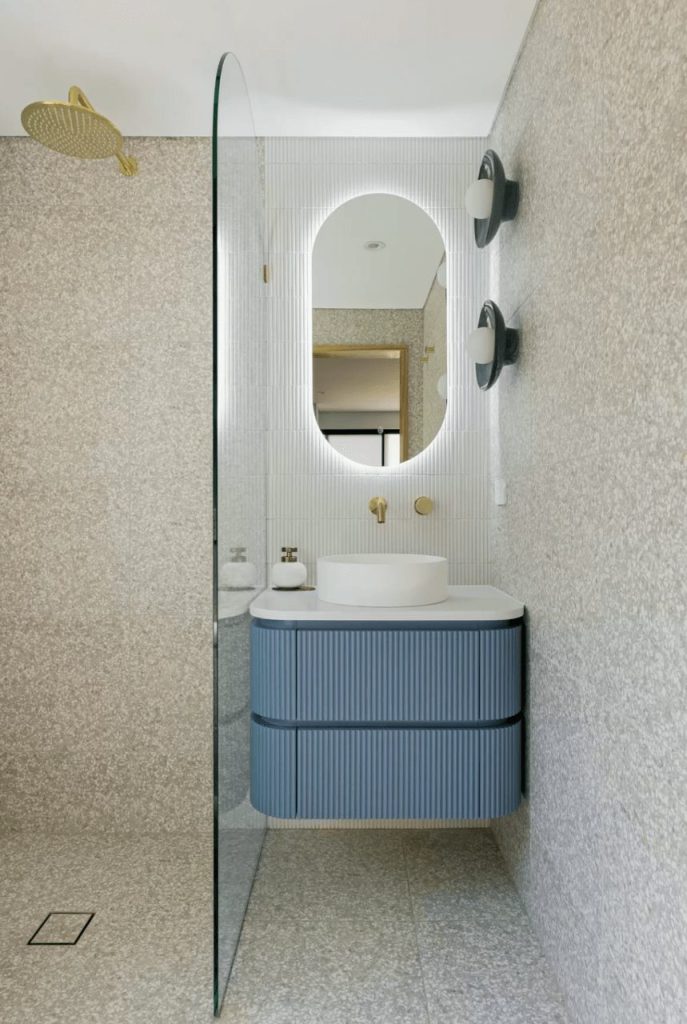

Subway Tiles: Classic subway tiles are perfect for a timeless look in kitchens or bathrooms, especially when installed in creative layouts like herringbone or vertical stacking.
Mosaics: While mosaics take more time to install, and certainly have more grout to clean, they create a wonderful sense of texture and visual interest, often with interesting plays on colour. Consider using them in shower niches, as a laundry splashback, or teamed in contrast with large format floor tiles with the larger tiles continued 1200mm high on a bathroom wall and the mosaic tile above it.
4. Pay Attention to Colour and Pattern
The colour of your tiles will set the tone for your entire room, so take your time with this decision. Neutral colours—whites, greys, beiges—are popular in Sydney homes as they provide a versatile base. But don’t shy away from using bold colours or patterns if you want to make a statement.
Neutral Tones: If you’re renovating for resale, neutral tones are a safe choice as they appeal to a broad range of tastes. They also create a calm, cohesive look. But don’t be tempted to go for the cheapest most basic grey or white tile as this will cheapen the look of your space and stand in the way of achieving a premium sale price. Neutral doesn’t have to be boring!
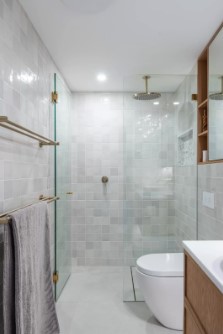
Statement Patterns: Patterned tiles are perfect for feature walls or floors, especially in a bathroom or entryway. Just be cautious with patterns—too many can overwhelm the space, so use them sparingly and ensure the colours are complemented with the rest of the space to achieve a sense of cohesion.
Colour Psychology: Remember, colour can impact mood. Blues and greens are calming and work well in bathrooms, while earthy tones can create a cosy atmosphere in kitchens. When designing a space consider the 60 – 30 – 10 rule of colour, with the majority of the space in one colour, 30% in a secondary shade and 10% in an accent colour through the use of accessories or small design features.
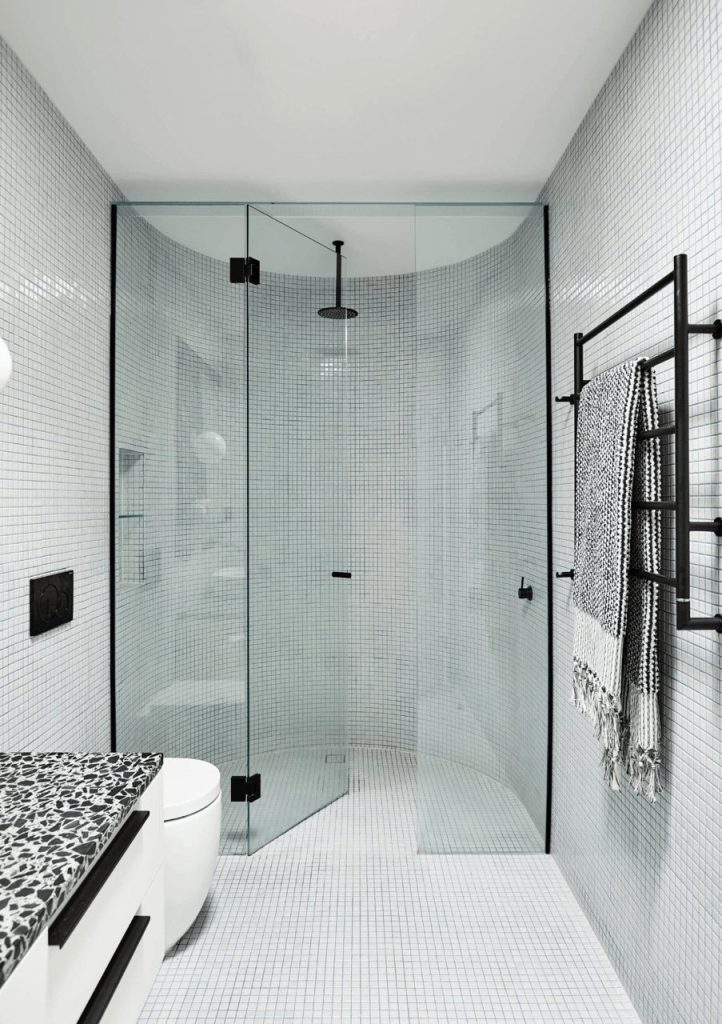
Image from Studio Doherty
5. Think About Grout
Grout might seem like an afterthought, but it’s an important part of your tile choice. The colour and thickness of grout lines impact both the look and the maintenance of your tiled areas. A good rule of thumb is a grout width of around 3mm for pressed edge floor tiles and no less than 1.5mm for wall tiles. Above all, be sure to select a quality product to ensure longevity.
Contrasting Grout: A darker grout against light tiles, or vice versa, can make a beautiful design statement and bring another element of colour into the design. Don’t be afraid to get creative and have some fun with it!
Matching Grout: Using grout in a similar shade to your tiles creates a seamless effect, making the space look larger. When choosing grout for dark floor tiles, find the darkest hues in the tile and choose a grout colour to match.
6. Don’t Forget About Maintenance
Different tile materials require different levels of maintenance. Stone tiles, for instance, need sealing to prevent stains, while porcelain tiles are low-maintenance and simply need regular cleaning.
Porcelain and Ceramic: These are some of the easiest tiles to maintain. They’re water-resistant, stain-resistant, and only need a quick mop or wipe down.
Natural Stone: Natural stone tiles like marble or travertine are beautiful but need extra care. Regular sealing is required to prevent stains, and it’s best to avoid using harsh chemicals.
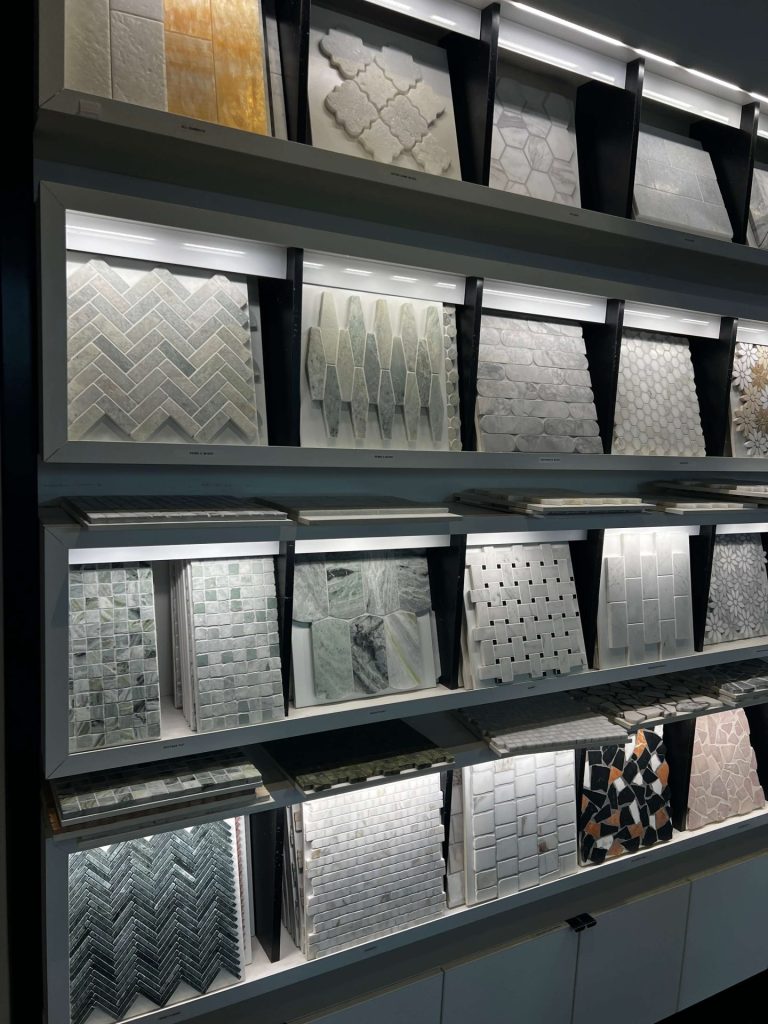
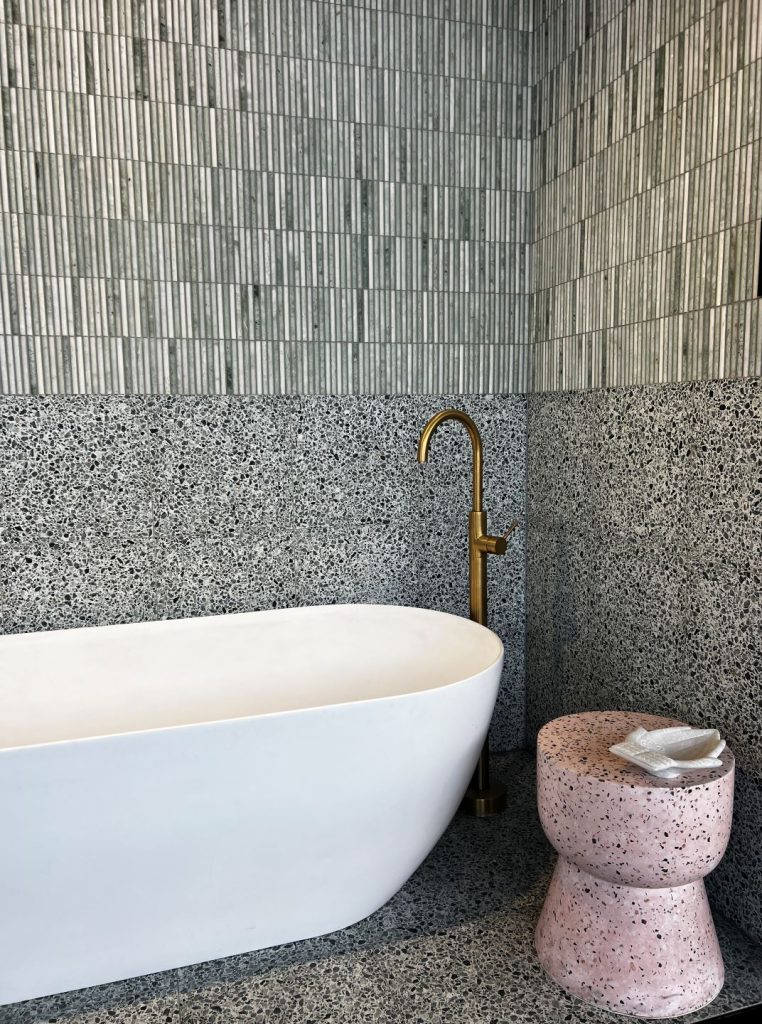
7. Set Your Budget
The cost of tiles can vary widely, and it’s important to choose tiles that meet both your design goals and your budget. Large format tiles or custom designs might be pricier, but you can often find budget-friendly options that offer a similar look. For smaller areas like powder rooms and splashbacks, you can afford to splash out a bit!
Quality Matters: For high-traffic areas, it’s worth investing in good-quality tiles that can stand up to daily wear and tear.
Sample Before You Buy: Always request a few samples before making a final decision. Tiles can look very different in person compared to online photos.
Final Thoughts
Choosing tiles for your renovation can feel overwhelming, but with the right approach, you can find the perfect balance of style, function, and durability. I’ve seen how thoughtful tile choices can elevate a space and make it feel truly unique. Keep these tips in mind, and you’ll be well on your way to creating a beautiful, practical space you’ll love for years to come.
If you’re looking for more renovation help, don’t hesitate to reach out for personalised advice here — happy tiling!
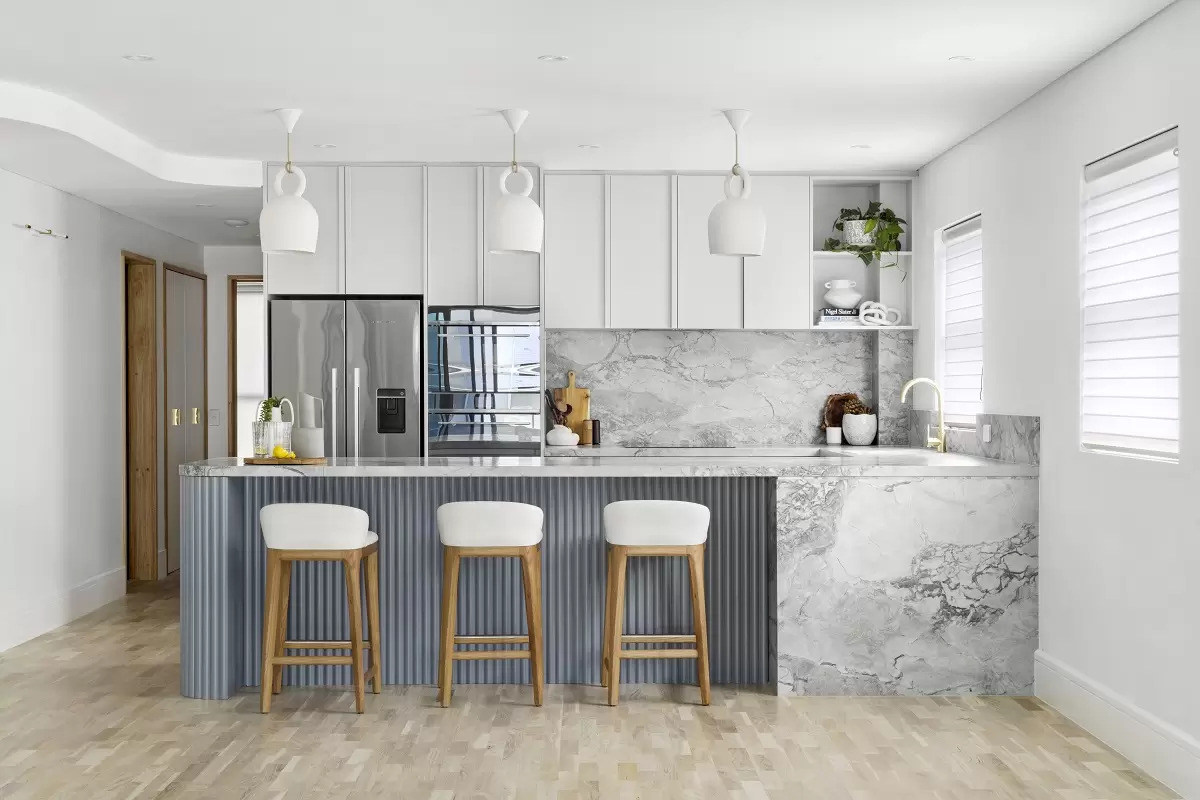
26 Oct
Why You Should Hire a Kitchen Designer for Your Northern Beaches Kitchen Design

The kitchen is often considered the heart of the home—a place where family and friends gather, meals are created, and memories are made. Given its importance, renovating a kitchen can be one of the most rewarding investments you make in your home. However, it can also be one of the most complex and overwhelming projects, with decisions to be made about layout, materials, appliances, and finishes. Not to mention the huge cost outlay, so making mistakes in this part of your house can either mean living with something that doesn’t function correctly or spending big to fix the problem.
That’s where we come in! A professional kitchen designer can make all the difference to your Northern Beaches kitchen renovation project.
Here are several compelling reasons to consider hiring a kitchen designer:
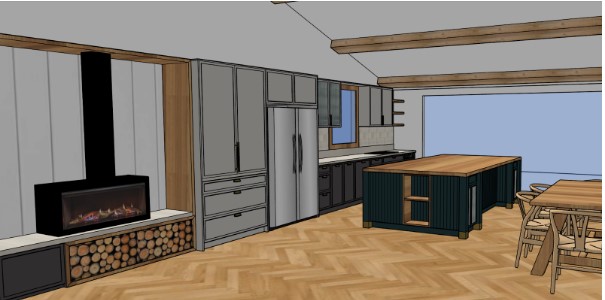

Kitchen designers are specialists in their field. They understand the nuances of kitchen design that go beyond just aesthetics. With a thorough knowledge of space planning, ergonomics, and the latest design trends, they can create a kitchen that’s not only beautiful but functional too. From optimising cabinet storage to creating work triangles that make food prep easier, their expertise ensures you get the most out of your space.
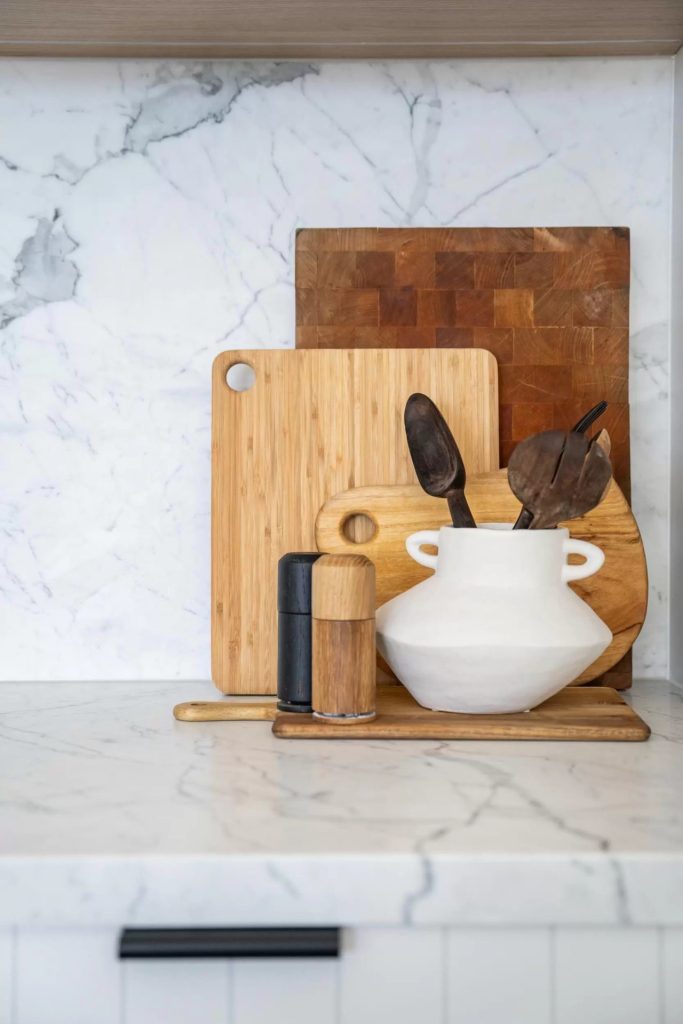
A professional kitchen designer will take the time to understand how you use your kitchen. They will create a space that fits your lifestyle, ensuring the design serves your specific needs.
Whether it’s integrating a large island for gatherings or selecting the perfect drawer system for easy access to cooking tools, they customise every detail to work for you. This personalised approach not only enhances your day-to-day living but also adds value to your home.
Renovating a kitchen is a complex process that involves countless decisions. From the layout and material selections to lighting, hardware, and appliances, it’s easy to get overwhelmed. A kitchen designer takes on the heavy lifting, streamlining the decision-making process and coordinating the project from start to finish. This reduces the stress of the renovation and ensures that your kitchen comes together seamlessly.
Hiring a designer also helps you avoid costly mistakes. Whether it’s selecting incompatible materials or misjudging space requirements, a designer has the foresight to catch potential issues early and prevent setbacks down the road.

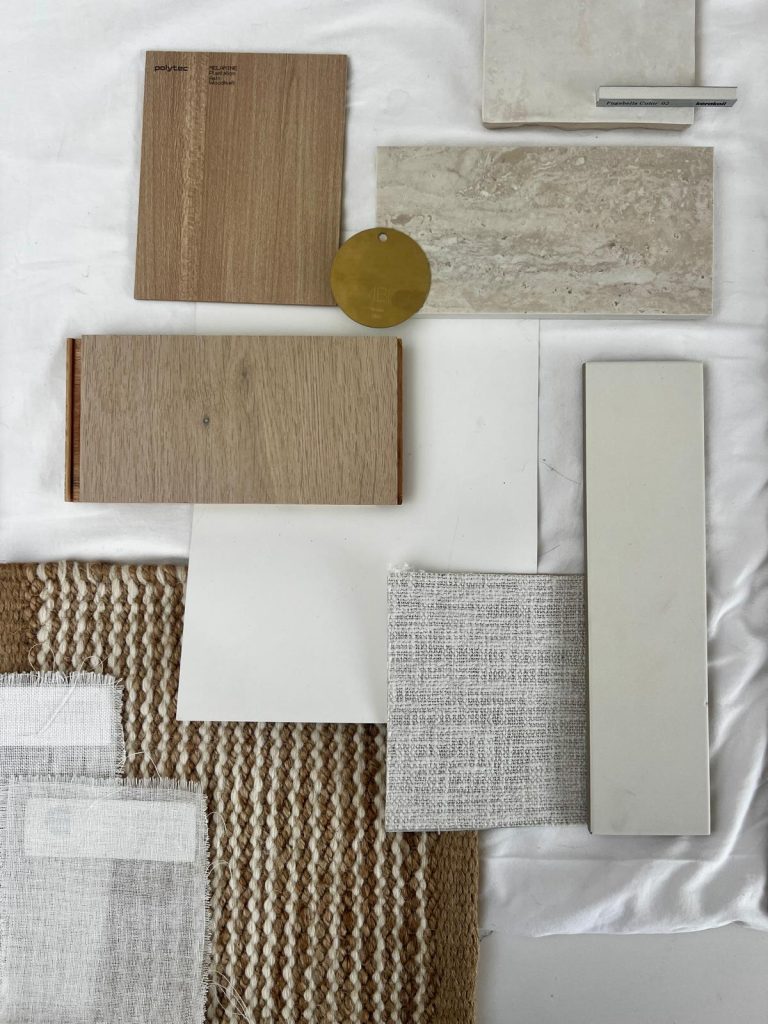
One of the perks of working with a professional kitchen designer is gaining access to exclusive resources. Designers often have connections with suppliers and manufacturers, giving you access to high-quality materials that aren’t available at standard retail stores. They also have experience with a range of products and can recommend materials that fit both your budget and style while ensuring durability and performance.
Additionally, designers can source custom pieces—whether it’s a unique backsplash or bespoke cabinetry—that add a one-of-a-kind touch to your kitchen. These elements can truly elevate the look and feel of the space, making it uniquely yours.

A well-designed kitchen is one of the top factors that can increase the value of your home. By working with a professional designer, you’re ensuring that your renovation meets the latest trends and standards while also addressing the preferences of potential buyers. Even if you’re not planning to sell immediately, investing in a quality kitchen now means your home will stand out in a competitive market when the time comes.

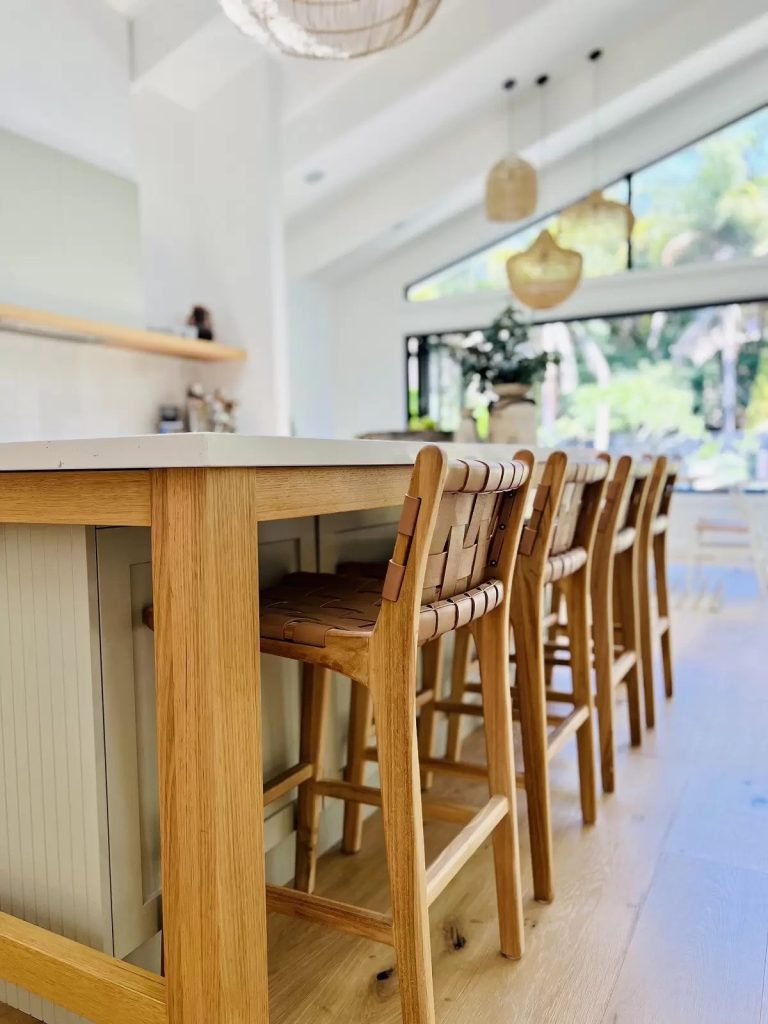
If sustainability is a priority for your renovation, a kitchen designer can guide you toward eco-friendly solutions. From energy-efficient appliances to sustainable materials, they can help reduce the environmental impact of your kitchen. Designers are often well-versed in green building practices and can introduce you to products that improve energy efficiency, indoor air quality, and waste reduction.
Whether you’re interested in using recycled materials, choosing non-toxic finishes, or installing energy-saving appliances, a designer will know the best options available on the market.
Perhaps the most important reason to hire a kitchen designer is their ability to bring your dream kitchen to life. While you may have an idea of what you want, turning that vision into reality requires expert design skills and careful planning. A kitchen designer can create detailed renderings and layout plans that allow you to visualise the finished space before construction even begins.
This level of planning ensures that every detail—down to the lighting, countertops, and even cabinet hardware—is considered. It also allows you to make changes during the design phase, rather than mid-renovation when adjustments become costly and time-consuming.

Renovating a kitchen is a significant investment, and hiring a kitchen designer can help you maximise the potential of your space while making the process as smooth and stress-free as possible. With their expertise in design, project management, and access to exclusive resources, they can transform your kitchen into a space that enhances both your lifestyle and the value of your home.
If you’re ready to embark on a kitchen renovation, consider bringing a professional designer on board to guide you every step of the way. You’ll end up with a space that’s not only functional and beautiful but one that you’ll enjoy for years to come.
If you would like some help with your forthcoming renovation or interiors project please feel free to reach out to us here – we’d love to help you!
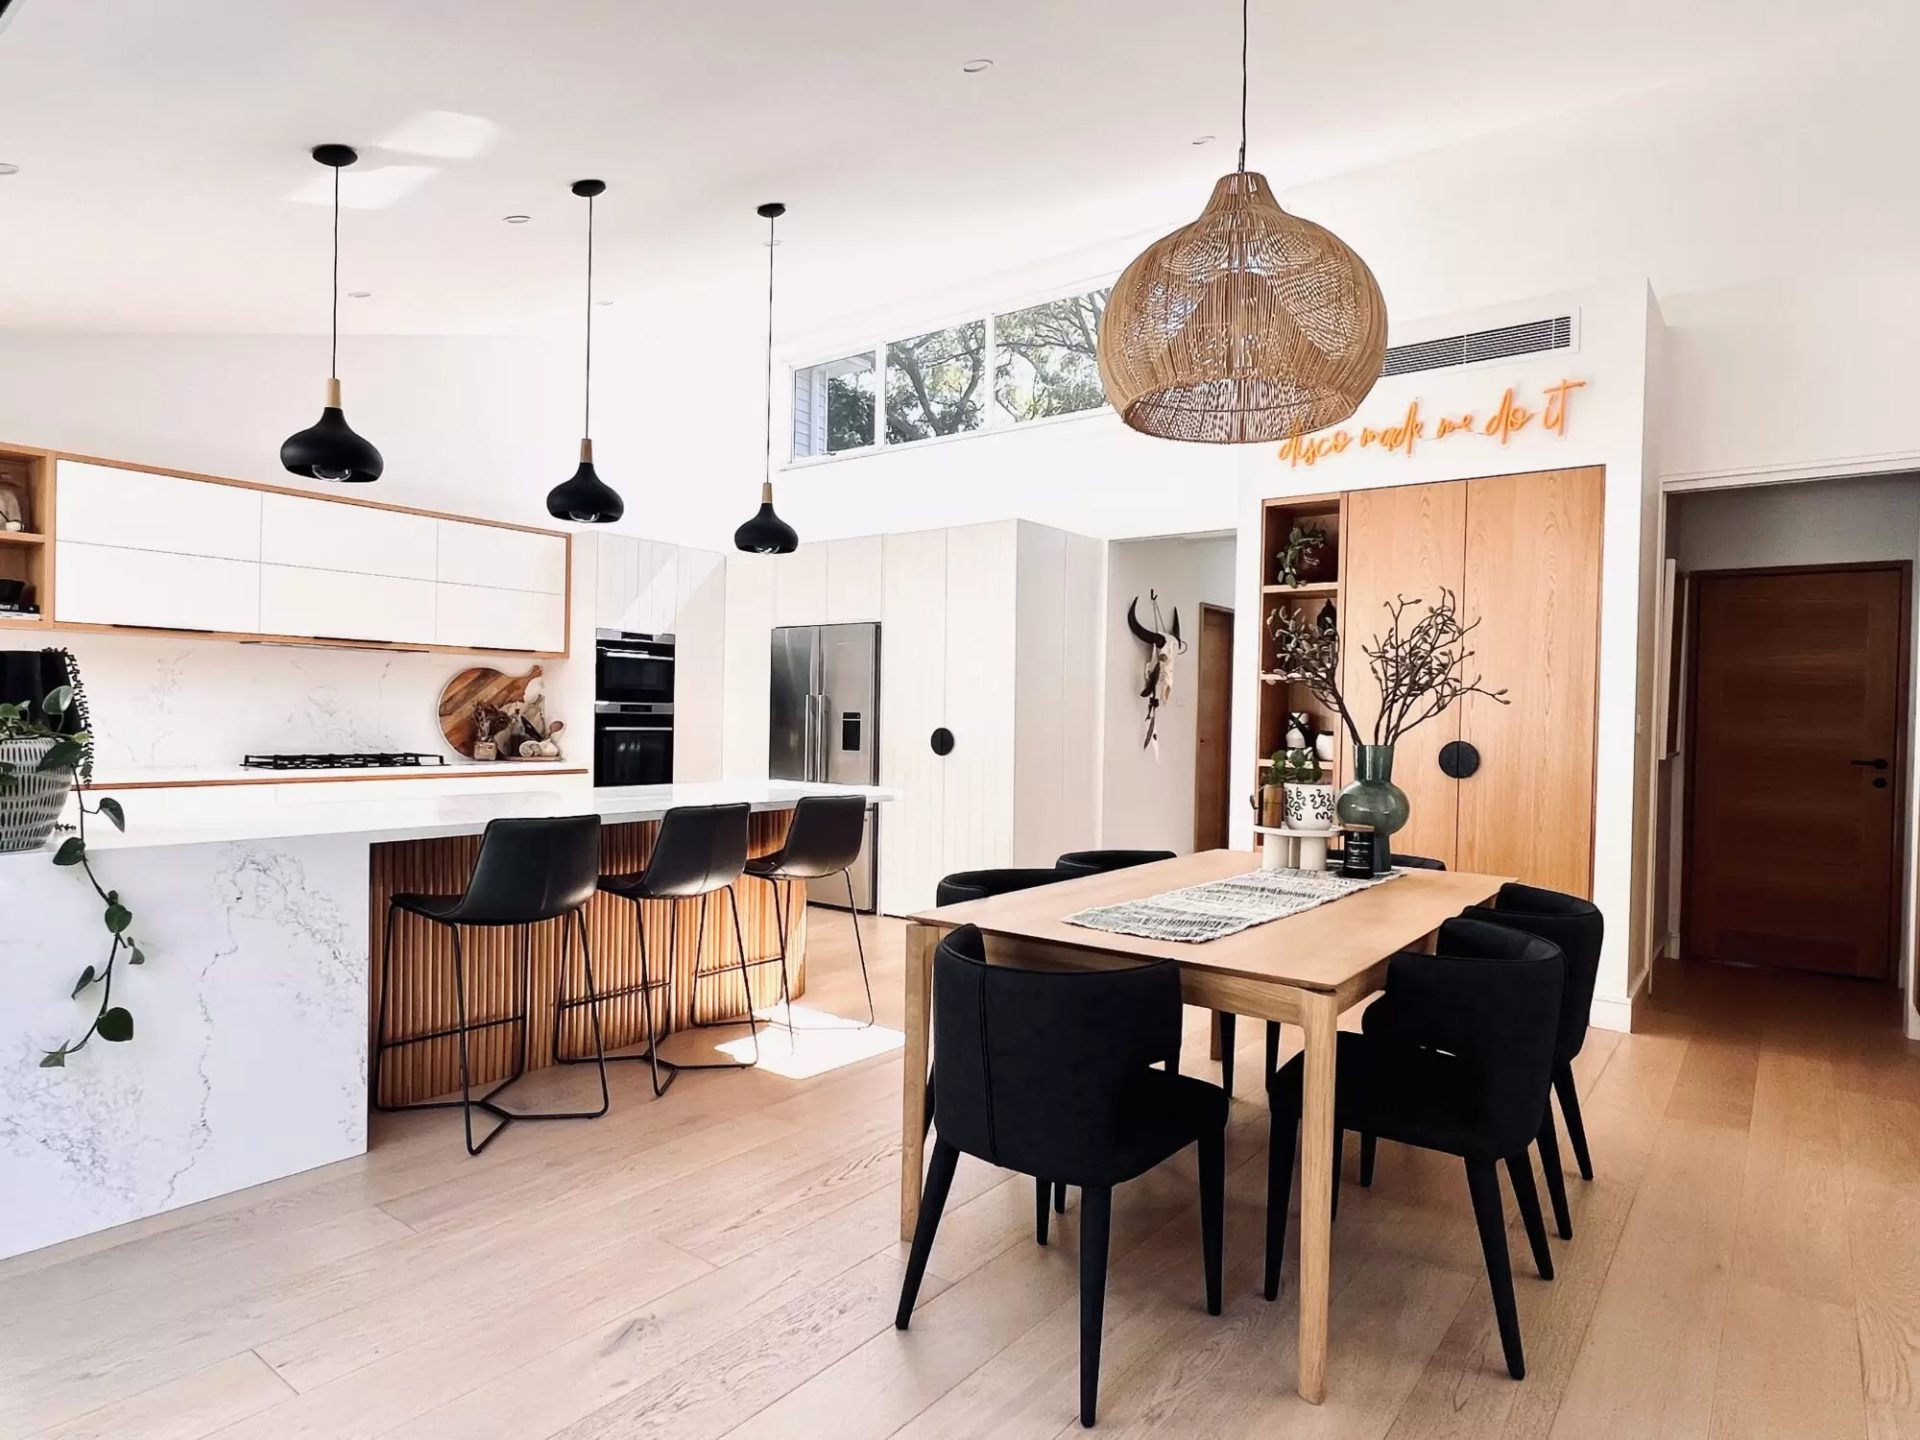
12 Oct
Renovating Your Home: A Step-by-Step Guide by a Northern Beaches Interior Designer
You know you want to renovate but where do you even start?!
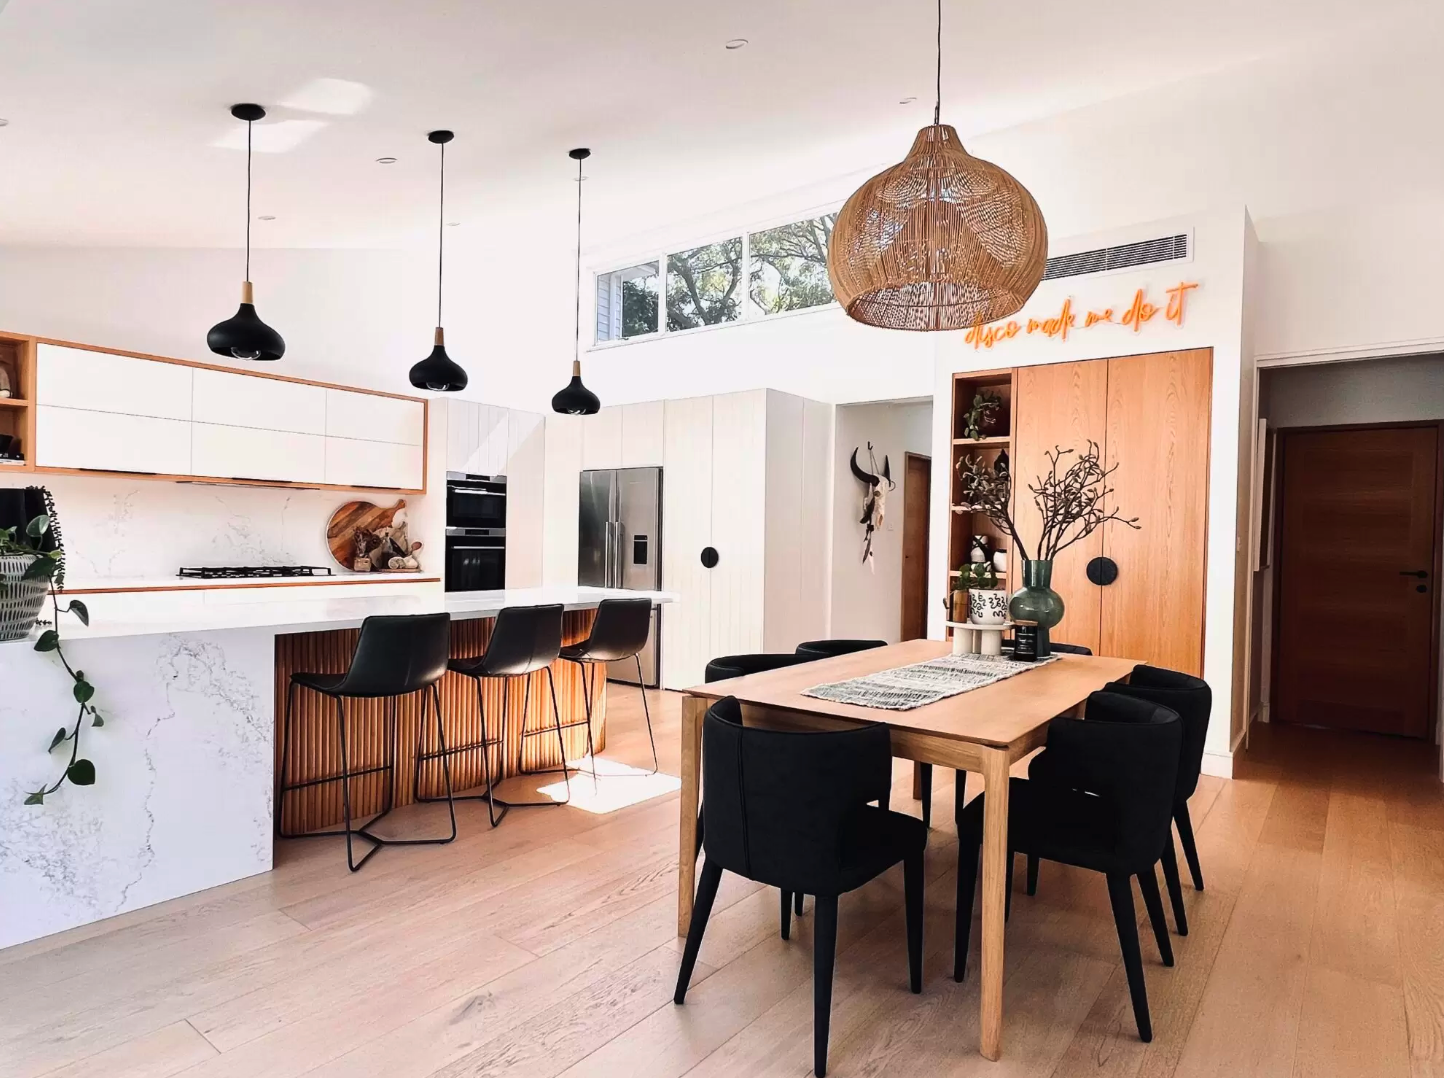
Renovating your home is one of the most exciting yet daunting experiences. With endless possibilities and the promise of a transformed living space, it’s easy to get swept up in the vision. However, without proper planning, things can quickly become overwhelming and Sydney’s stunning Northern Beaches have some specific traits well worth considering. From balancing coastal conditions to blending laid-back charm with modern functionality, there’s a lot to consider. If you’re a homeowner wondering where to start with your renovation journey, this guide is for you!
1. Begin with Design and Planning
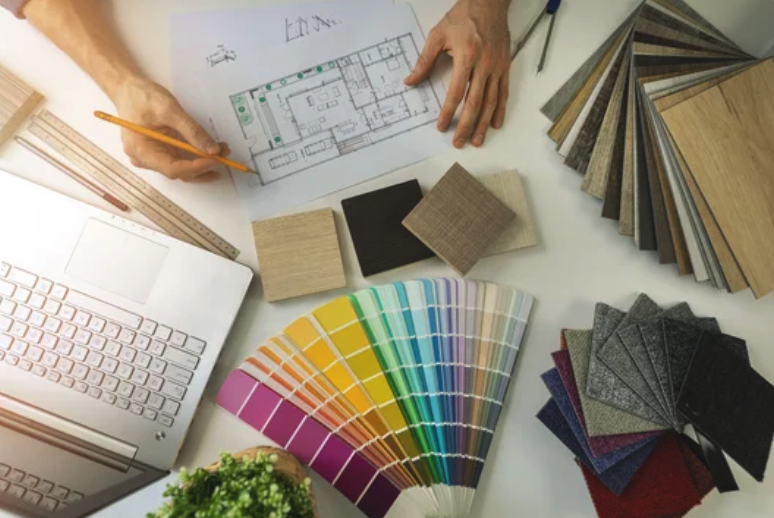
2. Decide on DIY or Professional Help

3. Secure Council Approval
Council regulations can vary, so it’s crucial to check with your local council before making any significant changes to your property. You may need approval if you’re:
Key tip – Allow plenty of time to acquire the necessary approvals… the wheels of council often grind slow!
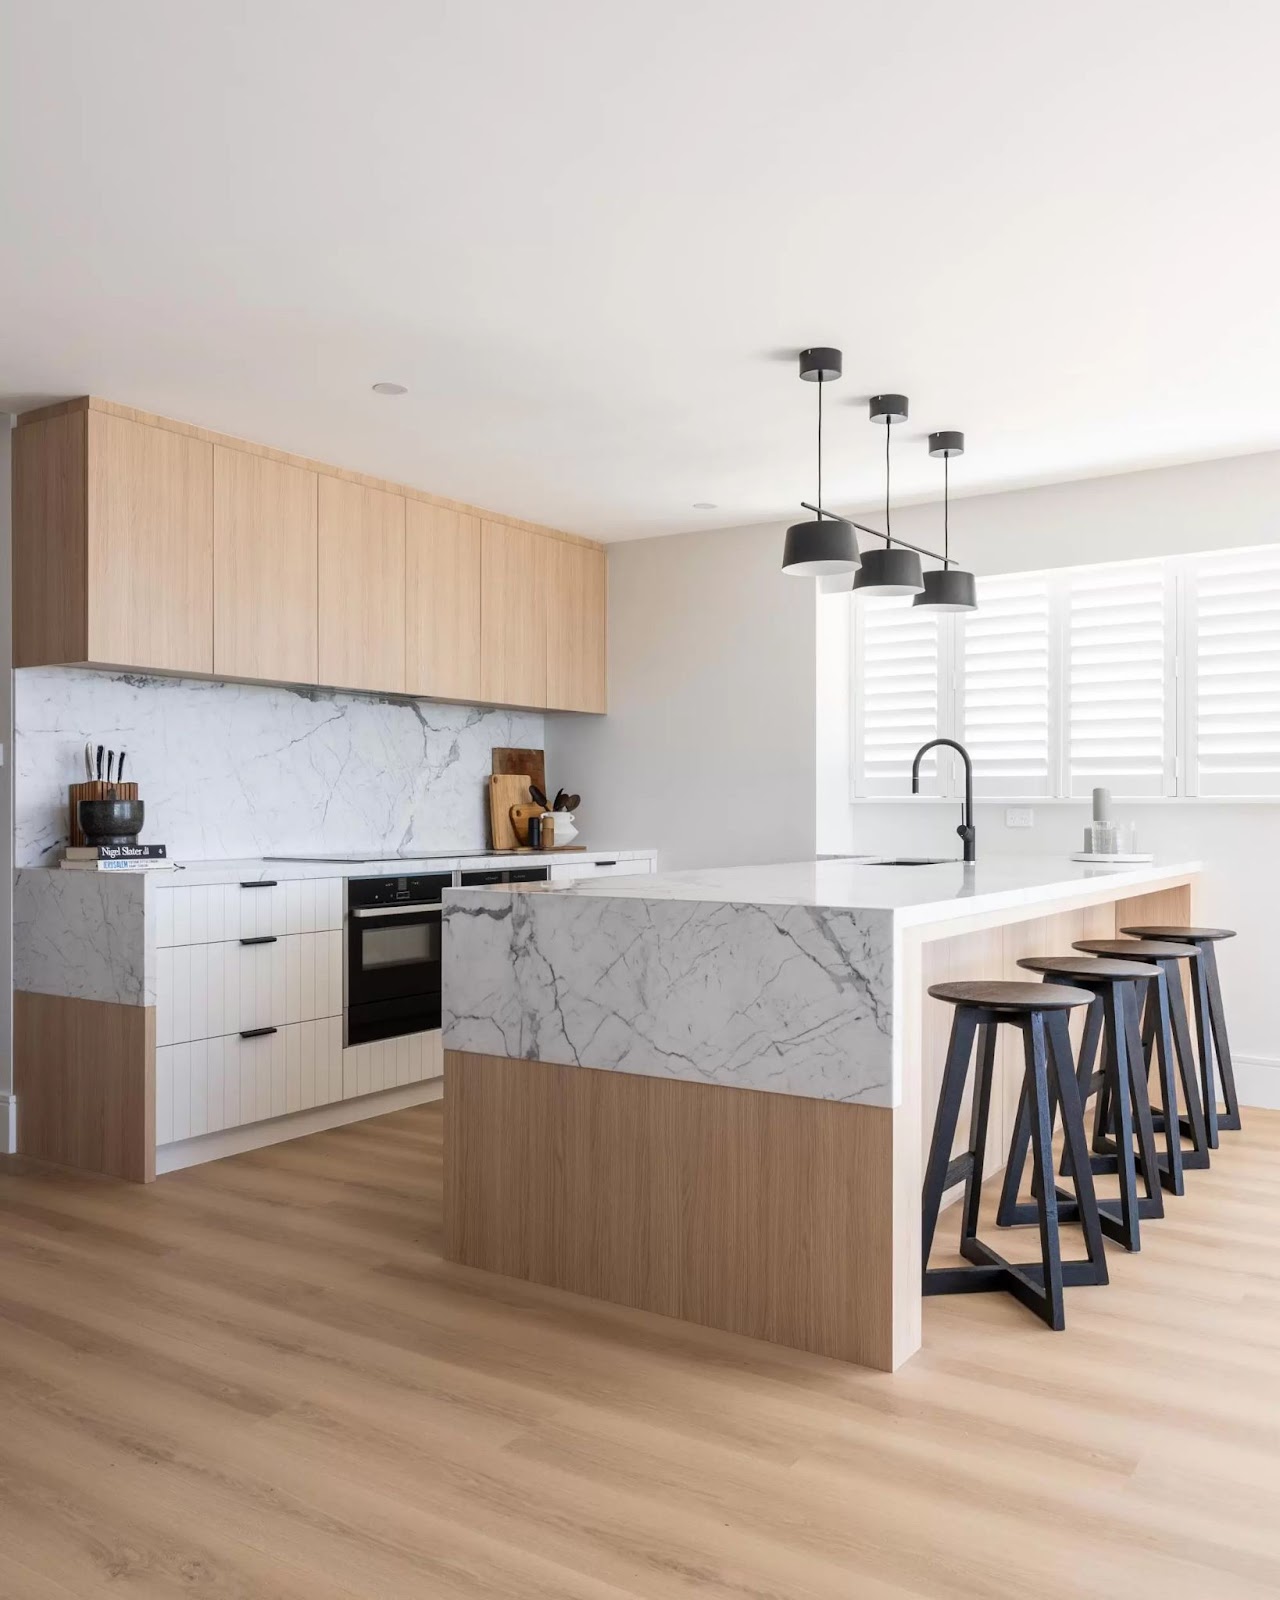
4. Prepare Your Budget

Landscaping – for Northern Beaches homes, don’t forget to factor in landscaping and outdoor elements. Decks, pergolas, and outdoor kitchens are highly desirable in coastal areas, adding significant value to your property.
4. Follow the Right Sequence of Works
To avoid unnecessary headaches and rework, always follow the right order when tackling renovations. The general rule is to work from the top down:


6. Prepare for Unexpected Delays
Even with the best-laid plans, renovating is unpredictable. From hidden issues like asbestos to delayed material deliveries, there are always unexpected obstacles. Don’t rush the final stages. In fact, many professionals agree that the last 20% of a renovation takes the longest and can cost the most.
Key tip: Stick to your checklist and budget, but be ready for surprises. Flexibility is essential in ensuring a smooth renovation.
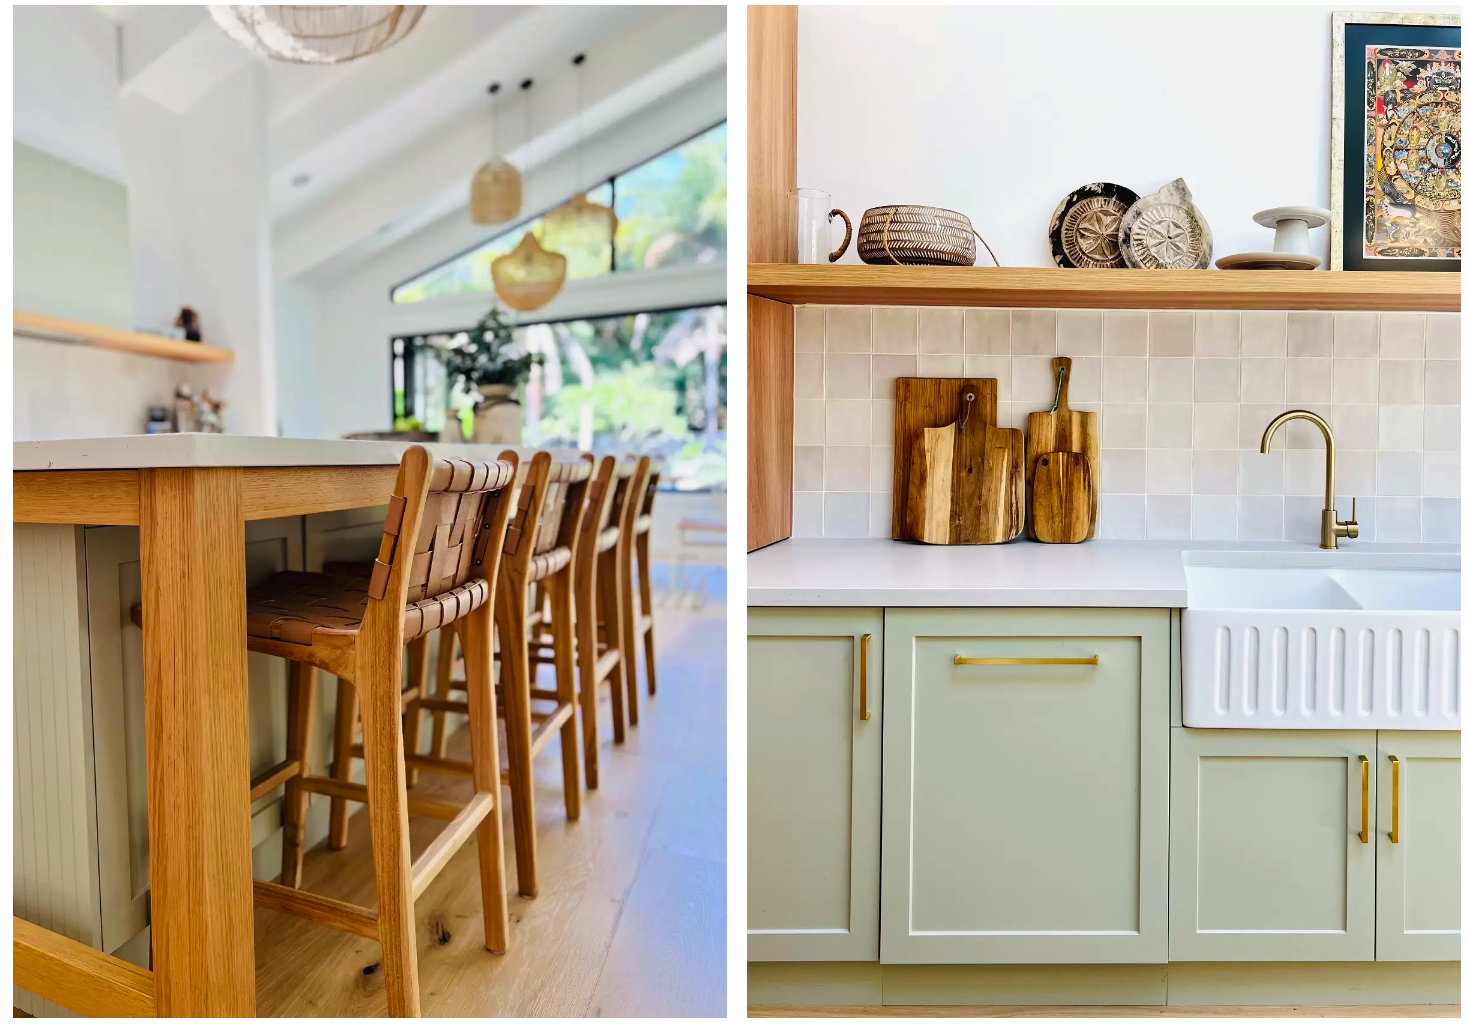
Renovating your home can be both a rewarding and challenging experience. By following this step-by-step guide, you’ll be able to create a beautiful, functional space that reflects the relaxed coastal lifestyle of the Northern Beaches while adding value to your property.
If you’re unsure where to start or need assistance managing the process, please feel free to reach out to us here – we’d love to help you! With expert knowledge of local conditions and regulations, your renovation journey will be a smooth one.

28 Sep
How to Choose the Perfect Sofa for Your Home
Choosing a sofa can feel like a big commitment, especially when it’s the centrepiece of your living room. It’s not just about comfort – your sofa should reflect your style and meet the practical needs of your home. Whether you’re looking for something timeless or trendy, here are a few key factors to consider when selecting the right sofa.
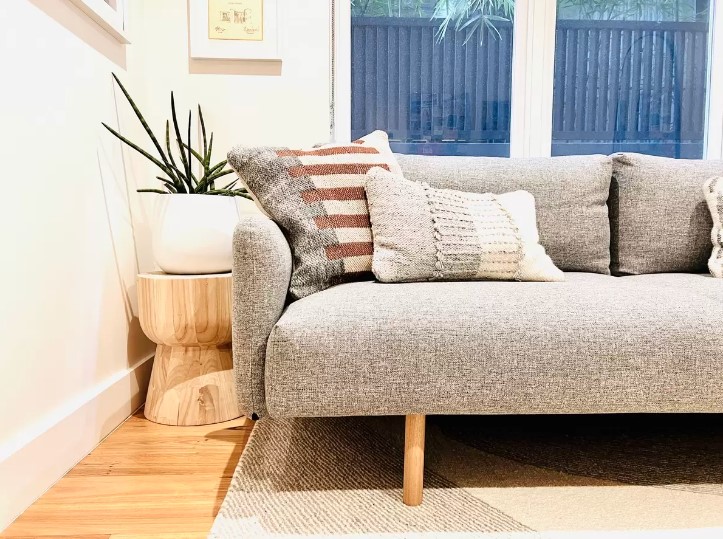
1. Frame Matters
Investing in a quality frame is crucial to the longevity of your sofa. Look for a solid hardwood frame, such as beech or oak, as these materials are strong and durable. Sofas with inferior frames might be cheaper upfront but will cost you more in the long run.
2. Manufacturer Guarantee
It’s always a good idea to check the manufacturer’s guarantee. The longer the period, the more confident they are in the product’s durability. Aim for at least a 10-year guarantee on the frame.
3. Cushion Fill: Feather, Foam, or Fibre?
Comfort is everything, and cushion fill plays a huge role in that. Feather cushions are soft but can lose shape over time. Foam provides more structure but can be a little firm. For the best of both worlds, I recommend opting for foam cushions wrapped in a feather layer. This gives you the softness of feather with the support and longevity of foam.

4. Cushion Channels
My top tip and a detail often overlooked is the inclusion of channels in the cushions. These are small tubes or pockets sewn into the fabric to contain the feathers, preventing them from bunching up in one area. This simple feature can keep your sofa looking plush and even.
5. Fabric Choices
The fabric you choose will set the tone for your sofa’s style. Most sofas come with a limited range of fabric options, but some manufacturers offer full customisation. Consider your lifestyle when choosing fabric – if you have kids or pets, go for a durable, easy-to-clean material. Look for built in scotch guarding properties like Zepel’s FibreGuard. If your sofa is more of a showpiece than a daily-use item, you can splurge on something a little more luxurious.
6. Colour Selection
Choosing the right colour can make or break your sofa’s presence in your space. Remember, dogs and white sofas don’t mix well! However, going too dark might overwhelm a small or poorly lit room. Find a balance that works with your existing décor and lighting conditions.

7. Cleaning & Maintenance
Life happens, and spills are inevitable. Consider whether you need a sofa with removable, washable covers or if a simple spot-clean fabric will suffice. Either way, it’s always a good idea to scotchgard your sofa as soon as it arrives to protect it from accidental stains.
8. Get the Size Right
It sounds simple, but measuring your space – and measuring again – is critical. Don’t forget to consider access points such as doorways, hallways, and staircases to make sure your sofa can actually get into your home!
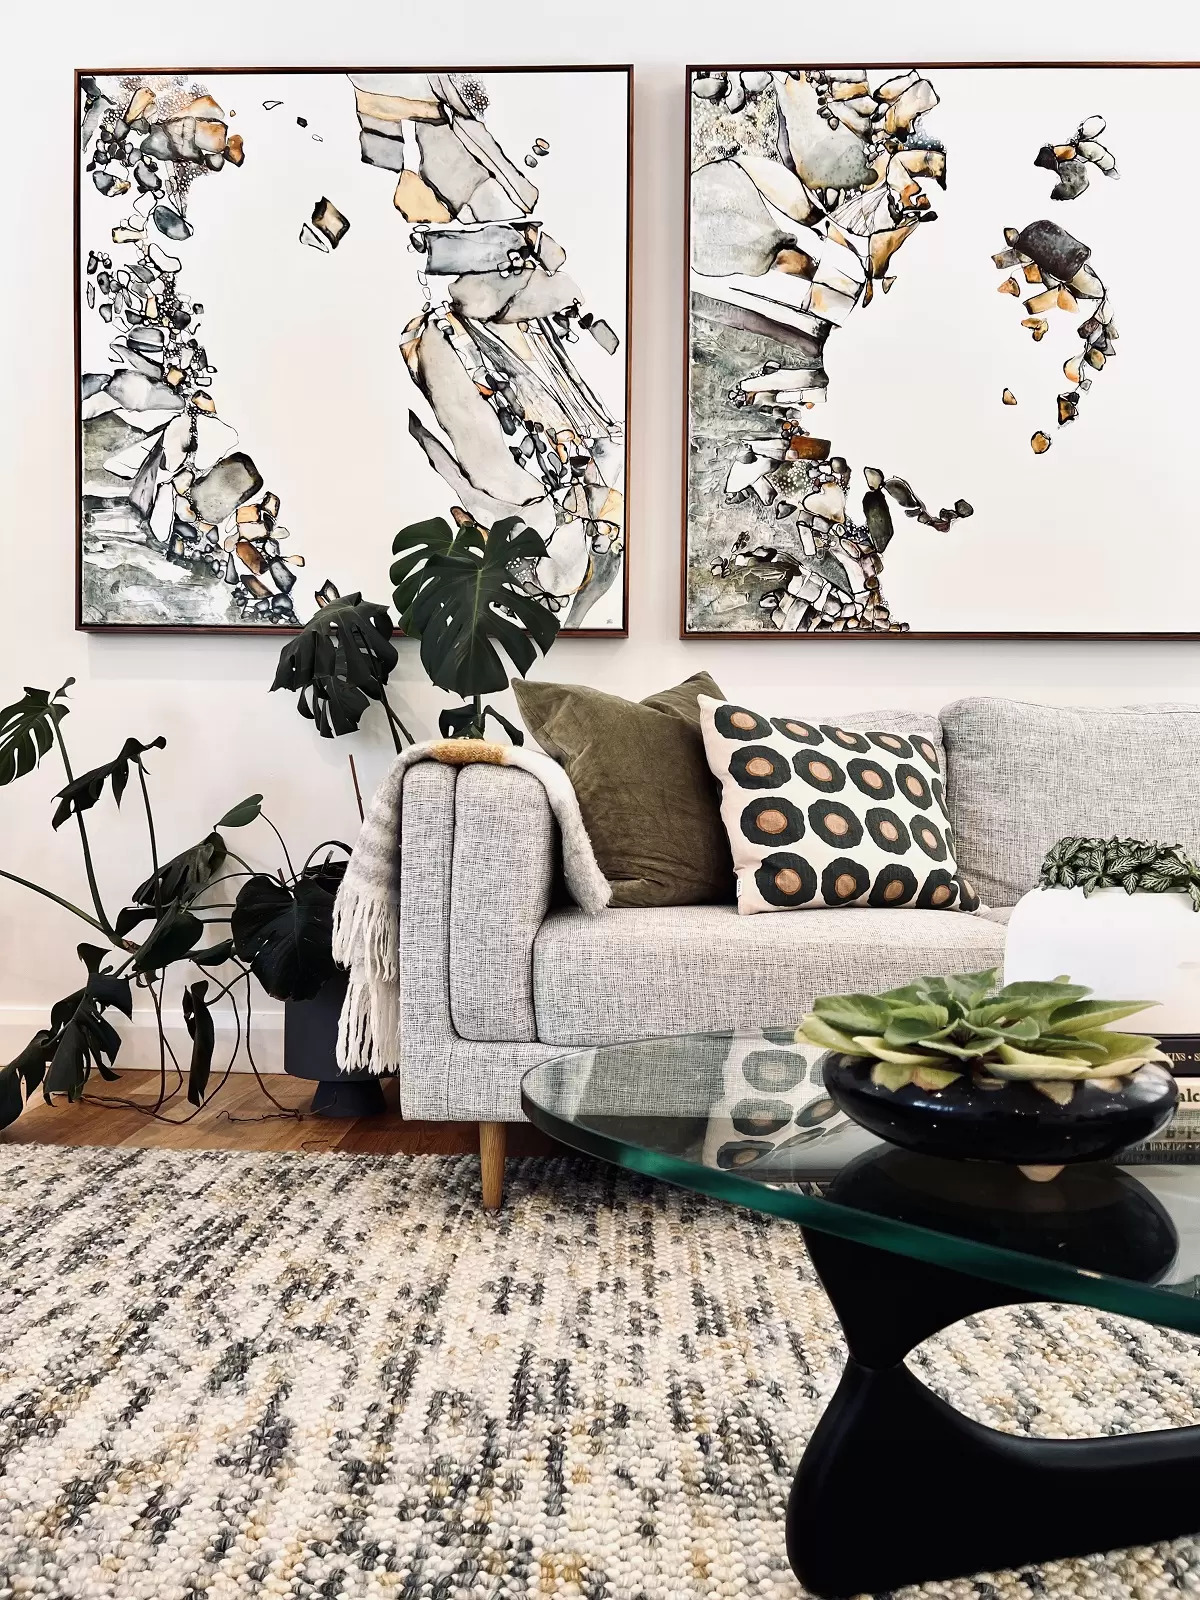
9. Lead Time Expectations
Most custom-made sofas have a lead time of 16-20 weeks. If you’re in a rush to furnish your space, consider opting for a local manufacturer. For example, @craftedfurnituresydney offers beautiful custom options and, because it’s made in Sydney, you can expect your new sofa in just 8 weeks!
Conclusion
Choosing a sofa is a big decision, but with these tips in mind, you’ll be well-equipped to make the best choice for your space. Whether you’re designing your dream living room or updating your current space, remember to think about comfort, practicality, and your personal style.
If you would like some help with any styling or interior design projects please feel free to reach out to us here – we’d love to help you!

12 Sep
Transform Your Space: A Guide to Bathroom Renovations in Sydney
Renovating your bathroom can be one of the most rewarding home improvement projects. Not only does it enhance the overall aesthetic of your home, but it also increases the property’s value. Whether you’re looking to update an outdated space, improve functionality, or add a touch of luxury, a well-planned bathroom renovation can transform your home into a modern sanctuary. In this guide, we’ll explore essential design tips, standard measurements, and considerations to ensure your bathroom renovation is a success.
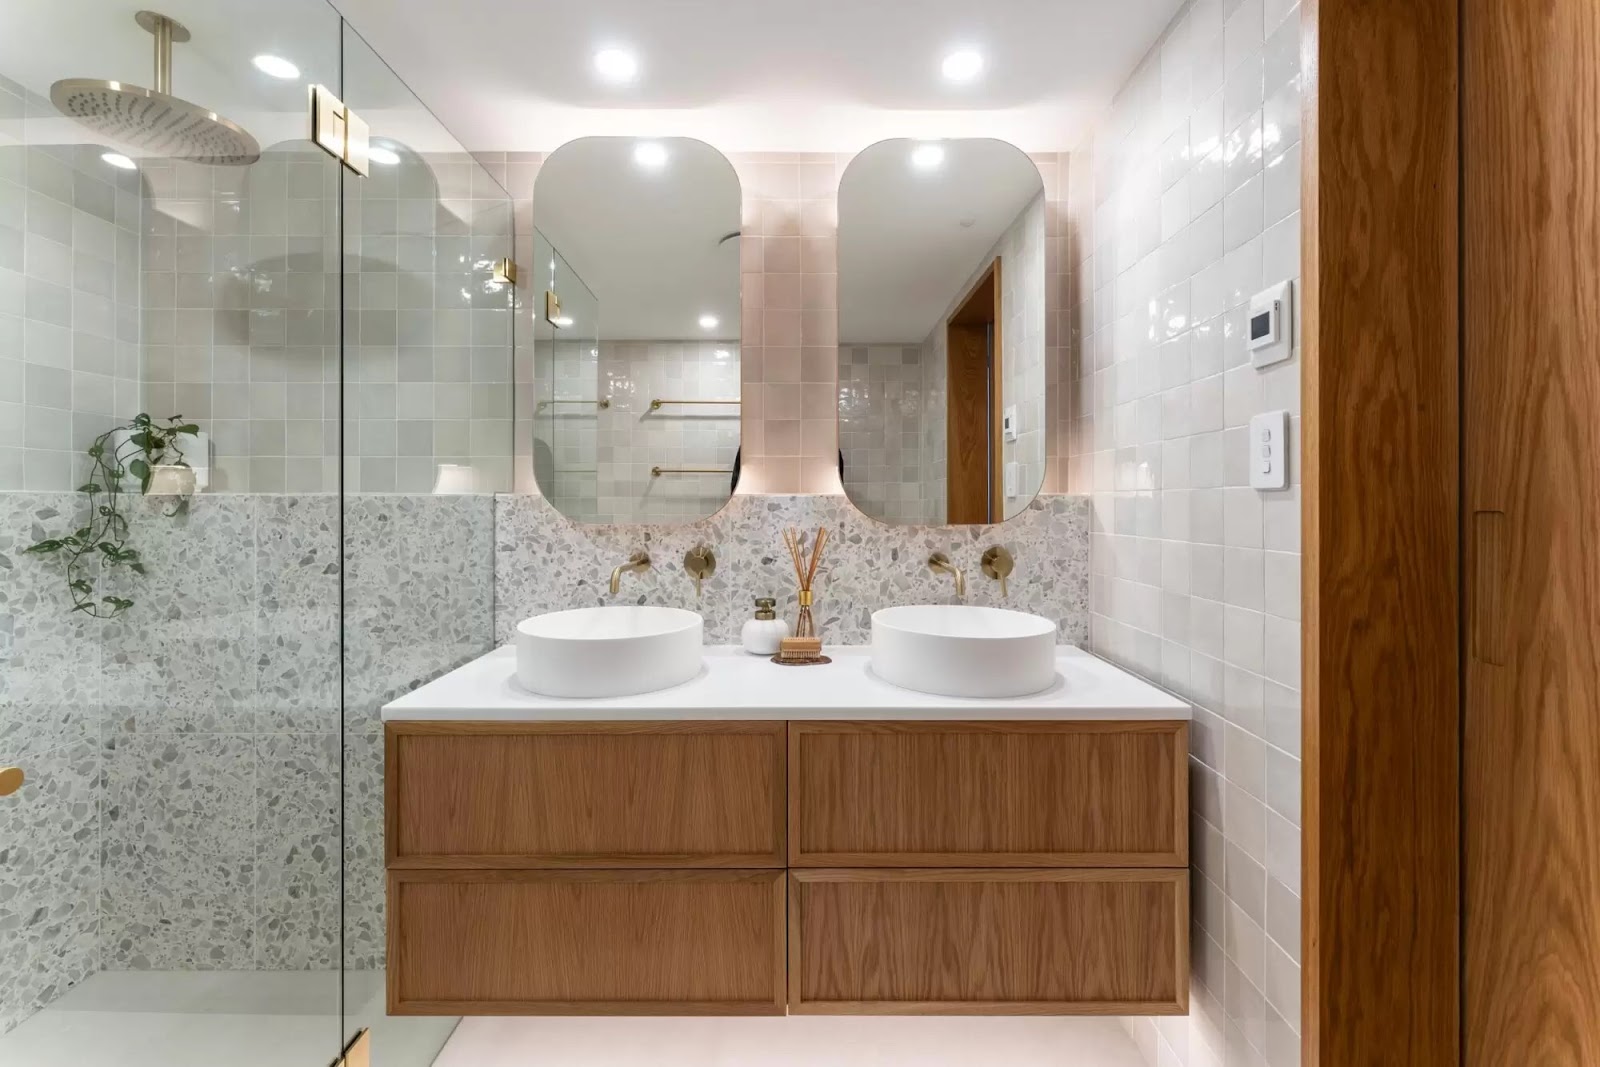
1. Planning Your Bathroom Renovation
Before diving into the renovation process, careful planning is crucial. Consider the following steps to ensure a smooth and efficient renovation:
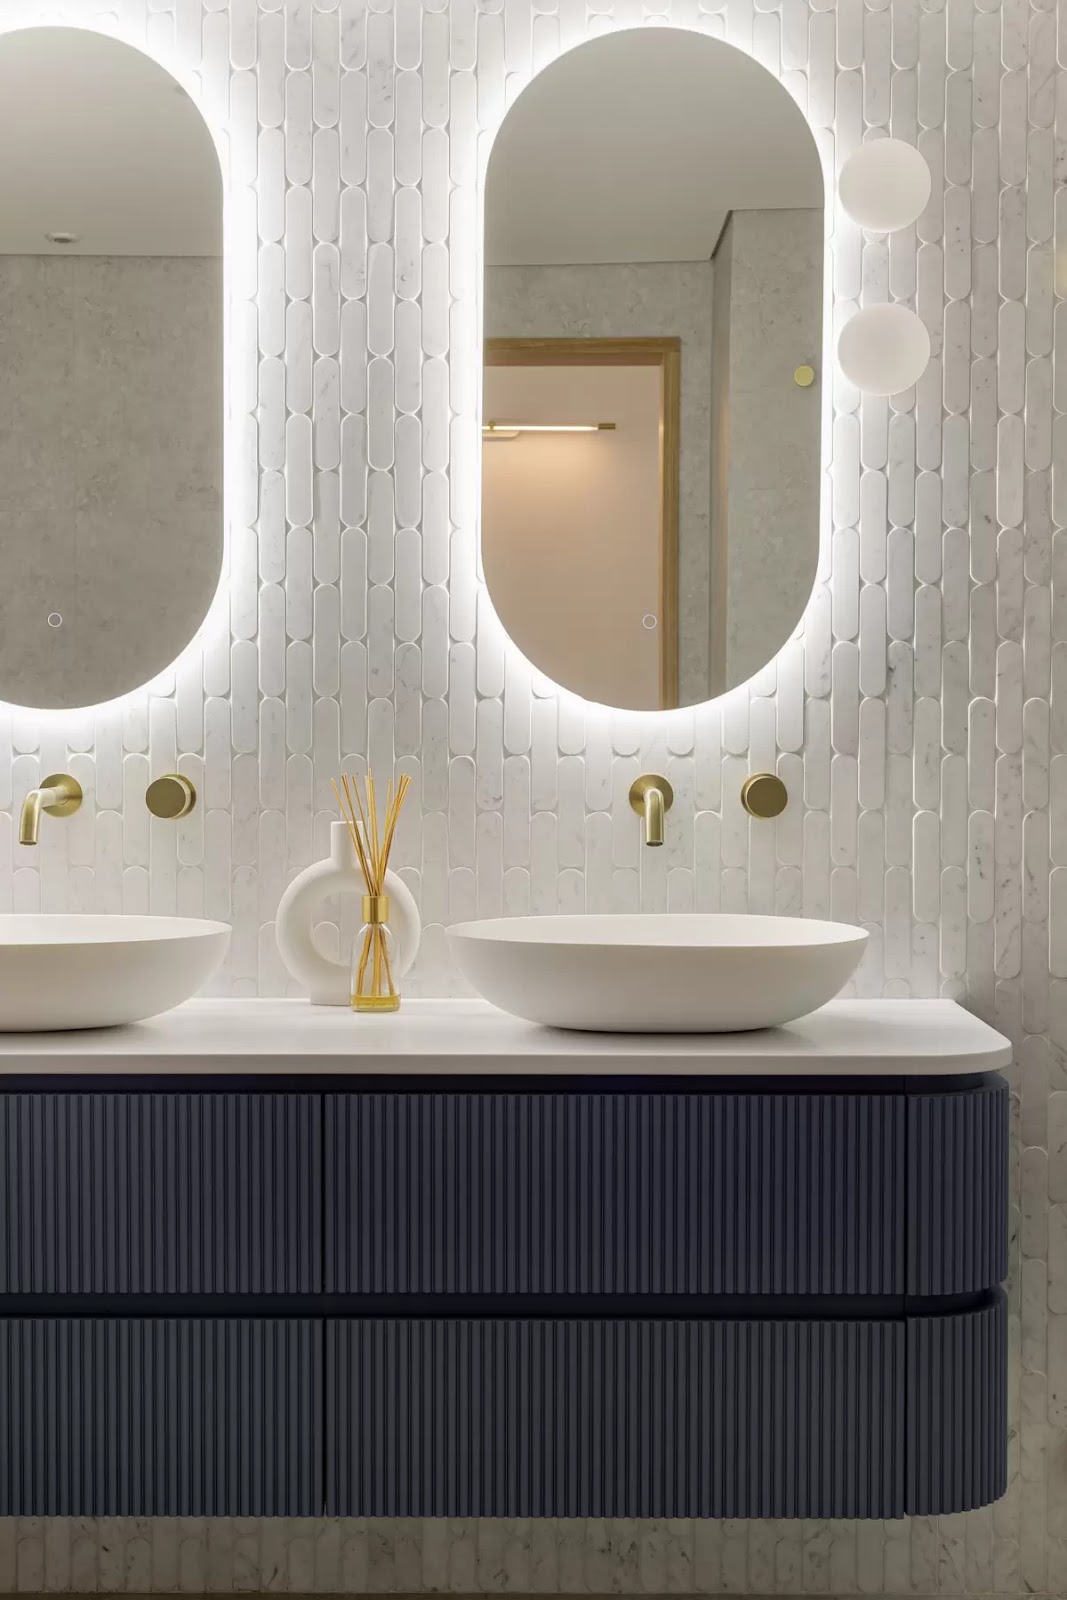

2. Standard Measurements for Bathroom Renovation
Understanding the standard measurements for bathroom fixtures is crucial to creating a functional and comfortable space. Here’s a breakdown of the essential dimensions:


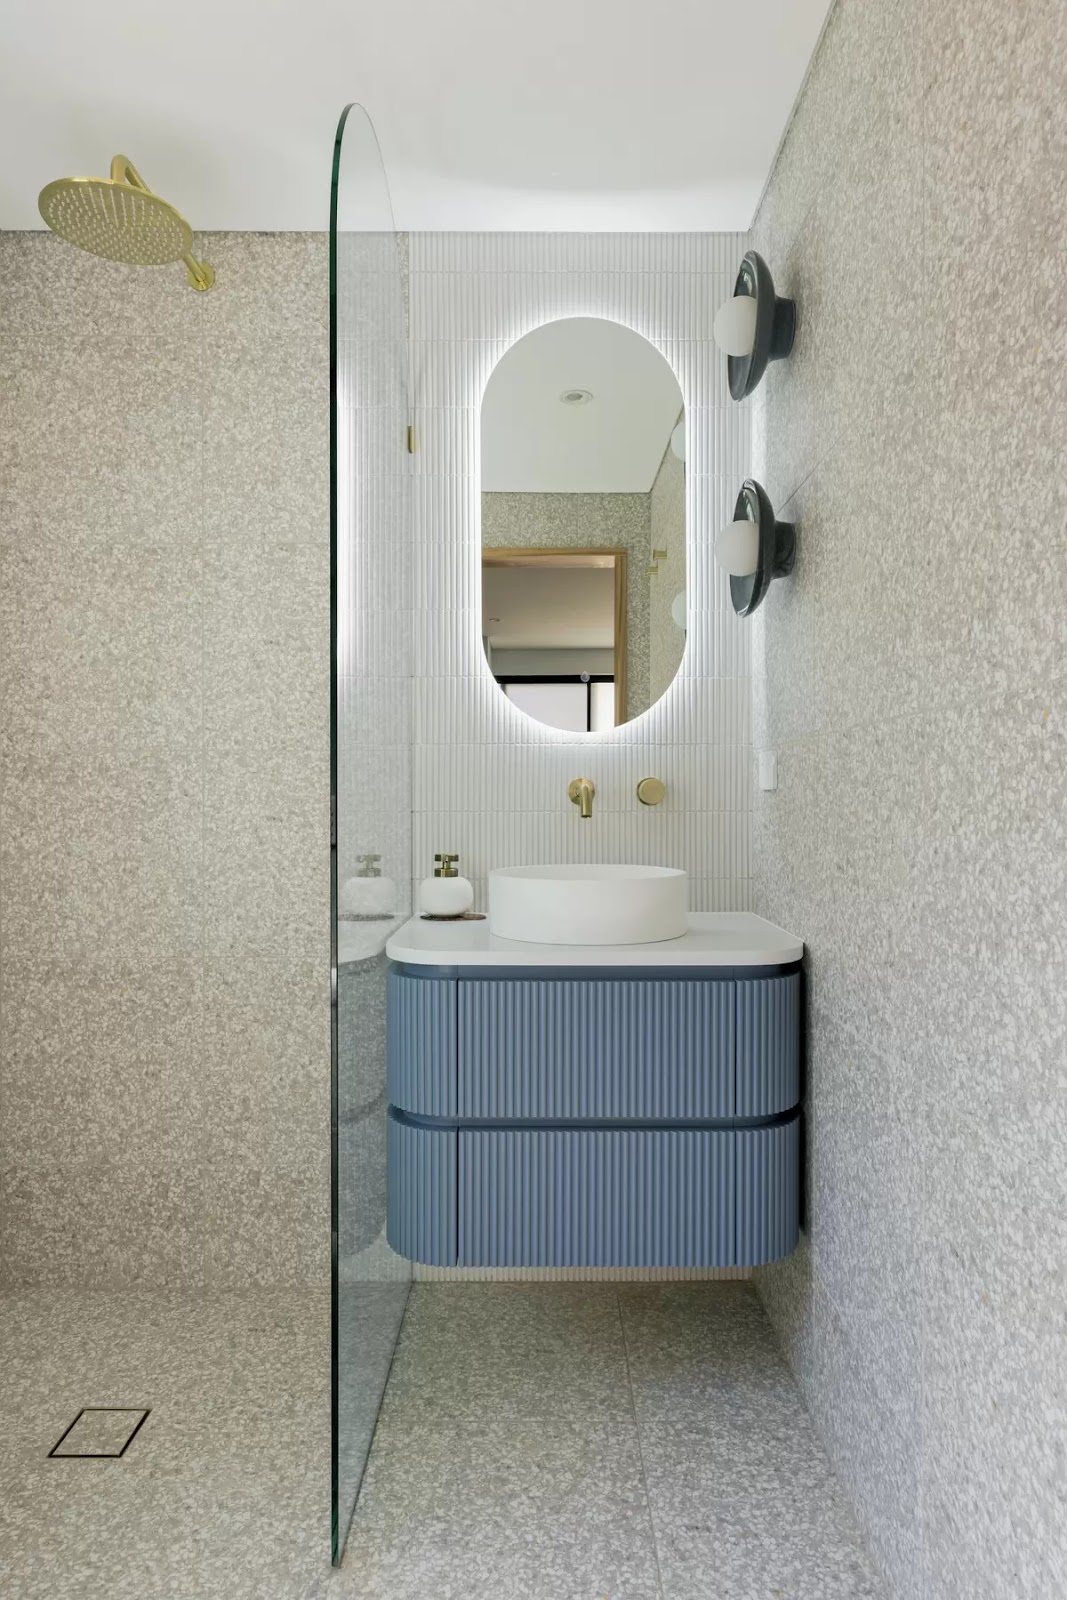

3. Design Tips for a Stunning Bathroom Renovation
Now that you have the basics of bathroom layout and measurements, let’s dive into some design tips that will elevate your bathroom renovation in North Sydney.
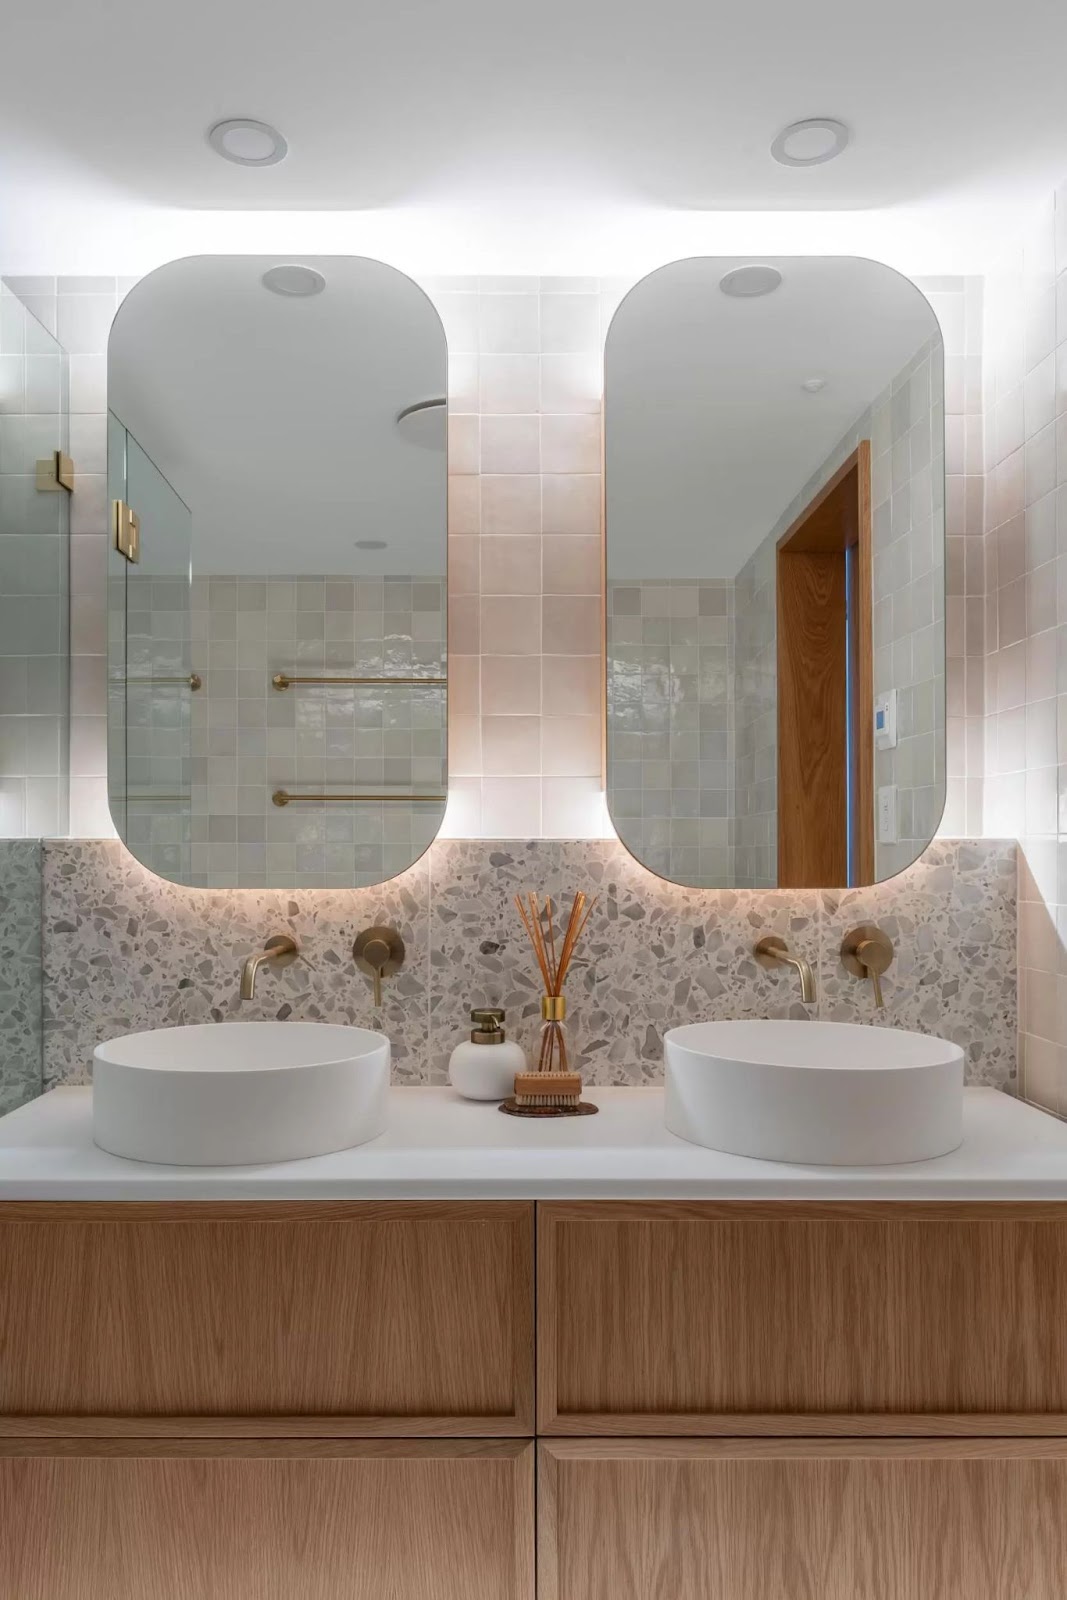
A successful bathroom renovation often requires a team of skilled professionals, especially for complex tasks such as plumbing, electrical work, and tiling. Hiring the expertise of an interior designer will make sure your money is well spent on creating a beautiful space with an effective and functional layout. When choosing contractors in Sydney, consider the following:
A well-executed bathroom renovation can transform your Sydney home, making it more functional, beautiful, and valuable. By understanding standard measurements, incorporating smart design tips, and hiring the right professionals, you can create a space that meets your needs and reflects your personal style. Whether you’re updating a small bathroom or creating a luxurious retreat, careful planning and attention to detail will ensure your renovation is a success. Happy renovating!
If you would like some help with your forthcoming renovation or interiors project please feel free to reach out to us here – we’d love to help you!


30 Aug
Why a Thoughtful Lighting and Electrical Plan is Key to Your Renovation Success
When it comes to renovating, there’s one aspect that’s often underestimated but can make all the difference: a well-thought-out lighting and electrical plan. Have you ever gone to plug something in and realised there is no convenient power point? As a Sydney interior designer, I’ve seen firsthand how a proper lighting and electrical plan can make a space easy to use and a joy to live in. It’s not just about flipping a switch; it’s about creating an atmosphere, highlighting the best features of your home, and ensuring functionality for your daily life.
So, why is a lighting and electrical plan so important in making your renovation a ‘shining’ success?
Lighting Design: More Than Just Brightness – Lighting design is an art form in itself. It’s about finding the perfect balance between natural and artificial light, task and ambient lighting, and the overall mood you want to create in each room. Imagine walking into a beautifully renovated kitchen with the perfect pendant lighting hanging over the island. The kitchen pendant lighting doesn’t just illuminate the space; it adds character, warmth, and style. Without a proper lighting plan, you can easily miss out on subtle yet impactful details.
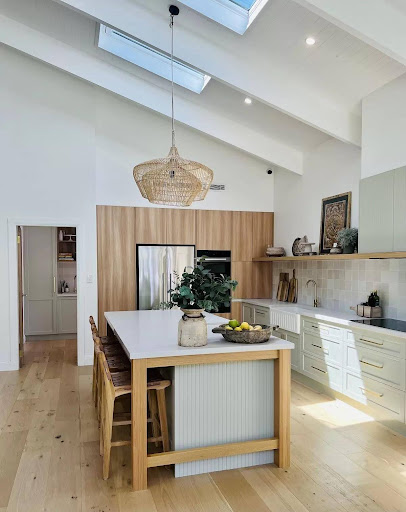
On the Northern Beaches, where we love to blend indoor and outdoor living, lighting design becomes even more crucial. Natural light is abundant, but it’s the strategic placement of artificial lighting that can make your home feel cosy and inviting as the sun sets. Whether you’re after a minimalist look with sleek, modern fixtures or something more rustic using natural materials, having a clear plan in place ensures that every corner of your home is well-lit and welcoming.
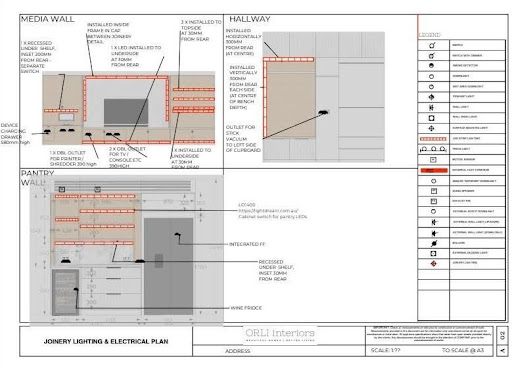
The Role of Electrical Planning in Renovations – Hand in hand with lighting design is electrical planning. This is the backbone of your renovation project, and getting it right from the start can save you a lot of headaches down the line. Electrical planning involves more than just deciding where to place power outlets. It’s about understanding how you’ll use each space, what appliances or gadgets will need power, and how to future-proof your home for any technology upgrades.
For instance, in a kitchen renovation, you’ll need to consider not just the placement of kitchen pendant lighting but also where your appliances will go, where you’ll need extra outlets, and how the lighting will work with your overall kitchen design. Proper electrical planning ensures that your lighting is functional and that you have enough power points in all the right places. It also helps avoid the nightmare of having to ruin freshly painted walls because you forgot to include an outlet for that new appliance you just bought.
Here are a few things to consider in different rooms.
Kitchens: The heart of the home – The kitchen is often considered the heart of the home, and it’s a space where lighting and electrical design is particularly important.
Kitchen pendant lighting is a popular choice over the island or peninsula, and for a good reason. It not only provides focused light for tasks like cooking and meal prep but also adds some serious style to the space.
When choosing pendant lights for your kitchen, think about the size and scale of the fixtures in relation to your island or dining table. Too small, and they might get lost in the space; too large, and they could overwhelm the room. The right pendant lights should complement your kitchen’s overall design, providing both functionality and a visual focal point. Here are some quick win tips:
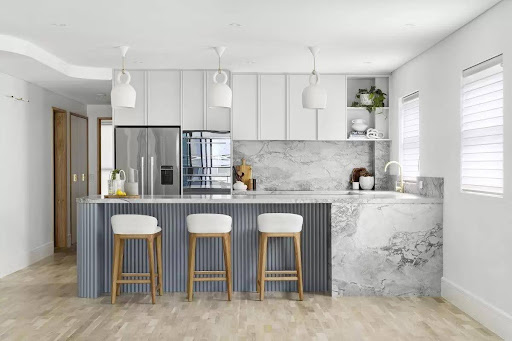
Busy Bathrooms – One of the most used but least thought about rooms in the home. Your bathroom needs to accommodate everything from shaving and makeup application to relaxing in the tub and the odd late night visit.
Like every space in the home, a layered plan provides for all these different circumstances:
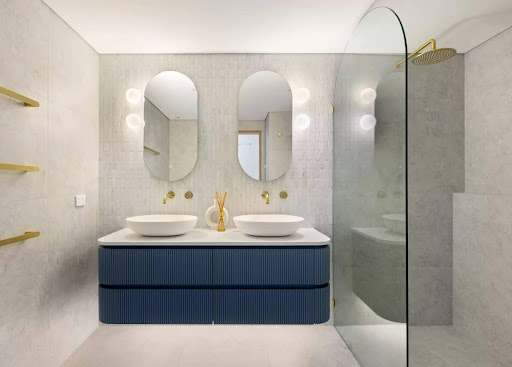
Creating Ambiance with Lighting – The right lighting can completely transform the mood of a room. Whether it’s the soft glow of a wooden floor lamp in your reading nook or the dramatic effect of pendant lights in your dining area, lighting has the power to influence how we feel in a space.
When planning your lighting design and electrical plan, consider how each room will be used. By thinking about how you want each space to feel and function, you can create a lighting plan that enhances your home’s overall design.
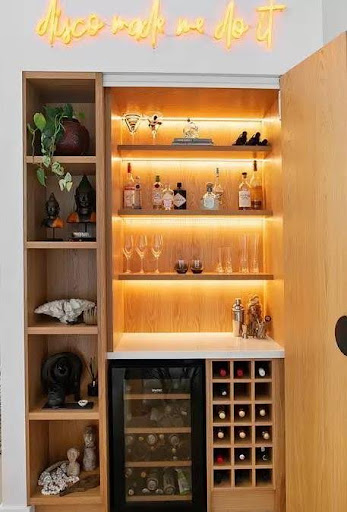
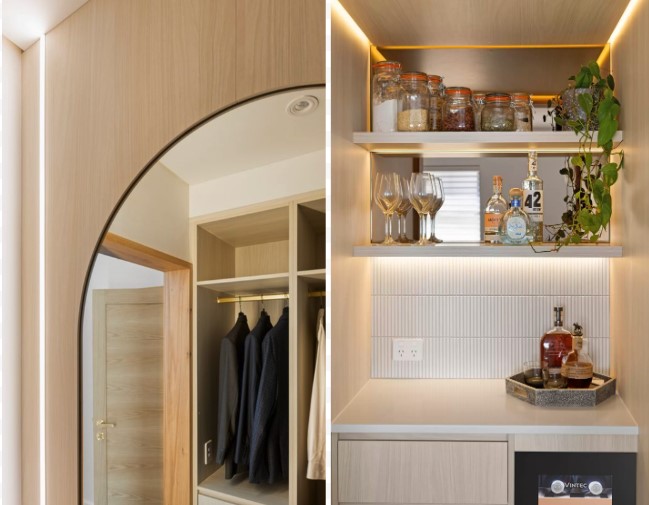
The Importance of Joinery Lighting – Joinery lighting is a detail that can elevate the design and functionality of your cabinetry, shelving, and other built-in furniture. It not only adds an aesthetic appeal but also enhances the usability of these spaces.
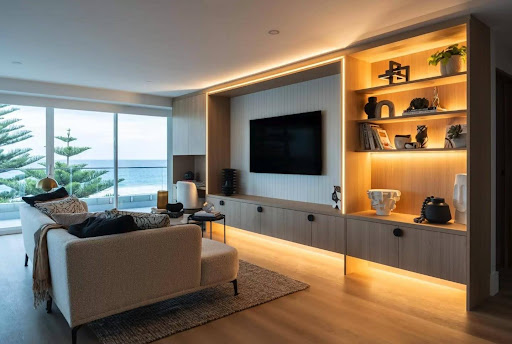
Outdoor Lighting: Extending Your Living Space – Outdoor lighting plays a vital role in extending your living space beyond the four walls of your home, an absolute must here in our sunny Northern Beaches. Thoughtfully placed lighting can transform your garden, patio, or balcony into a magical retreat, perfect for entertaining or simply relaxing after a long day.
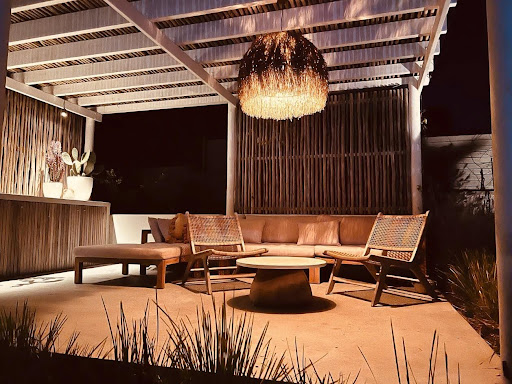
Consider:
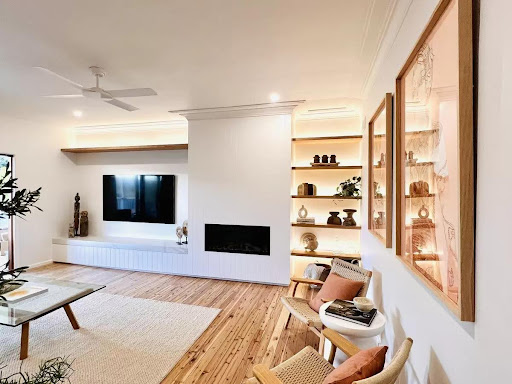
Why Hire an Interior Designer for Your Lighting Plan? – Working with an experienced interior designer can make all the difference in your renovation project. We understand the unique lighting needs of homes in Sydney, from maximising natural light to selecting the perfect fixtures for our coastal lifestyle. Plus, we can help you navigate the technical aspects of electrical planning, ensuring that your home is not only beautiful but also functional and future-proof.
A thoughtful lighting and electrical plan is part of the crucial skeleton that your renovation is built around. It’s about more than just aesthetics; it’s about creating a home that is both practical and enjoyable to live in, day in and day out. So no matter the scope of your renovations, make sure you have a clear plan in place. Trust me, your future self will thank you!
If you would like some help with your forthcoming renovation or interiors project please feel free to reach out to us here – we’d love to help you!

16 Aug
Creating Your Dream Bedroom: Expert Styling Tips from your local Northern Beaches Interior Designer
Your bedroom is more than just a place to sleep; it’s your personal sanctuary and escape from the outside world. As a Sydney based interior designer, I’ve helped countless clients transform their bedrooms into dreamy, cosy retreats. Today, I want to share my top bedroom styling tips, to help you to create your own perfect space.
Start with a Soothing Colour Palette – Colour is one of the most powerful tools in an interior designer’s arsenal. It can change the mood of a room, make it feel larger or cosier, and it can have a great influence on your emotional wellbeing.
When it comes to your bedroom, selecting the right colour palette is essential. For the perfect tone of relaxation and comfort, choose soothing colours that resonate with you. Think soft blues, muted greys, or warm neutrals. These shades create a serene ambiance and serve as the perfect backdrop for the rest of your design elements. Remember, colour has a powerful impact on our emotions, so select hues that make you feel at ease. Consider not only the wall colour but also the colours of your bedding, curtains, and decor. These elements should work together to create a harmonious and inviting space. Don’t be afraid to experiment with different shades and combinations until you find the one that resonates with you the most.
Layer Up with Textures – Texture is a secret weapon in creating a cosy and inviting bedroom. It adds depth and visual interest to the space. The key to successfully incorporating texture is balance. Too much texture can make the room feel cluttered, while too little can make it feel cold and sterile.
Bedding: Experiment with different types of bedding. Mix and match linen sheets with a cosy, textured doona cover. Layer your bed with various pillows and throws in different materials. The interplay of textures not only feels luxurious but also visually enhances the room. A knitted throw or a velvet cushion can turn an ordinary bed into a sumptuous haven.
Rugs: A well-chosen rug can define your bedroom’s style and add warmth. Opt for a soft, plush rug beside your bed for that luxurious feeling underfoot. Alternatively, a natural fibre rug like jute or sisal can bring a touch of rustic texture to your space.
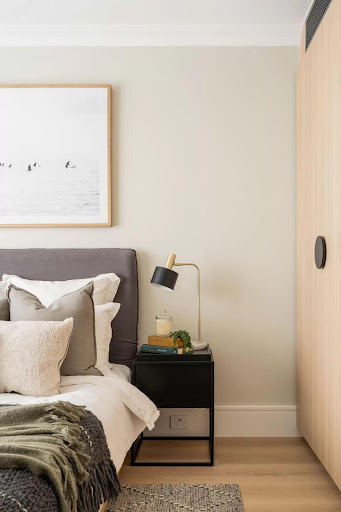
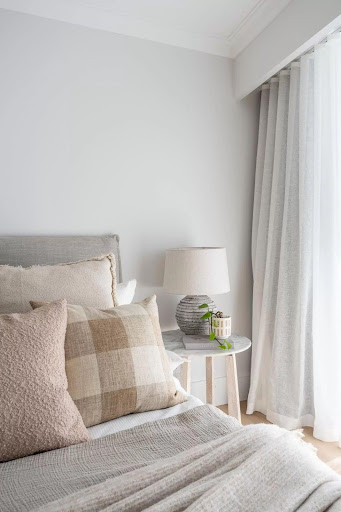
Upholstery: Consider an upholstered headboard or chair in your bedroom. The fabric adds an extra layer of comfort and visual interest. Velvet and interesting weaves are popular choices for their rich textures and versatility.
Wall Treatments: Consider textured wall treatments like fluted or vj cladding, or wallpaper with raised patterns. These options add depth and character to your bedroom and help to create a focal point to the space behind the bedhead.
Curtains and Drapes: The choice of fabric for your curtains or drapes can significantly impact the overall texture of the room. Sheer, gauzy curtains can create an airy, light feel, while heavier materials like brocade or jacquard can add elegance and a touch of indulgent luxury.
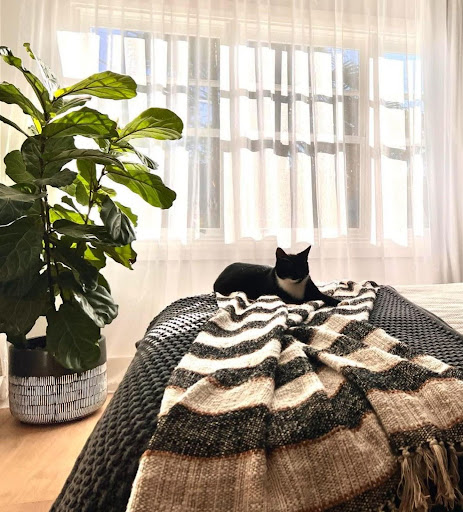
Bring Nature In – If you are a regular reader of
my blogs you will know I love a plant or three!
Bringing nature into your bedroom has a
multitude of benefits. Not only does it add a pop
of green to your decor, but it also helps purify
the air for a better night’s sleep and enhances
your overall well-being. Houseplants, like snake
plants, rubber plants or fiddle leaf figs are
perfect choices. They’re visually pleasing,
relatively low-maintenance and add a refreshing
touch of nature to your space. Be sure to check
your green buddy’s natural light requirements
before placing it though, and be sure not to
under or over water.
Personalise Your Space – Your bedroom should tell your story. Display artwork, photos, or decor items that are meaningful to you. Surround yourself with things that make you happy and evoke positive memories. Whether it’s family photos, travel souvenirs, or a gallery wall of your favourite artwork, personalising your space ensures it’s uniquely yours. Your bedroom should be a place you feel happy and relaxed, surrounded by things you love.
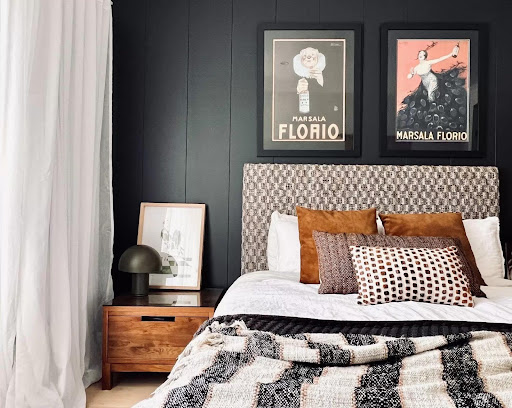
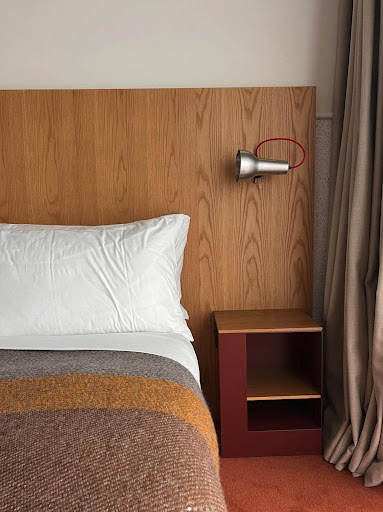
Don’t Forget Lighting – Lighting is a crucial aspect of bedroom design. It sets the mood and creates the right atmosphere. To achieve a warm and inviting space, consider layering your lighting. Incorporate ambient, task, and accent lighting. An elegant pendant light or chandelier can serve as a focal point, while bedside lamps provide soft, soothing light for reading or winding down. Don’t underestimate the transformative power of lighting in making your bedroom truly inviting. (Image from Ace Hotel Sydney)
Declutter and Organise – A cluttered and disorganised bedroom can be a major source of stress. To maintain the zen vibe you’re after, invest in smart storage solutions. Under-bed storage, wall-mounted shelves, or a well-organised closet can help you keep your space tidy. Remember, a tidy bedroom not only looks better but can also have a positive impact on your mental well-being.
Invest in Quality Bedding – Your bed is the centrepiece of your bedroom, and the quality of your bedding can significantly impact your sleep quality and overall comfort. Invest in a comfortable mattress that suits your sleeping style. High-thread-count sheets, soft duvet covers, and a variety of pillows can make all the difference. Select bedding that feels heavenly against your skin and provides the right level of support for a restful night’s sleep.
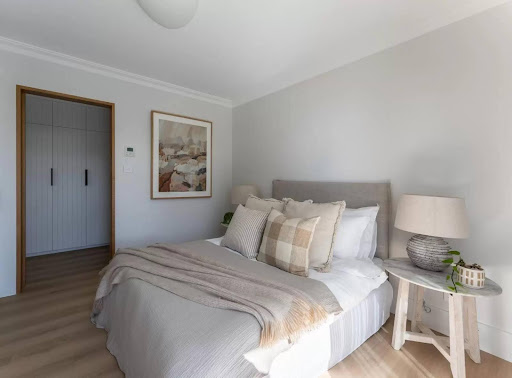
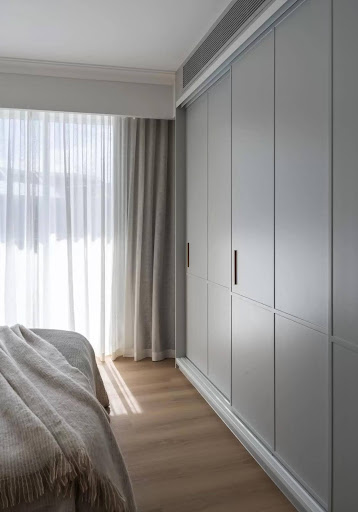
Consider your Wardrobe – Designing a perfect bedroom goes far beyond just choosing the right color palette and furniture; it involves a thoughtful approach to wardrobe design that can transform a space from merely functional to completely tailored to your needs. A well-designed wardrobe does more than offer ample storage; it becomes an integral part of the room’s aesthetic and daily rhythm. By incorporating elements like adjustable shelves, built-in lighting, and smart organization systems, you can ensure that your wardrobe not only maximizes space but also complements the overall design of the bedroom. The possibilities for wardrobe doors are almost endless and will form a key feature within the room. A thoughtfully designed wardrobe will not only enhance the flow of the room and reduce clutter, but even contribute to a more relaxing and enjoyable environment, ultimately crafting a bedroom that’s as perfect in function as it is in style.
Creating your dream bedroom is a journey,
and it’s important to focus on both aesthetics
and functionality. With these expert tips in
mind, you’re well on your way to designing the
perfect bedroom for your needs. Remember,
it’s not just about making it pretty; it’s about
making it a space that truly enhances your life.
If you would like some help with your forthcoming renovation or interiors project please feel free to reach out to us here – we’d love to help you!
(Image from Bali Interiors)
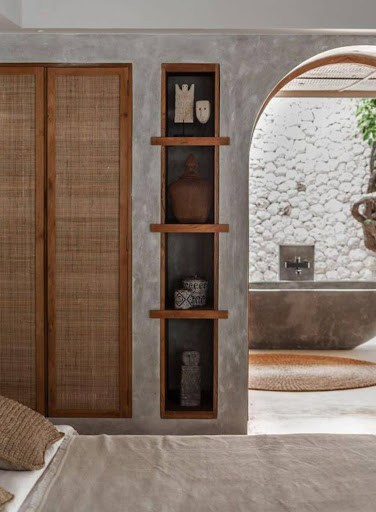
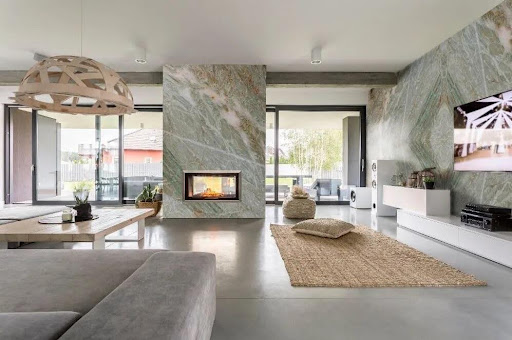
02 Aug
Quartzite: The Versatile and Durable Choice for Your Home Renovation
Hello, lovely readers! If you’re diving into the exciting world of home renovation, you’ve probably encountered a myriad of material options for your interior design projects. Today, I want to spotlight one of my absolute favourites: quartzite. This natural stone is not only stunning but also incredibly durable, making it a fantastic choice for various applications in your home. Let’s explore why quartzite deserves a place in your next Northern Beaches renovation project.
What is Quartzite? Quartzite is a natural metamorphic rock that begins as sandstone. Over time, under intense heat and pressure, it transforms into quartzite, a dense and durable material. Its beauty often rivals that of marble, with a similar range of stunning colours and intricate veining. However, quartzite offers superior durability, making it a practical choice for high-traffic areas in your home.
The Beauty of Quartzite in Interior Design – One of the first things you’ll notice about quartzite is its exquisite appearance. Each slab is unique, featuring natural patterns and a spectrum of colours ranging from whites and greys to vibrant blues and greens. This variety allows you to find the perfect match for any interior design style, whether you prefer a minimalist, contemporary look or something more classic and luxurious. Imagine a stunning quartzite benchtop in your kitchen, reflecting light and drawing the eye with its unique patterns. Or picture a fireplace feature wall clad in quartzite, creating a dramatic focal point that exudes warmth and sophistication.

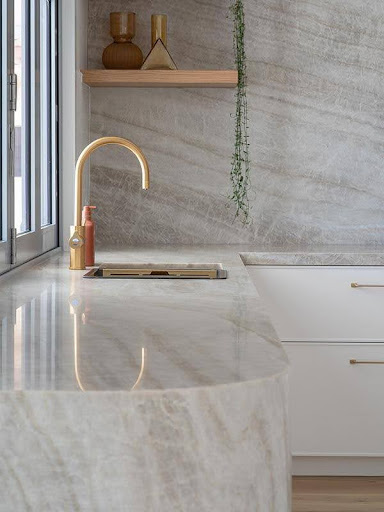
Quartzite Benchtops: Combining Aesthetics with Functionality – When it comes to benchtops, quartzite is a top contender. Its hardness and durability make it resistant to scratches and etching, which are common concerns with other natural stones like marble. This means your beautiful quartzite benchtop will maintain its pristine appearance even with daily use. Additionally, quartzite is heat resistant, which is a crucial factor for kitchen benchtops. You won’t have to worry about placing hot pots or pans directly on the surface. However, like all natural stones, it’s still a good practice to use trivets or heat pads to prolong its life and beauty.
Another advantage of quartzite is its low porosity. This characteristic makes it less prone to staining compared to other natural stones. With proper sealing, your quartzite benchtop will be well-protected against spills and stains, making it easier to maintain. As an interior designer, I always recommend quartzite to clients who want a benchtop that combines luxury with practicality.
Feature Walls: Making a Bold Statement –
A fireplace feature wall is a fantastic way to add character and style to your living space. Quartzite is an excellent material choice for this application due to its durability and striking appearance. The natural patterns and colours of quartzite can create a breathtaking backdrop for your fireplace, transforming it into the centrepiece of the room.
Whether you prefer a sleek, modern look or a more rustic, traditional style, there’s a quartzite variety that will complement your interior design. The stone’s natural veining and coloration can add depth and texture to your fireplace feature wall, creating a cosy and inviting atmosphere. Plus, quartzite’s heat-resistant properties ensure that it will withstand the high temperatures around the fireplace without losing its charm.
Tips for Incorporating Quartzite into Your Home Renovation:
Choose the Right Finish: Quartzite can be finished in various ways, including polished, honed, and leathered. Each finish offers a different look and feel, so consider the overall aesthetic you want to
achieve in your space. A polished finish will give a sleek, glossy appearance, while a honed finish provides a more matte look. A leathered finish adds texture, making it a great choice for feature walls.

Consider the Colour Scheme: Quartzite comes in a range of colours, so think about how the stone’s hues will complement your existing colour scheme. Lighter shades of quartzite can make a space feel more open and airy, while darker tones can add drama and sophistication.
Maintenance: Although quartzite is relatively low-maintenance, it’s essential to keep it sealed and clean. Use a gentle, pH-balanced cleaner to maintain its beauty. Regular resealing will help protect the stone.
Professional Installation: To ensure the best results, always work with experienced professionals for the installation of quartzite. Proper installation is crucial for the longevity and appearance of the stone.
As an interior designer, I can’t recommend quartzite enough for home renovation projects. Its combination of beauty, durability, and versatility makes it a standout choice for a variety of applications.
Whether you’re updating your kitchen with a stunning quartzite benchtop or creating a captivating fireplace feature wall, this natural stone will enhance the aesthetics and functionality of your home.
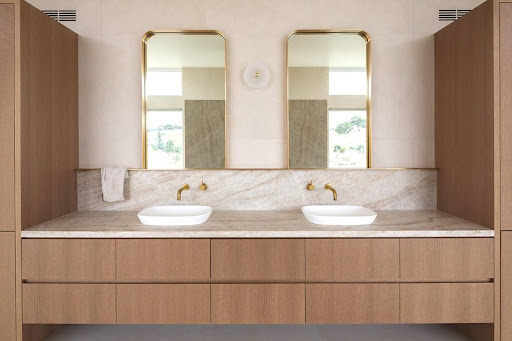
If you would like some help with your forthcoming renovation or interiors project please feel free to reach out to us here – we’d love to help you!
Photo credits:
Cosmo
Surfaces
AnteriorXL
CDK Stone
Cabex Construction
BC STONE
Cdk Stone
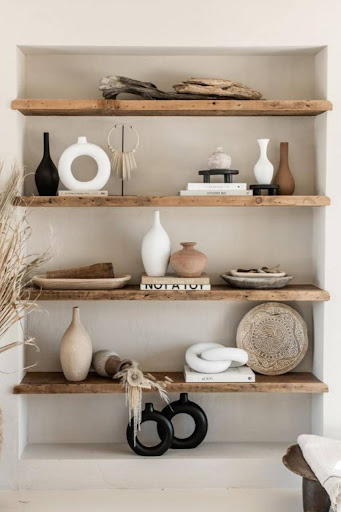
19 Jul
The Art of Styling Bookshelves & Tables: Transforming Your Space with Charm and Personality
Today, we’re diving into one of my favourite aspects of home styling: bookshelves. A well styled bookshelf can be a game changer in the look and feel of a space. These versatile pieces are more than just storage solutions—they’re an opportunity to infuse your space with charm, personality, and a touch of your unique style. Whether you’re a seasoned decorator or just starting your journey, I’m here to guide you through the process of creating a bookshelf display that not only looks stunning but also reflects who you are.
Begin with a Clean Slate – Before you start styling, clear everything off your bookshelf. This step allows you to see the space with fresh eyes and opens up possibilities you might not have considered before.
Plus, it’s a great opportunity to dust and clean those shelves! As you remove items, consider which ones you love and want to feature and which can be stored elsewhere or donated.
Go Big – Always arrange your largest items first. This will help you establish the scale and balance of your bookshelf. You can then arrange smaller items around these.
Embrace the Power of Books – Books are the heart of any bookshelf, so let’s make them shine. Start by grouping books by size and colour for a cohesive look. You can arrange them vertically, stack them horizontally, face the cover out or even face the spine backwards to give a neural look (that will make it hard to know what book they are though!). Don’t be afraid to mix things up – combine different combinations for visual interest.
Consider creating small clusters of books, alternating between vertical and horizontal stacks. This approach not only breaks up the monotony but also provides varying heights for other decorative elements.
Add Personal Touches – Now that your books are in place, it’s time to add some personality as you style the rest of your bookshelf. Think about the items that make you smile – treasured holiday finds, family photos, heirlooms, quirky trinkets and your latest purchases all give shape to the arrangement and inject personality.
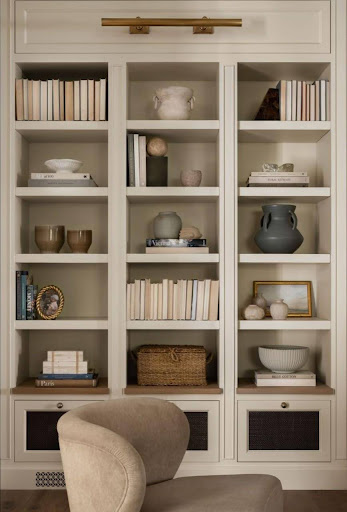
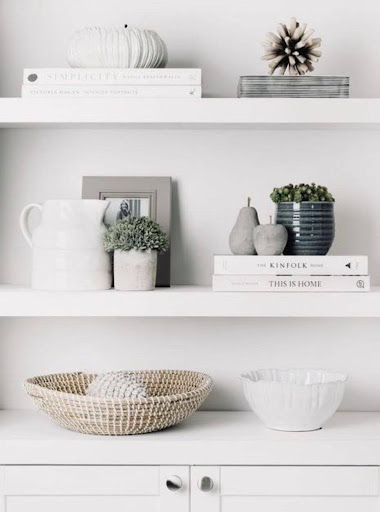
Layering and Variety – When adding decorative objects, vary their sizes and shapes to create a dynamic look. For instance, a small sculpture can sit atop a stack of books giving it height and greater presence; framed photo can lean against a row of upright books or be placed at the back with smaller items in front.
Remember, odd numbers of items tend to look more visually appealing. Arrange little vignettes of varying heights together in groups of 1, 3 or 5 and imagine each as its own little scene that is linked to its neighbour.
Introduce Greenery – Plants are a fantastic way to bring life to your bookshelf. They add a touch of nature, freshness and vitality which can soften the overall look. Consider small potted plants like succulent, personally I love a trailing Devil’s Ivy for its ultimate low maintenance style. If you are worried about maintenance, high-quality faux plants are a great alternative.
Play with Texture and Color – A well-styled bookshelf isn’t just about what you put on it, but how those items work together. Pay attention to texture and colour to create a harmonious display. Mix materials like wood, metal, glass, and ceramics to add depth and interest. For colour, choose a palette that compliments your room’s decor. Neutral tones can create a calming effect, while pops of vibrant colours can energise the space but it is best to stick to no more than 3-5 colours and spread them out.
Utilise Bookends – Bookends are not just practical; they’re also an opportunity to add style. Look for bookends that complement your decor—anything from sleek, modern designs to vintage finds can work. They can also be a fun way to express your personality.
Create Visual Balance – When styling your bookshelf, aim for visual balance rather than perfect symmetry. This means distributing colours, shapes, and sizes evenly across the shelves. For example, if you have a tall vase on the top left shelf, balance it with a tall object towards the lower right. This approach keeps your display looking cohesive and pleasing to the eye.
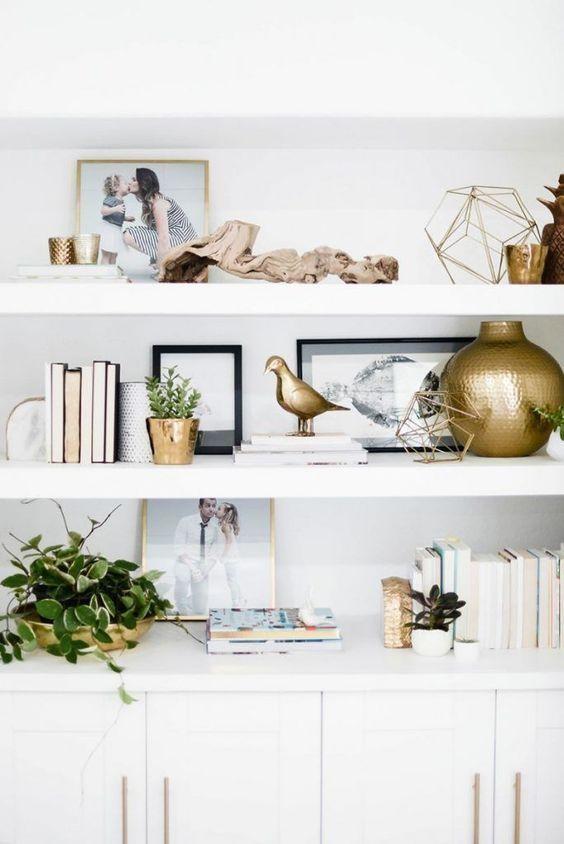
Incorporate Art – Art isn’t just for walls—your bookshelf can be a mini gallery too! Incorporate small framed prints or photos to add an artistic touch. You can lean them against the back of the shelf or even layer them in front of books. This adds another layer of depth and personalization to your display.

Creating Joy – Remember, there’s no right or wrong way to style a bookshelf. It’s all about creating a space that makes you happy. Your home is a reflection of you, and every detail, from the smallest trinket to the grandest piece of art, tells your story. Enjoy the process, and don’t be afraid to experiment. Design is all about finding joy in the journey and creating spaces that bring you happiness and comfort.
Rotate and Refresh – One of the best things about styling bookshelves is that they’re not permanent. Feel free to rotate items and refresh your display whenever you like. This keeps your space feeling dynamic and allows you to showcase new finds or seasonal decor. Plus, it’s a fun way to keep your creativity flowing!
Happy decorating! But as always if you would like some help with a forthcoming renovation or interiors project please feel free to reach out to us here – we’d love to help you!
Photo credits:
Public311design
LivingetcOfficial
Theluxecollective
TaraNelsonDesigns
TheEveryGirl
SarahBirnie
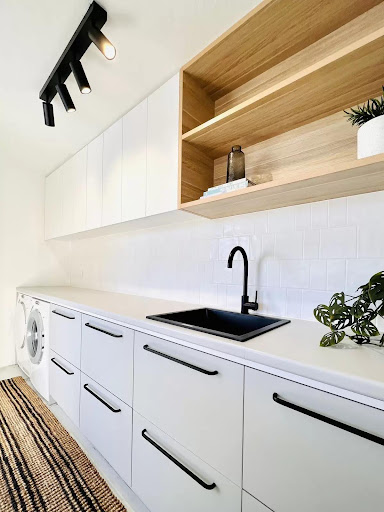
05 Jul
Laundry Love-up!
OMG, where does all the washing come from?
I swear my family produces five items for every one of mine… Sound familiar?
If you’re nodding along, you’re not alone! Laundry is one of those never-ending household tasks, especially for busy families. But what if doing laundry didn’t have to feel like such a chore? Imagine having a laundry room so well-designed that you actually enjoy spending time in there.
Here on Sydney’s beautiful Northern Beaches we all love the outdoor lifestyle but that often means loads of laundry… gym gear, football gear, hiking gear, beach towels and that’s before we even get to the day to day wear! I love putting my interior design skills to work helping families transform their laundry spaces into efficient, stylish havens. Here are my top must-haves for creating the laundry of your dreams:

Hanging Space for Rainy Days – Rain or shine, your laundry routine shouldn’t skip a beat. Internal hanging space is perfect for those rainy days when outdoor drying isn’t an option. Be sure to avoid damp clothes getting in the way of the room’s functionality when in use and look for options that will neatly store out of sight when they’re not needed.
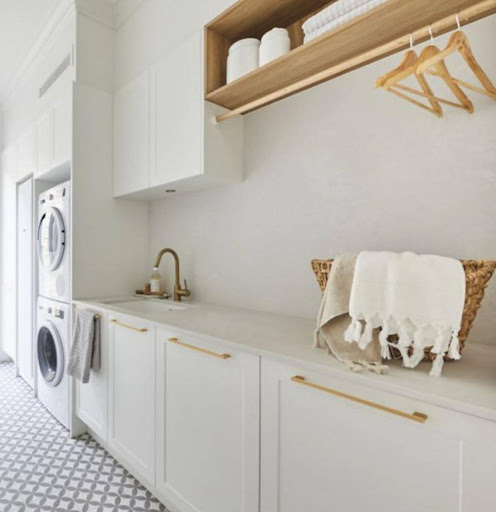
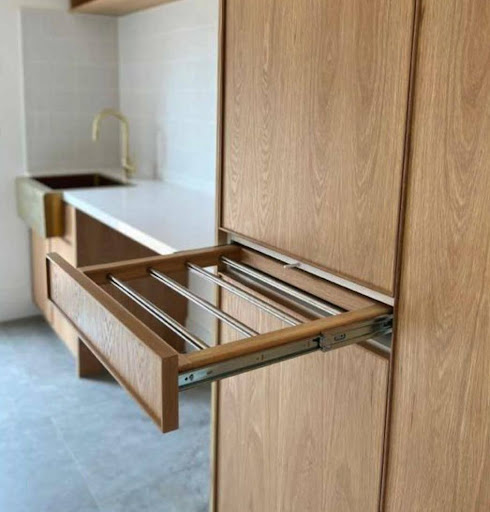
Underfloor Heating for Quick Drying in Winter – Lux! Underfloor heating is the ultimate luxury in a laundry room, especially during the chilly winter months. It speeds up the drying process and keeps the space warm and cosy and free of damp and mould.
Consider installing it in the wall if you are having wall mounted drying racks.
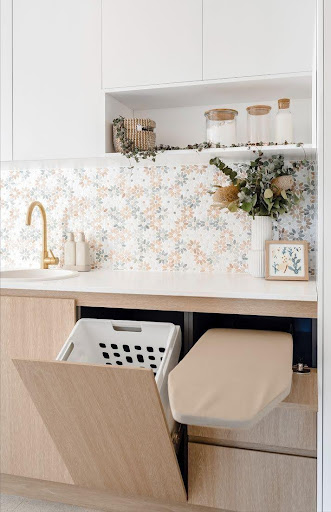
Concealed Laundry Hampers – A tidy laundry room starts with hidden hampers. Concealed laundry hampers keep dirty clothes out of sight and help you sort them efficiently, maintaining a clean and organised space.
Open Shelving for Plants and Pretties – Open shelving isn’t just practical – it’s an opportunity to add a touch of personality to your laundry room. Display your favourite plants, decorative jars, or just about anything that makes you smile.
Ironing Board & Broom Storage – Integrated storage solutions for your ironing board and brooms keep everything you need within reach but neatly tucked away. No more tripping over awkwardly placed items!
Maximum Benchtop for Folding Clothes
– Who doesn’t need more bench space? A spacious benchtop is a game-changer for folding and sorting clothes. It gives you plenty of room to spread out, making the folding process quicker and more efficient.
Room to Move! – A cramped laundry room can make chores feel even more tedious. Designing an efficient layout ensures you have room to move around with a place for everything, making the entire laundry process more comfortable. This apartment laundry was super tiny but we managed to fit the boiler, two machines, a retractable clothes line (tucked out of sight when not in use) with storage and benchtop space aplenty.
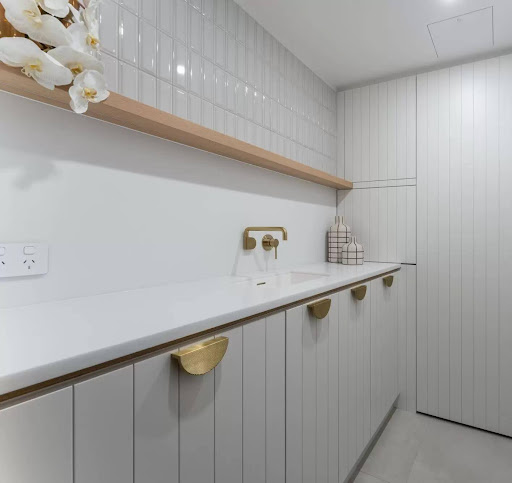
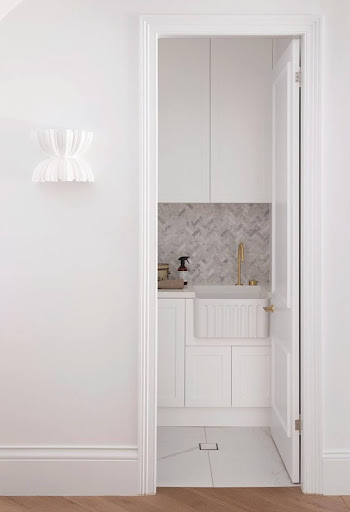
Plenty of Natural Light – Natural light can transform any space, making it feel brighter and more inviting. Large windows or skylights are perfect for flooding your laundry room with sunshine and allowing that much needed airflow..
Lush Tiles and Taps… Obvs! – Why not add a bit of luxury? Beautiful tiles and stylish taps can elevate the look of your laundry room, making it a space you’re proud of and happy to spend time in.
What are your non-negotiables?
Everyone has different needs and preferences when it comes to their laundry space. What are your must-haves? Whether you’re dreaming of a more organised, efficient, or just plain beautiful laundry room, we’re here to help make it a reality.
If you would like some help with your forthcoming renovation or interiors project please feel free to reach out to us here – we’d love to help you!
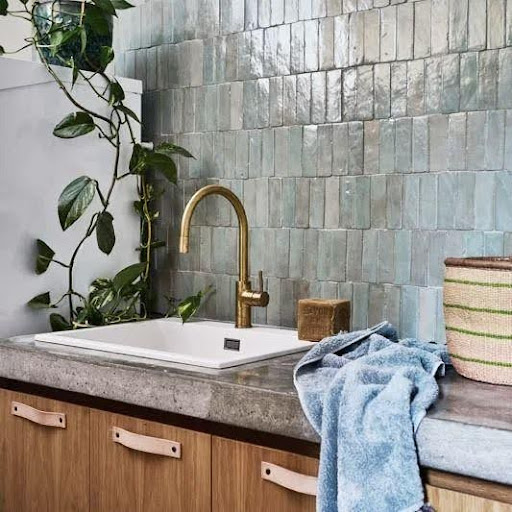
Photo credits:
Orli Interiors
George and Willy
The Block Shop
Arquette
Interiors Adp
Australia
Orli Interiors
Three Birds
Faucet Strommen

01 Jul
Harmonious Hallways and Enticing Entries: Balancing Functionality and Style in Tight Spaces
Here on the Northern Beaches space is often at a premium. Whether it be the long thin hallway of an early 1900’s home or the small entryway of a more modern build, when it comes to styling a narrow or small hallway, design choices can make a big impact.
Here are some of the tricks I use as an interior designer to deal with these often difficult spaces.
Set the tone for the home – The primary palette for this home was a simple monochrome scheme warmed with an abundance of natural timber, layered textures and earthy shades of terracotta.
The solid oak door jambs and oak internal doors along with black accents in the door handles, picture frames and black striped jute runner all help to introduce the look to anyone entering the house.
Runners and rugs – Use a runner or rug to add texture and colour. Remember this will be a high traffic area so make sure you use a durable piece.
This one is a low cost jute rug that doubles as a doormat to ensure shoes are clean by the time you make it to a chair to take them off; something to consider if you don’t have space for a bench seat.
Play with Patterns and Textures – Introducing different textures and patterns can add visual interest to a narrow hallway without overwhelming the space. Consider incorporating textured wallpaper or wall panels to create depth and dimension. Mixing and matching materials like wood, metal, and glass can also add richness and character to the design.
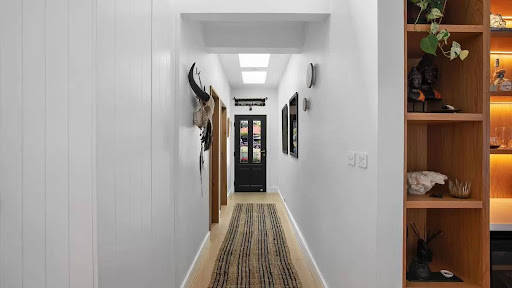
Lighting – A super important element in your hallway. It will stop the area feeling dark and dingy. In this renovation I added skylights which completely transformed what was a dark and narrow space, along with timber disc wall lights to create a warm and inviting atmosphere in the evening, while appearing more sculptural during the day. A gorgeous pendant or two is another great way to wow your visitors. Remember to make the light switch easy to find – when you step in at night the last thing you want to be doing is fumbling around in the dark.
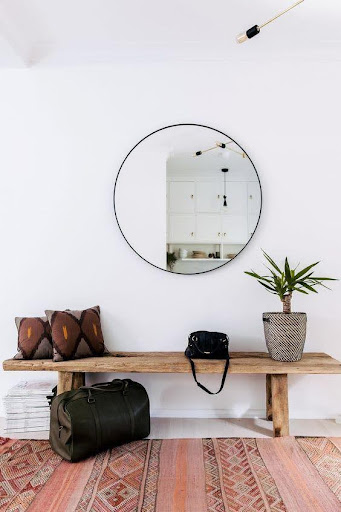
Add a statement mirror – If skylights aren’t an option consider installing a mirror opposite a source of natural light from another room to increase ambient levels while also giving the impression of more space.
Incorporate Natural Elements – Bringing elements of the outdoors inside can help create a sense of harmony and tranquillity in your hallway. If space permits (maybe those floating shelves would be a good spot!), consider adding potted plants or a small indoor garden to infuse the space with greenery and natural beauty. Not only do plants improve air quality, but they also add a touch of colour and freshness to the environment.
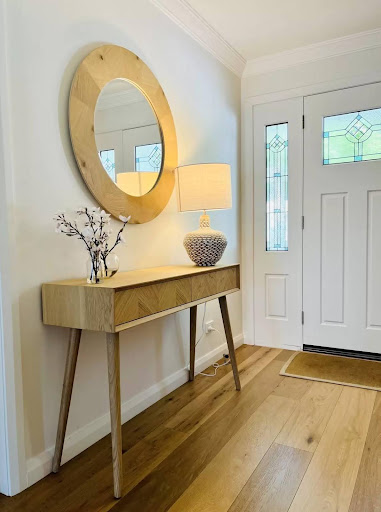
Add impactful art – Every space needs a statement piece and a corridor is no different; with floor space at a premium your walls are the go to for this. Go for something fun that makes you smile or a piece that reminds you of a favourite holiday.
By incorporating these design elements, you can transform your narrow hallway into a stylish and functional space that sets the tone for the rest of your home. Whether you’re welcoming guests or simply returning from a busy day, your hallway will make a lasting impression with its thoughtful design and attention to detail.
If you would like some help with your forthcoming renovation or interiors project please feel free to reach out to us here – we’d love to help you!
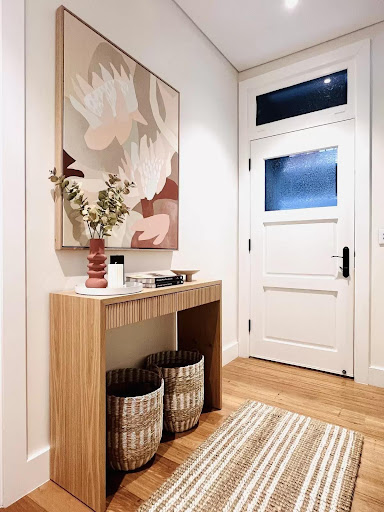
Photo credits: 1. Orli Interiors | 2. Orli Interiors | 3. Pursuit Decor | 4. Orli Interiors | 5. Orli Interiors

21 Jun
Wonderful Wallpaper: Tips from an Interior Designer
Wallpaper is a fabulous way to add personality, texture, and warmth to your space. As an interior designer I love using it to define a breakfast or study nook, create a stunning feature wall or transform a room with a ceiling application! With so many wallpapers available you will be sure to find a design that that you love and that reflects your unique personality.
Here are some things to consider when choosing wallpaper!
Consider the Room’s Purpose – Is it a cosy bedroom, a bustling kitchen, or a calm home office? The function and purpose of the space will influence your choice of wallpaper. Bold patterns work well in high-energy spaces, while calm and serene designs are better for bedrooms and other relaxing areas. Wallpaper is great for adding an element of fun in a child’s bedroom or playroom. But remember that for high-traffic areas, like hallways, playrooms or kitchens, it is best to opt for durable, washable wallpapers that can stand up to daily wear and tear. In bedrooms or living rooms, you can get away with more delicate, luxurious options.

Take Room Dimensions into Account – The size of the room and the height of the walls will also impact the appearance of the wallpaper. Consider the scale of the design and make sure it will look proportionate to the space. In small rooms, opt for smaller-scale prints to avoid overwhelming the space.
Conversely, larger rooms can handle bolder, more expansive patterns without feeling cramped. And if you’re working with low ceilings, vertical stripes can create the illusion of height, while horizontal stripes can make a room feel wider.
Think About Lighting – The amount and type of light in a room will affect the appearance of the wallpaper. Sunlight can bring out the true colours and textures of wallpaper but depending on the direction and intensity of sunlight, the appearance might change throughout the day. When it comes to artificial light; warm-toned lights may make the colours appear richer and more vibrant, while cooler lights can create a more subdued or crisp effect.
Placement of light fixtures can also add to the patterns and textures of wallpaper – accent lighting, such as well placed wall sconce, can draw attention to particular areas of the wallpaper or an architectural detail. This can create a focal point within the room and highlight the unique features of the wallpaper design.
Play with Patterns and Coordinate with other Elements – One of the most exciting aspects of wallpaper is the endless array of patterns and designs available. From classic stripes and florals to bold geometric prints and whimsical motifs, there’s something for every taste. Don’t be afraid to get creative and experiment with different patterns – just remember to keep our above tips on scale and proportion in mind and don’t forget to coordinate it with other elements such as furniture, flooring, and window treatments. to ensure a harmonious look.

Embrace Texture – While patterned wallpapers often steal the spotlight, don’t overlook the power of texture. Textured wallpapers can add depth and dimension to a room, creating visual interest and tactile appeal. Linen wallpapers can be a timeless addition to any room, while sisal really comes to life on the walls. Other luxurious finishes like velvets will take on a 3D appearance while a bouclette wallpaper creates exceptional depth. Check out @casamance_official for some great inspiration here!”Mix and match textures for a dynamic look that’s uniquely yours.
Go Beyond Walls – Who says wallpaper is just for walls? Get creative and think outside the box by using wallpaper to accentuate other areas of your home. Consider lining the backs of bookshelves for a pop of colour, covering cabinet fronts for a stylish makeover, or even framing wallpaper as art for a one-of-a-kind focal point.
The possibilities are endless!


Dull the Noise: Acoustic wallpaper offers a dual benefit of enhancing both the aesthetic appeal and the acoustic performance of a home. Beyond its visually pleasing designs, this innovative wallpaper absorbs sound, reducing echoes and minimising noise levels within the living space, a big plus in the world of open plan living. Whether applied in a living room, a home office, or bedroom, acoustic wallpaper creates a quieter, more comfortable environment. Its seamless integration into interior decor makes it a versatile solution for noise control without compromising style.
This linen wallpaper has a foam backing for an acoustic effect.
Test Samples – Once you’ve narrowed down your options, it’s time to bring home some samples and see how they look in your space. Lighting can have a significant impact on how a wallpaper appears, so be sure to test your samples in different areas of the room at different times of day. And don’t forget to consider how the wallpaper will complement your existing furniture, decor, and colour scheme.
Do You – Your home should be a reflection of your own personality and taste, so let your personal style guide your wallpaper selection. Are you drawn to sleek and modern designs, or do you prefer something more eclectic and bohemian?
Understanding your aesthetic preferences will help narrow down your options and make the decision-making process easier. Don’t be swayed by trends or opinions. If you love it, that’s all that matters! And remember, wallpaper is not a lifelong commitment – if you ever tire of your chosen design, it’s relatively easy to remove and replace.
“If you would like some help with your forthcoming renovation or interiors project please feel free to reach out to us here – we’d love to help you!”
Image Credits:

17 May
Leveraging Light for a Beautiful Bathroom
Let there be light!
… but where to put it in the bathroom?
Good lighting is essential when it comes to great bathroom design, for both functionality & ambience. When it comes to lighting, no matter which room in the house, a layered approach is the key. This is sadly often overlooked in the bathroom; it might be one of the smallest rooms in the house but with the right lighting it can still pack a punch! Here are our top tips to get your bathroom in the spotlight.
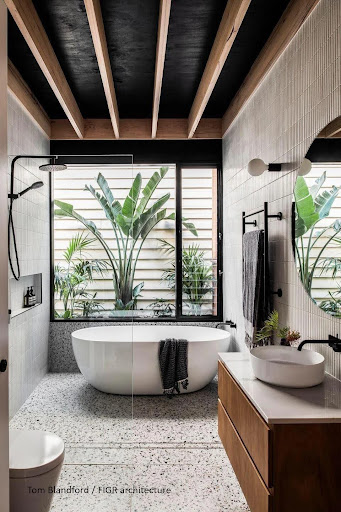
Natural Light – Nothing beats it! Natural light connects us to the outside world and helps regulate our circadian rhythms, whether it is waking us up in the morning or winding us down at night our body is programmed to respond to the light outside. Where windows are concerned the bigger the better – but don’t forget some screening unless you’re planning on putting on a show for the neighbours!
Translucent glass is the perfect way to let the light in without losing your privacy. Or if the orientation is right and you have the space consider planting some lush foliage outside your bathroom window.
If you are concerned about privacy, or you are short on wall space, then high windows are a great option for introducing light without compromising these other factors.
Bounce it around – Large mirrors are not only useful in a bathroom to ensure you step out looking your best, they can do wonders to increase the amount of light by bouncing it around the room… and don’t forget any reflective surface will do the same. A gloss tile option is a great means of increasing perceived space and light in a small bathroom.
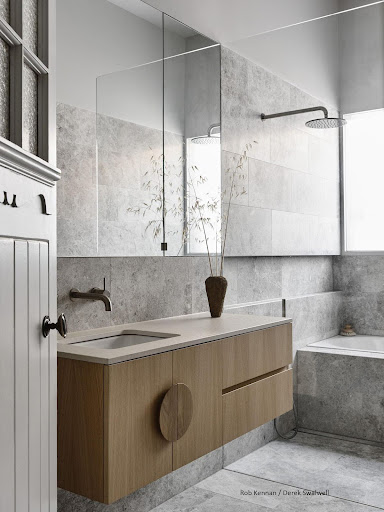
Skylights – If, like in this recent project, the bathroom is in the middle of the house, a skylight is a fabulous option. Skylights add a special touch to any bathroom and I would always recommend adding one over the shower or bath where it is a possibility, with or without windows. I just love to be able to look straight up at the blue sky in the morning!

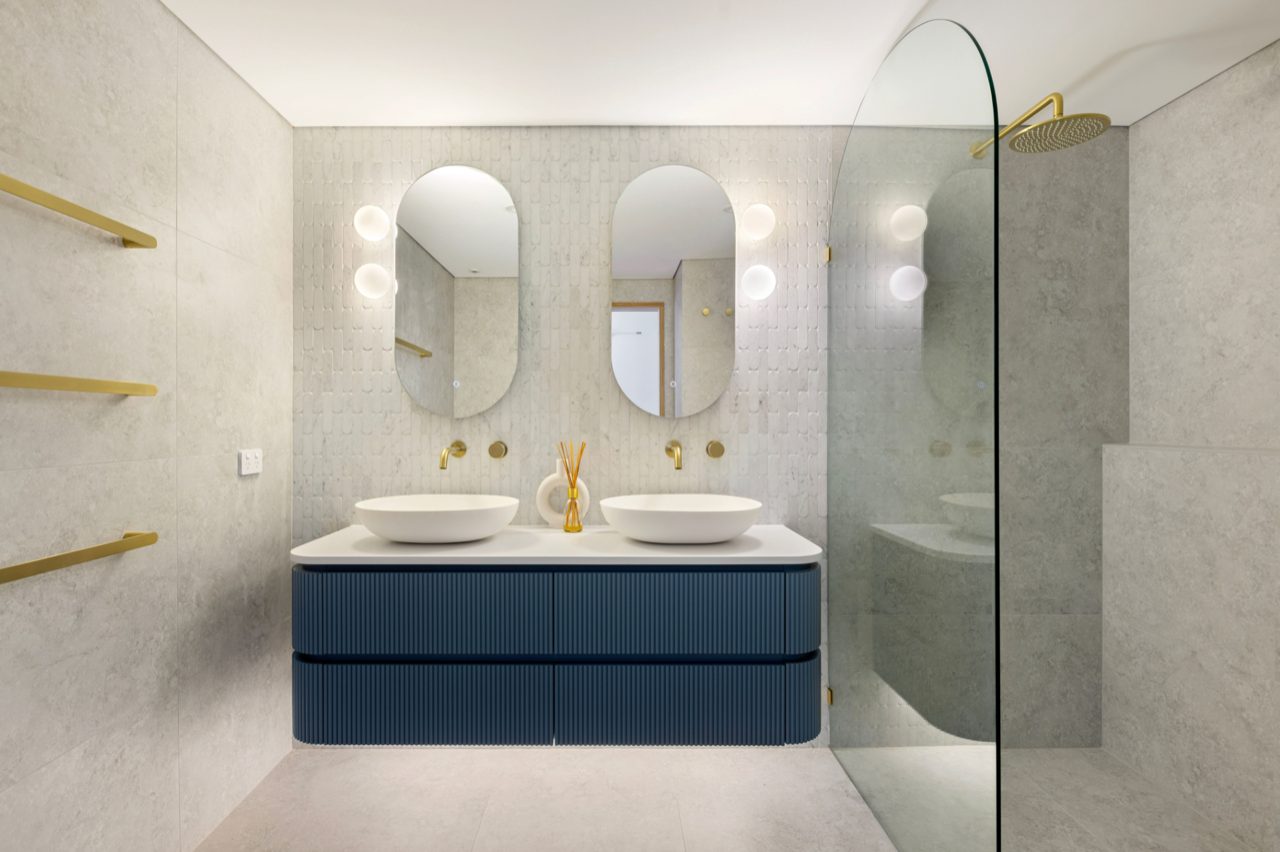
Now you have your natural light sorted, build up the other lighting you need for all the different bathroom uses of your bathroom:
Consider the colour – YES light has colour. The colour temperature of your light bulbs can greatly impact the mood of your bathroom. Opt for warmer tones (around 2700-3000 Kelvin) for a cosy, spa-like atmosphere, while cooler tones (4000-5000 Kelvin) are perfect for a crisp, energising feel. Daylight downlights above the sink area can complement wall sconces for those occasions when you need ultimate clarity. Experiment with different temperatures to find the perfect balance for your space, this is as easy as changing a light bulb!

Mind Your Mirror – The mirror is the star of the show in any bathroom, so it deserves special attention when it comes to lighting. Ensure that your vanity lights are evenly spaced and mounted at eye level to minimise shadows and provide flattering illumination. If space allows, consider adding a backlit mirror for a modern touch.
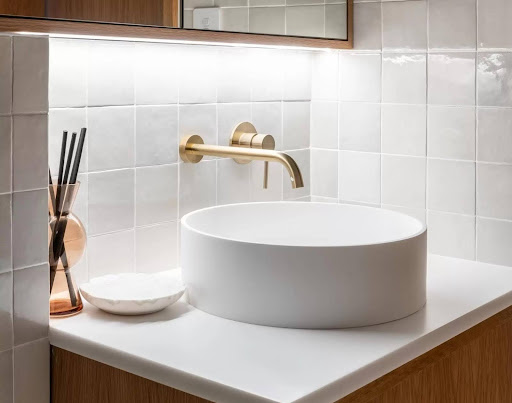
Pay Attention to Placement: When installing your lighting fixtures, pay attention to placement to ensure optimal functionality and aesthetics. Avoid placing lights directly above the mirror, as this can cause unflattering shadows. Instead, position them on either side for even illumination. For ambient lighting, aim for uniform coverage throughout the space.
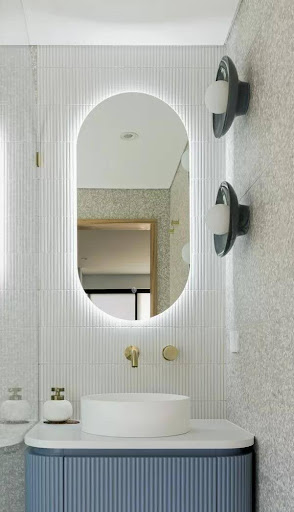
Accessorise with Style – Last but not least, don’t forget to accessorise! Light fixtures are not only functional but also decorative elements that can enhance your bathroom’s style. Choose fixtures that complement your existing decor—whether it’s sleek and modern or classic and timeless.
If you would like some help with your forthcoming renovation or interiors project please feel free to reach out to us here – we’d love to help you!
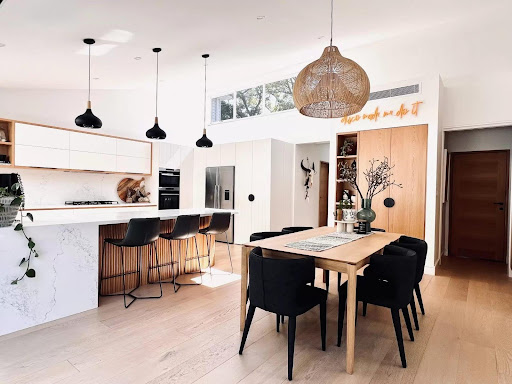
03 May
Choosing Chairs? Selecting Stools?
Top Tips to Find the Right Ones for You
A recent reno – or even just update – on your kitchen or dining area can mean it’s time to get some new seating in place to match that stylish new look. Be that dining chairs, bar stools or both, I’ve got you covered.
With the rise and rise of open-plan living there’s a lot less need these days for a separate dining room, or separate furniture to go within it. This means that today’s kitchen-diner seating has to be more multi-functional – and multi-stylish – than ever… covering occasions from breakfast to home-working to dinners with friends.
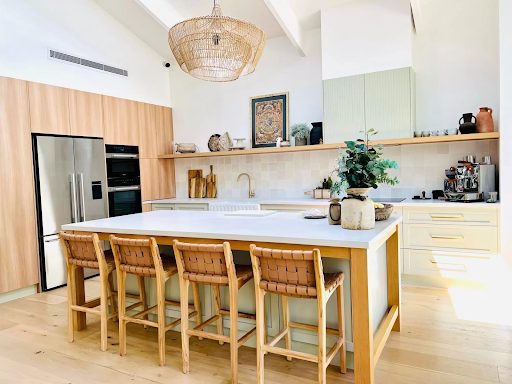
When designing an interior finishes scheme, all furniture within it should work in harmony. Consider the planned style of the space around your seating. Is there a particular era or aesthetic you’re going for? A contemporary look might involve complementing sleek lines alongside luxury finishes and textures whereas a more casual coastal scheme might employ natural timber, breezy ocean tones and textured organic finishes like rattan and linen for a more lived-in look.
Where is your dining table to be located and have you ensured this is the best spot for it? If space is tight, opt for a smaller arrangement that won’t overwhelm the space and doesn’t restrict the general flow of traffic around the home. Think about putting the table against a wall if needs be or building in a dining bench if you feel the latter could be unavoidable. Before buying that huge table just for Christmas day gatherings, remember it’s best to furnish your house for everyday use rather than for the occasional event once or twice a year – an extendable table could be just the ticket, but they do come at a premium.
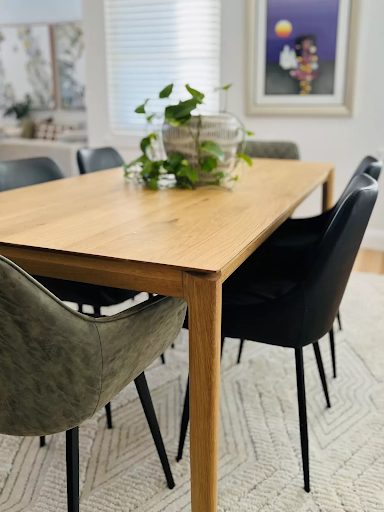

If you’re keen on wooden seating, the timber you choose will likely be influenced by your chosen scheme. Light timbers generally work best for Scandi and coastal looks, while darker timbers suit mid-century or heritage styles – though the chocolate tone of walnut works wonderfully in both moody and modern settings as well as the more classic styles. Beautiful rattan has also made a huge comeback in recent years, and evokes everything from upmarket Palm Springs, through vintage boho to colonial tropical vibes.
Think also about how your seating will work with the surface it will surround. What is the table or benchtop itself made of? Timber is the most popular dining table choice, in which case, either use the exact same material for your chairs or contrast definitively against it; something that’s ‘almost the same but not quite’ could easily look out of place. For example a black timber chair with an oak table is a great match; similarly an upholstered or leather dining chair will make a great complement. For any seating-surface combo, think about what you want the room’s focal point to be: are your chairs or stools the standout feature, or the stunning table or bartop? If the latter, your seats might just provide simple complement or contrast. Or, if you want them to do the talking, you might choose a more show-stopping design or colour.

Wow-factor (if desired), along with your chosen scheme, will influence whether you employ colour, and how. If you do want your seating to pop, your chosen colour can make a bold statement in some way within the rest of your scheme (though for most aesthetics think complementary rather than clashing). Crisp whites and striking blues marry perfectly with the ever popular Hamptons look while rich block colours remain chic and contemporary in a minimalist setting. A pair of table end-chairs in a contrasting colour and style to the main collection of chairs can also make a great statement – and don’t forget to add a striking pendant light to finish the look.
For chairs to play a quieter role; focus on matching timber chairs and table or at least veer towards tonal differences of the same shade used elsewhere in the home; muted hues look great among traditional, coastal or Scandi schemes.
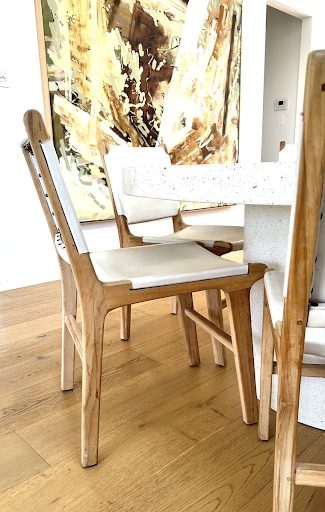
Before taking the plunge on this particular investment, be sure also to look beyond your home and take note of any seating that you feel works particularly well with the surrounding décor. While social media channels will yield endless images, getting amongst it can also help you appreciate the cohesion of a well curated scheme; aside from the obvious interiors stores; stylish eateries, bars, shops and salons can also be a great source of inspiration.

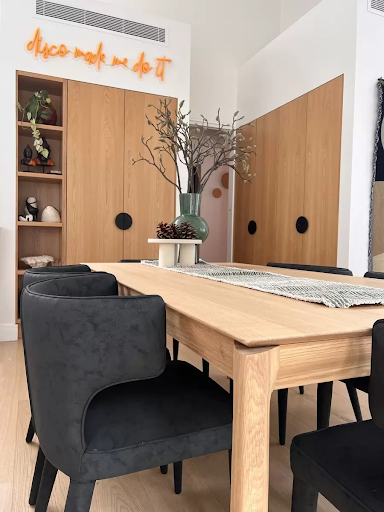
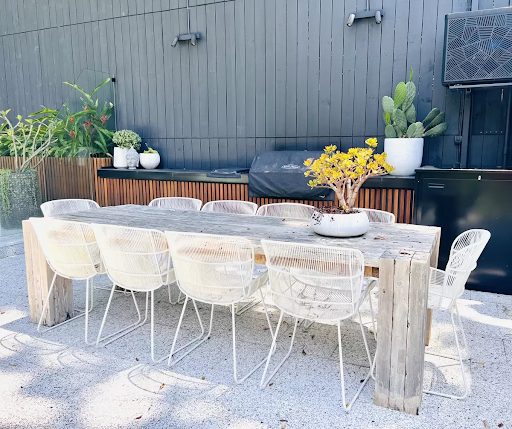
Consider the likely wear and tear for your chairs or stools, especially if you have young children or pets. If you do, any finish that’s super-sensitive to bumps or scratches, or any fabric difficult to remove or wash, is probably not for you. Yes, that includes the velvet-upholstered chairs you may have been eyeing up for some time (it’s a fact I struggle with myself – surely I can convince my cats not to destroy the chairs I so desperately crave?!) And as with any hard-working furniture, especially that which has to support a person’s weight, invest in the best quality you can afford and you’ll be rewarded with a solid item that gives you years of use.
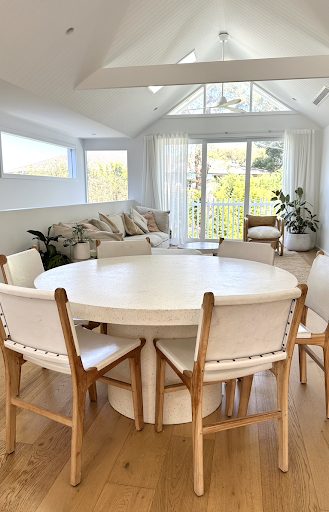
Please do your homework and take the time to get accurate measurements for your seats to avoid costly pitfalls. Standard dining-table height is between 71 and 76cm while the average chair seat is 47cm high.
Between the chair’s seat and the underside of the table top, or the table-rail if there is one (the wooden ‘pelmet’ that skirts around the sides of the table) you should be aiming for around 24-30cm, with 26cm being the ideal to allow enough space to manoeuvre in and out. You’ll also need to consider the space widthways around each chair, with most experts recommending about 15cm of elbow room between each – overall around 70cm per person is a comfortable seating width and will allow your chair to be pulled out without disturbing your neighbouring diner.
Remember also you will need to check the distance between the legs of the table to ensure that all chairs can be pushed under the table and that no one has to sit with an uncomfortable table leg between theirs. If your chairs have arms – be sure they will fit under the table and they are at a comfortable height for your guests. Finally allow around 70-90cm behind each chair to allow for easy pulling out and definitely no less than a metre between the table edge and the nearest wall or obstacle.
For bar stools and bar tops, although the overall heights will exceed those of tables or chairs, the important distance to consider is still that between your lap and the ‘leaf’ or surface top. For the average adult not to be slouching forwards if the stool is too high, or stretching up if it’s too low, you want to aim for around 23-28cm of space between lap and counter top. Again, around 15cm either side of each bar stool is recommended for wiggle room, though when measuring stools do take into account if they have arms, which will add extra width beyond just the seat.
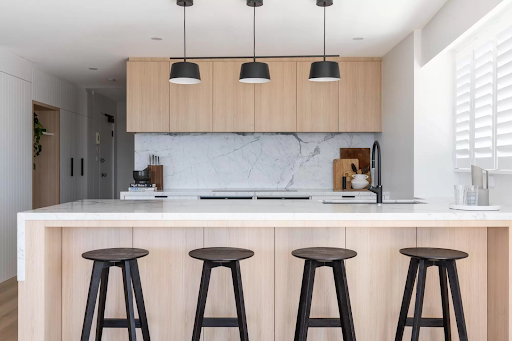
A mix of practicality and preference… Do you want backrests? This could make them more comfortable to sit in for longer periods, like casual dinners. Having stools that swivel can also make them a bit more manoeuvrable, especially in tighter spaces, though they often cost more and can become pesky if you have young children who see them more as toys than furniture (and yes, I’m speaking from experience!) But whatever you do, ensure that any stool has, for comfort, a decently-placed foot rest for the average adult. Too high and it’s cramp-inducing but too low and numb, dangling legs can soon ruin relaxation.
For any seating you choose, take a seat – literally, make sure you sit in it first! There’s nothing worse than an uncomfortable chair or stool, so always try before you buy. And if not – check the returns policy!
If you need any help furnishing your home please do reach out for a chat, we’d love to help!
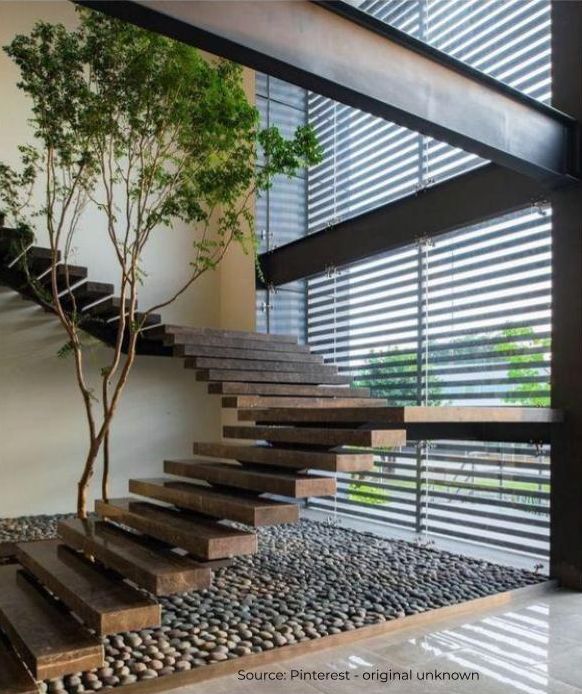
17 Apr
Stellar Staircases
Designing a staircase can bring a lot of challenges in terms of both function and form. That said, with the right approach and know-how, you can create one that works perfectly while also adding some wow-factor. Here are some tips for doing just that:

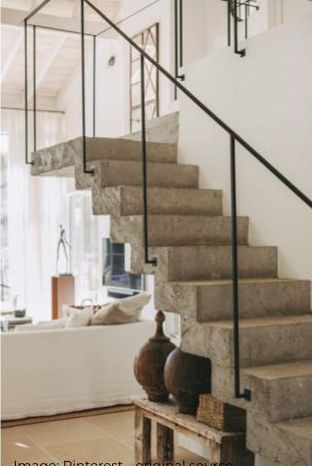
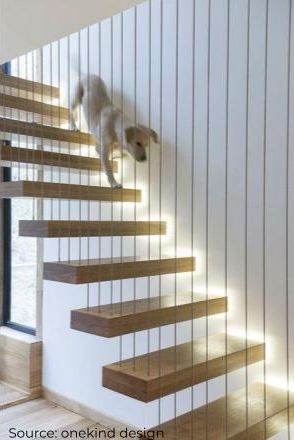
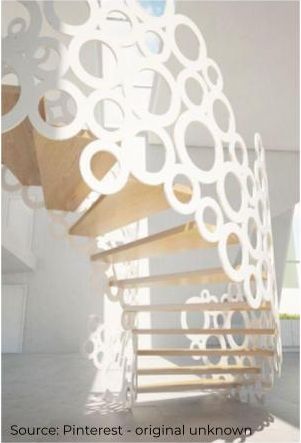
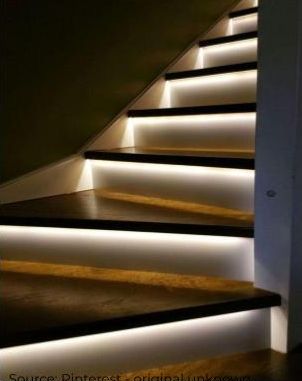
5. Make it a focal point: A staircase can be a great way to create a focal point in your home. Use a combination of materials, unique shapes and eye-catching details to make it stand out. Some of my favourites definitely add serious drama to something that could just be ho-hum functional! I sometimes dream of an enormous house with a deliciously curved white spiral staircase sweeping up into a great void which channels the light from an overhead custom round skylight back down into the ground floor.
6. Incorporate storage within the stairs: If space is limited, consider incorporating storage into your design. Open shelving, closed cabinets or drawers, or custom joinery such as a reading or study nook can all help to make the most of an often awkward space. And yes, there are staircases where the risers in the stairs (the vertical bit) are made into drawer fronts, with the drawers themselves sliding underneath each stair. Clever, hey?
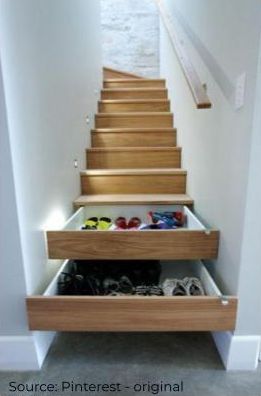

i) An extra feature that this floor might really need, which usually comes from something you might be struggling with. Could you do with a powder room on this floor? Are you short on coat-hanging/shoe-stashing space? What about a study or reading nook, away from the hustle and bustle of the kitchen or living room area? The possibilities are endless – with a bit of clever thinking you can solve many of these niggling issues.
ii) A joy-inducing feature which you simply have the space for now. Who said wants couldn’t become needs? If you’re looking beyond just utility, celebrate this space with a lovely display area. Those personal treasures and family photos aren’t going to put themselves on display! Your home is your own personal sanctuary – take care to create little pockets of joy and inspiration wherever you can and I promise it will lift your spirits every time you wander past.
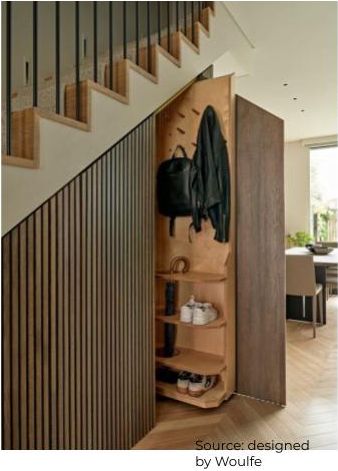
8. Consider safety: Safety should always be a top priority when designing a staircase. Make sure the steps are the right size, have enough traction, and are well lit. Here are the basics of legal stair design to bear in mind:

– As a rule, your staircase must have no fewer than 2 risers or have no more than 18 risers without a 750mm2 landing or rest area.
– A staircase should have no more than 36 risers without a change of direction.
– Risers must be between 115-190mm high and Goings or Treads (the horizontal bit) must be 240-355mm deep.
– Stairs themselves can’t be less than 600 mm wide measured between the inside edges of the handrails.

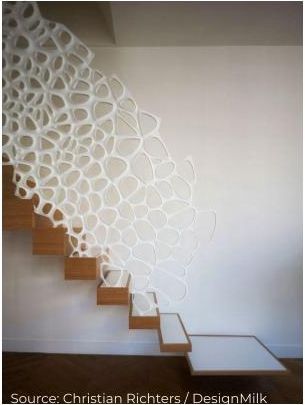
10. Finally, add personal touches: This can make your staircase truly your own. You can add artwork, family photos, or even plants to create a warm, inviting space.
Remember, designing a staircase is about finding the right balance between function and aesthetics. By considering these tips, you can create an impactful, well-designed staircase that is both beautiful and functional.
If you would like some help with your forthcoming renovation or interiors project please feel free to reach out – we’d love to help you!

29 Mar
How to plan the perfect kitchen

The kitchen has long been the heart of the home, but with open plan living now more the norm than ever before, the kitchen has also become an extension of your living space and its design should reflect that. An interior designer will take a holistic view of your kitchen renovation with the rest of the home’s aesthetic in mind. But before we even get to the look – there’s lots to consider! Here are my top tips for anyone looking to renovate their kitchen.

1. Define Your Style: The first step in any kitchen renovation is to decide on the style you want for your space. What’s your go-to look? Pinterest is a great place to start to define your style if you’re unsure. This will guide your choices for materials, colour schemes, and design elements. From coastal to minimalist, hamptons to farmhouse, choose a style that speaks to you and your family’s lifestyle
2. Plan Your Layout: Consider the flow and functionality of your kitchen when planning your layout. This includes considering the triangle of work, which consists of the sink, refrigerator, and cooktop. The sum of the three sides of the triangle should ideally not exceed about 7-8m and no leg of the triangle should be less than 1.2 m (4 ft) or more than 2.7 m. Make sure they are positioned in an efficient and easily accessible manner. Additionally, think about the amount of counter space you need and where it should be located, and where your china, glass and cutlery cupboards are in relation to the dishwasher. I always like to position a pull out bin underneath the main preparation surface for easy disposal of food debris.
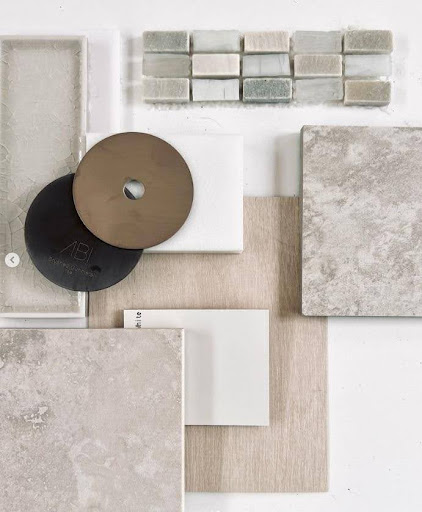
3. Choose Durable Materials: The kitchen is one of the most heavily used spaces in the home, so it’s important to choose materials that can withstand frequent use and are easy to clean. Countertops, cabinets, and flooring should be durable and low-maintenance. For example, quartz, granite, or solid surface countertops are a popular choice for their durability and ease of cleaning, though please don’t underestimate the beauty of natural stone. It requires a lot more TLC but is a no brainer when it comes to that high end finish and unique look.
4. Maximize Storage: No matter how large or small your kitchen is, maximizing storage is key. Use vertical space by installing shelving, cabinets, or open shelves to store items. Consider using corner cabinets with rotating shelving for added storage and accessibility. Additionally, consider creative storage solutions, such as pull-out pantry shelves & drawers or under-cabinet baskets, to make the most of every inch of space. Storage can be incorporated into the front of your kitchen island and extra deep tall units could open up opportunities for hidden end cupboards and a large corner pantry. For those with the luxury of space, a butler’s pantry offers enormous potential for storage tucked out of sight from your main entertaining zone, but if that is not an option consider an appliance / breakfast cupboard to keep everyday items within easy reach but away from view when not in use.
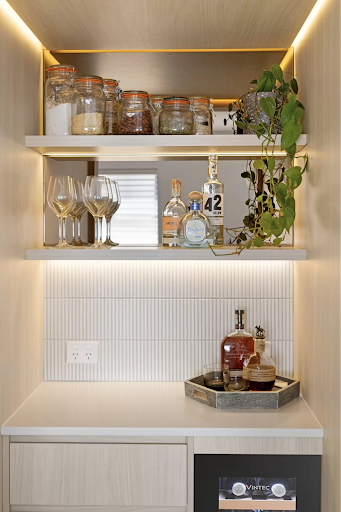
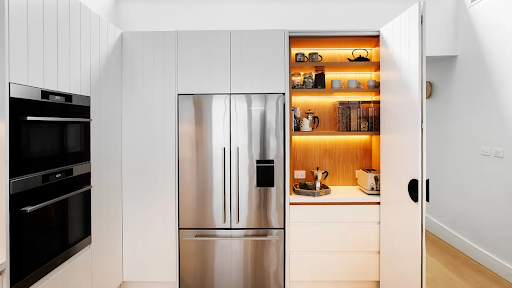
5. Incorporate Lighting: Good lighting is essential in the kitchen, both for practical reasons and to create a warm and inviting atmosphere. Consider installing a combination of dimmable overhead lights and under-cabinet lighting to provide ample illumination. Additionally, task lighting such as pendant lights or a countertop light should be used to highlight specific areas in the kitchen. Open shelves with recessed lighting are a great way of adding decorative lighting and can be styled with living greenery and a curated collection of treasured objects to help blend your kitchen with your living spaces.
6. Invest in Appliances: High-quality appliances that will stand the test of time can greatly improve the functionality of your kitchen and make cooking and meal prep a breeze. Invest in energy-efficient appliances, such as an induction cooktop, a dishwasher with a delay start option, or a refrigerator with a built-in ice maker, to help reduce your energy costs and benefit the environment. Give careful consideration to the size of your appliances – especially your fridge freezer – to be sure it will accommodate the needs of your lifestyle, and always check the warranty!
7. Backsplash: Good lighting is essential in the kitchen, both for practical reasons and to create a warm and inviting atmosphere. Consider installing a combination of dimmable overhead lights and under-cabinet lighting to provide ample illumination. Additionally, task lighting such as pendant lights or a countertop light should be used to highlight specific areas in the kitchen. Open shelves with recessed lighting are a great way of adding decorative lighting and can be styled with living greenery and a curated collection of treasured objects to help blend your kitchen with your living spaces.
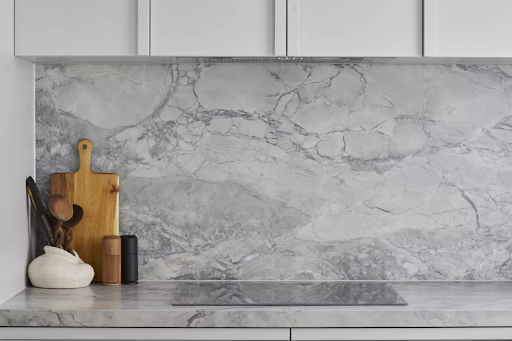
8. Install an Island: If your floor plan allows it, an island can provide extra counter space and storage, making it an excellent addition to any kitchen renovation. The fascia of the island offers great opportunities for colour and texture and, like your benchtop and backsplash, is a key consideration for the overall aesthetic. Consider adding a sink or cooktop to the island for additional functionality, though be aware that you may find you are constantly looking at last night’s washing up! Personally – if space permits – I like to keep an island or peninsula clear to give an uncluttered space for use as additional seating for casual meals or pre dinner drinks when entertaining.
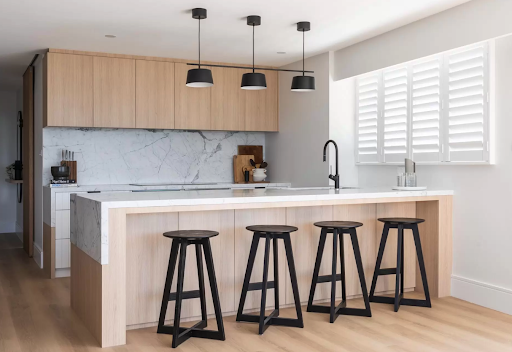
9. Focus on Ergonomics: Ensure that your kitchen is comfortable and easy to use. This means making sure the countertops are at the right height – generally I specify 920mm measured from the finished floor level to the top of the benchtop, but 950mm is a good height for tall people and 900mm for shorter people. The cabinets need to be easily accessible, and the appliances should be positioned in a way that is easy to reach and use. We don’t need to be breaking our backs every time we make dinner! Additionally, think about adding a comfortable seating area, such as a breakfast nook, to make the kitchen more inviting.
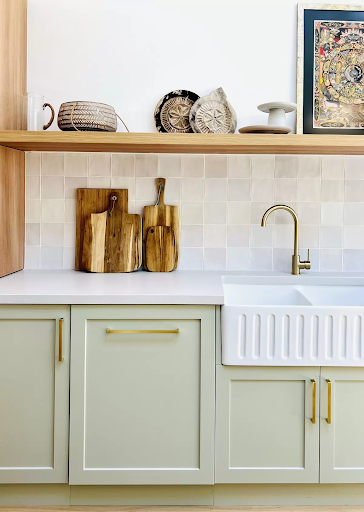
10. Aesthetics: Choose a consistent color palette that reflects your interior design style and creates a simple foundation to the overall look of the rest of your home. Highlighting key elements that define your interior, such as cabinetry and hardware finishes used elsewhere in the home also helps to bring a sense of cohesion. Rhythm and repetition throughout a home really does feed the flow from room to room to ensure each space works in harmony with the next. And don’t forget the kitchen is just as much a living space as the other rooms in your home, so be sure to showcase those personal touches such as decorative accessories, artwork, and statement pieces or treasured finds that help to tell a story about the person who lives there.
11. Don’t Forget the Details: Finally, don’t forget the small details that can make a big impact in your kitchen renovation. This includes things like cabinet handles, lighting fixtures, and accessories. Choose items that complement your style and add to the overall look and feel of your kitchen. Small touches, like a vintage pendant light or unique cabinet hardware, can make all the difference in creating a cohesive space with genuine personality.

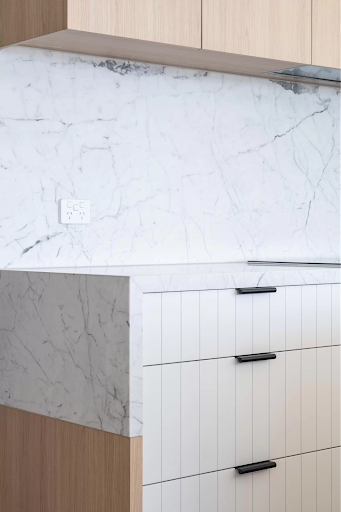
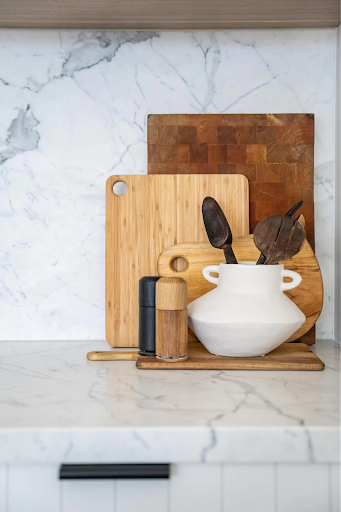
If you’re struggling to figure it all out and you are looking for a Northern Beaches Kitchen Designer to help you realize your culinary dreams, please do drop us a line – we’d love to help!
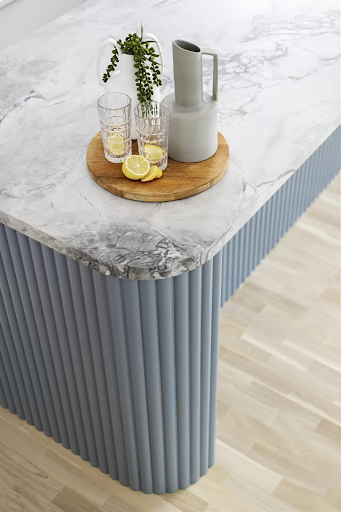
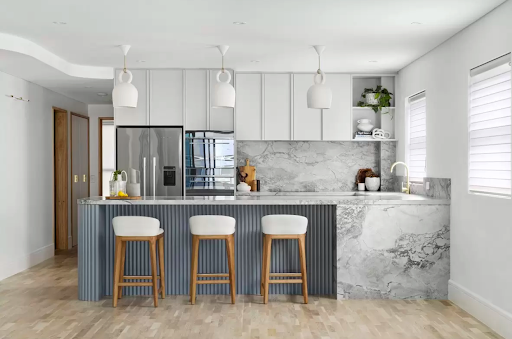

24 Jul
How to design the perfect home office
OK, so you need to work from home. And by that I mean actually work, be productive, get stuff done… we’re not talking about the “WFH” wink wink scenario here… so here’s a few simple steps and considerations to help you get yourself up and running and finishing each day with a whole heap of satisfying ticks next to your list of “things to do”.

This is key, find yourself a nook away from the hustle and bustle of the house if possible, ideally a room that allows you to close the door on the world outside, and close the door behind you at the end of the day. If you’re not lucky enough to have a dedicated study, perhaps the guest room could offer some space, or that under-utilised spot in the hallway. Check that you have power sockets available and enough space to keep all the essentials at hand, as well as good proximity to a window.
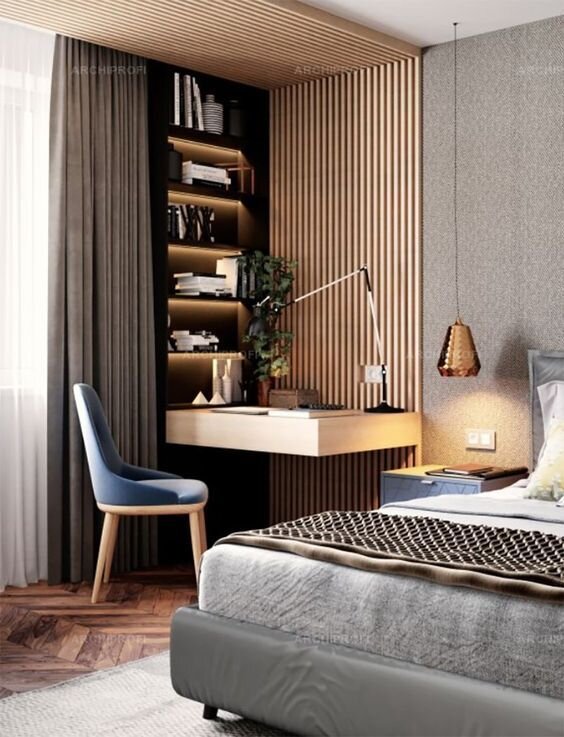
Make a list of everything you need in excel, or better still try using google sheets so you can access it any time, even on your phone when you’re out shopping. Estimate the cost for each item and establish a budget. You can update each product cost as you purchase to ensure you stay on track.
There are so many options out there, and your final choice will depend on the space you’re intending to use, but you should consider if you need a sit/stand option, can you build your desk in with custom joinery or do you need something less permanent? Think about how it will feel – personally I prefer resting my arms on the warmth of solid timber, a glass or polished top just feels too cold, but you will have your own preferences. Does it need built in storage or can you afford the space for drawers and / or shelves or cupboards? For optimum ergonomics allow a minimum depth of 60cm for your desktop, which gives sufficient space on top and underneath for legs, and ideally 150cm in width to accommodate writing space, laptop/monitor and an in/out tray and space for drawers under one side of the desk.

Even if you’re on a tight budget, be sure to invest in a good quality chair with sufficient support – your back, neck and joints will love you for it! It’s worth having wheels for ease of movement between drawers and printer if you have one nearby, and a swivel function will reduce the amount of twisting you need to do every time to get up. For those with back issues you will find that the flexibility of movement in chairs that recline and are height adjustable will make life so much easier, and subject to the level of lumbar support consider adding a cushion for comfort. I cannot tell you how many times I feel like I’ve aged 3 decades just by sitting in the wrong chair! Sadly my garden dining chairs just don’t cut it when it comes to sitting at a laptop all day… boo.
You may also need to think about adding a rug or runner to protect the floors, depending on the kind of chair you go for.

Look for more office chair ideas here
Clutter is a killer to productivity. Keep your lesser used items out of sight in a drawer, and only have the essentials on the desktop along with an item or two to style it up. Treat yourself to some smart stationery – an in/out tray to tidy up the paperwork, good looking folders for project organisation, matching stapler and hole punch, and a stylish vessel for your swanky new pens and pencils.
Make sure your cables are kept nice and tidy too – either with velcro cable tidy straps or in casing attached to a wall. I like to keep all our devices in one of our desk drawers to keep everything out of sight, which was simply a case of cutting a hole in the back of the unit and feeding the cables through – it’s definitely worth dedicating a drawer to this if you have the option.
Obviously make sure you have everything you will need at hand – printer (with ink! and ideally spare cartridges), paper, notebook, stapler, whatever it is, you don’t want to find yourself having to go rummaging around in your child’s craft box for it! (she says with a Frozen ruler stashed in her posh pencil case!).

If your home office is somewhere you are likely to spend a lot of time then it’s crucial to ensure you have plenty of natural light available. Not only does natural light boost vitamin D, but it also helps to ward off the ‘winter blues’ and promotes a better sleep cycle. This in turn makes for a more productive, healthier and happier workspace. For the night owls, ensure you have great overhead ambient lighting as well as a good level of task lighting in the form of a desk lamp. If your work space needs to allow different moods, for example if it is also used as a guest room or a kids tv room in the evenings, look into dimmable options and cool/warm bulbs that allow you to move between bright and subdued lighting levels to convert work mode into relaxation mode at the flick of a switch.
Just like natural light, the availability of fresh air is also critical for maintaining a healthy working environment. Your mum was right when she said the fresh air will do you good, and while I don’t need to reel off the numerous health benefits, it’s worth noting that fresh air also gives you more energy, vitality and a sharper mind and well, it will simply make you feel happier. No one wants to be stuck inside a stuffy office all day, and at home you shouldn’t feel you have to be. Even if you cannot open a window right by your desk, make sure you have windows and doors around the house open to allow air to circulate – it will do you and the whole family good! Try and take at least one of your breaks to go outside and feel the sun on your face too – I swear I am solar powered!
This may be an obvious point, but be sure to get the temperature right a the start of the day or it will most definitely interfere with your ability to stay focussed.
Often overlooked but a key aspect of the design of any space. An echoey room never feels inviting or comfortable, and if your work requires you to be on the phone a lot you will find it to be an enormous distraction, especially if there are two of you working. The key to avoiding this is to include soft furnishings and finishes to absorb sound. A spare bedroom will likely be readily equipped, but if not, consider including a small sofa, armchair or window seat if space permits – this also offers some variety of seating while talking to colleagues or reading documents. Carpet, rugs, curtains or blinds and artworks on canvas will also help to absorb sound while creating a cosy and inviting space to work in. Houseplants are another great option which also offer the benefit of cleansing the air.
“Yikes!” I hear you say, “does that mean I have to style it too?!”
If you want to avoid spending your days in a utilitarian and frankly un-inspiring work space, try a few of these tips to get you started…
Check out Pinterest for home office / study inspiration to figure out what you like – perhaps you’re in to bold colours for a touch of glamour and creative inspiration, or maybe you like to keep it subtle and simple to inspire focus and tranquility. Whatever your style, create a board of images you like and you will soon start to see a pattern appear.
Look for some design inspiration here

Before you start buying anything, consider your colour palette. Look up similar colour-ways on Pinterest to see if it works for you, or look to a favourite piece of artwork that you intend to display and take direction from the colours within it. Green is often used in interior design for its sense of nature, renewal and tranquility, while blues are considered to be cool and calming. Warm and fiery or autumnal colours are generally energising, passionate and positive… think about what colours make you happy and choose a palette to suit. If you type in “green colour palette” to Pinterest you will find lots of ideas for complementary shades.
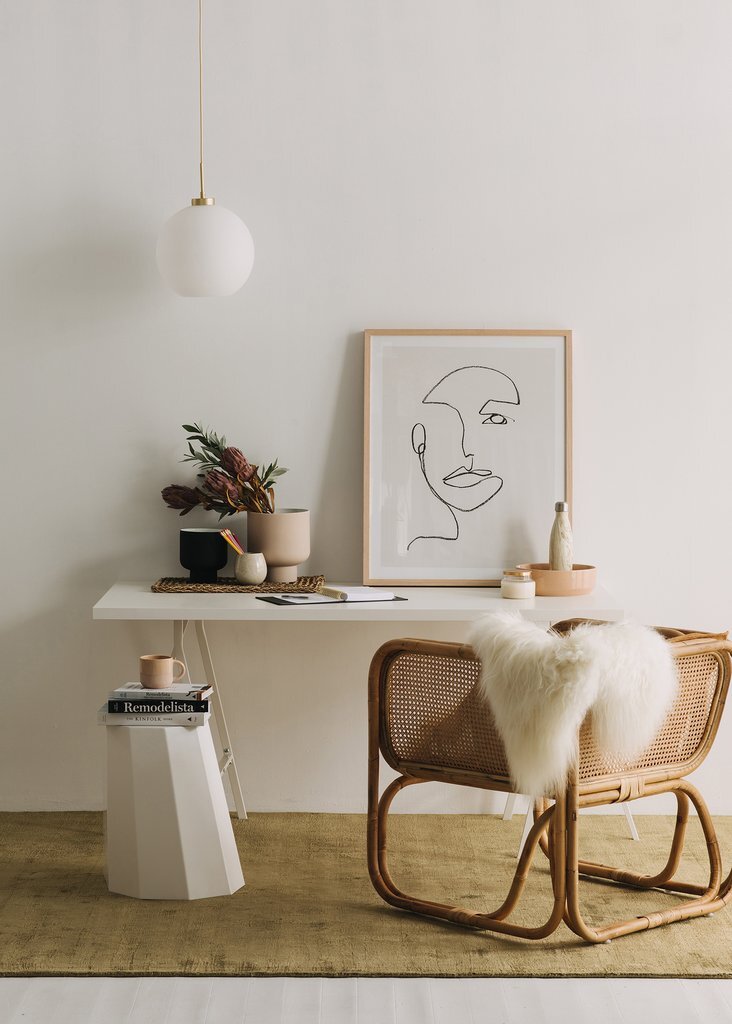
Houseplants are wonderful creatures that cleanse the air, absorb noise, bring the outside in and generally contribute to your sense of well being. There are plenty of low maintenance options out there such as Mother in Law’s tongue for a tall structural look, Devil’s Ivy for traily loveliness, and Happy Plants for scale. Try creating a vignette with plants of contrasting leaf shapes and using different sized vessels with a consistent design theme. If you feel like you might bring about an early demise to even these fuss free beauties, invest in some great quality faux plants and style them up with a great selection of pots and planters. There are some incredibly realistic options out there, including fresh touch flowers with petals that feel almost like the real thing. A vase of fresh flowers from the garden, or simply a couple of Monstera leaves will do the trick, but be sure to use a large enough vase for bigger leaves.
Check out some more ideas for Indoor Plants

I cannot stress enough just how important it is to create a space that you enjoy spending time in. Adorn your workspace walls and / or shelves with things that motivate and inspire you, things that quite simply make you happy. Inspirational quotes and aspirational images will help to remind you why you are working so hard – to pay for that incredible holiday, to give your child the best possible education, to achieve those life goals you scribbled down at New Year. It could be a large artwork that lifts you every time you see it, a small personal memento collected on a previous trip or simply a feel good photo of friends or family. Try to create a little vignette on one corner of your desk, perhaps raised on a stack of smart books or a pretty box to lift it away from the essential work space. alternatively try using favourite books, plants, images and quotes to make your very own shelfie… a little collection of well balanced and coordinated images, objects and plants will transform your space. You may want to rotate your choices to keep things fresh, especially if space is at a premium, but without a doubt, find a spot.
Don’t forget to add a couple of functional pretty things to your space. A good quality scented candle made from pure essential oils will help to avoid any stuffy office air, and dedicate a good looking water bottle and coaster to your workspace – filling it before every working day should be part of your morning routine in order to stay hydrated and focussed.

OK so you don’t need me to keep preaching to you on this one, but here’s my top 5 tips for getting through the to-do list:
And that’s it! Happy setting up, styling it up, and getting up every day feeling good about your home work space!
But if it’s all too much to get your head around – give me a call, I’d be happy to help.

24 Jul
How to hang a gallery wall
Picture hooks (various sizes, be sure to check the weight loading),
Hammer,
Spirit level,
Tape measure,
Pencil,Ruler, Set square if you have one,
Kraft paper (I have roll of 900mm x 50m Kraft Paper from Officeworks which is ideal),
Scissors.

Make sure you have all the frames you plan to hang ready. Gallery walls with a consistent theme or colour palette look fabulous – perhaps you have a collection of black and white artworks and photography, botanical themed prints, or a portfolio of stunning images from your travels that you’d like to display. Spend some time deciding on your preferred style of gallery – will it be a formal grid, coordinated artworks or mis matched images and objets?
Low cost frames can be found in Kmart, Spotlight or Target, and you will also find decent quality frames in places like Country Road and West Elm, and Temple & Webster has, as always, a huge range. Gallery wall frame packs are available at many retailers to get you started if you are able to print images to fit, and will come with an idea of how to best lay them out. There are also a wealth of online framing companies such as Frames Now who have an enormous range of styles and sizes and can also offer custom framing and replacement glass or mat boards, and even print to stretched canvas. Try not to go too matchy matchy with frames unless you are aiming for a formal grid style, in which case identical frames are the best option. All black frames in different shapes and sizes work well together with a consistent theme of images, and conversely a variety of finishes gives a more relaxed look.
If you don’t already have a collection there are some great retailers out there with gallery walls ready to go, frames and all, like this one from Desenio. If your gallery is to be located alongside furniture be sure to change up your accessories to complement the tones in the artworks to complete the look.

First of all you need to measure the space – I wanted my gallery centred above a sofa bed so I took the length of the sofa and arranged my artworks within it. Had the space been available I would have liked to offset it – don’t forget to consider this as an option, for example one large singular artwork looks great set off to one side of a bed or sofa, and the same can apply to a gallery wall. Leave a 30cm gap between the top of a sofa and the frames to avoid them getting knocked out of place and to give them room to be admired. The centre of the arrangement should be at eye level for optimum viewing so measure the distance between the bottom of the lowest frame (ie. 30cm above the sofa if this is where the gallery is to be positioned) and eye level – generally about 175-185cm above floor level.
Lay out a large piece of kraft paper big enough to cover the wall space – you may need to tape the paper together to get a large enough section. Arrange your frames on top of the paper, building the layout out from one or two larger centrepieces. Take a photo on your phone and then move the arrangement around a few times until you find the composition that works for you.
Use your ruler and / or set square to ensure your frames are evenly spaced – personally I find this easier to achieve by drawing around my frames on my large piece of kraft paper rather than using individual paper cut outs for each frame. You can also check your lines are straight and double check spacing easily once all the frames are drawn on in your chosen layout.
Next measure the hanging point on the back of each frame and mark it on the paper – if there is picture wire pull it taught to where it will sit when hung. Take your time to make sure the nail or hook is placed at the correct point or all your work on the spacing between frames will be out of kilter.
Once you have all your frames drawn, correctly spaced, with hanging points marked on, put the kraft paper on the wall in the appropriate position. Check you are happy with the arrangement and ask yourself if it fills the space appropriately. Now for the fun bit! Put your hooks or nails in at the marked spots and hang all your picture while the kraft paper is still on the wall. This is your final opportunity to ensure you have everything just as you want it – it will be much easier to mark adjustments on the paper. If you are happy with everything, remove the frames, carefully take down the paper and re-hang your pictures in place, using a spirit level to ensure they are all perfectly level. And voila! A fabulous gallery wall has appeared!

 Optimized by Seraphinite Accelerator